background image

15

14

model no. 054-8146-8  |  contact us 1.800.689.9928

8.  Depress the trigger switch to start the saw and bring it to the maximum 

desired cutting speed before applying the blade to the workpiece.

9.  Do not force the tool. Place the shoe firmly on the workpiece while cutting. 

Use only enough steady pressure on the blade to keep the saw cutting.

10. Reduce pressure as the blade comes to the end of the cut.

11. Release the trigger switch. Allow the saw to come to a complete stop before 

removing the blade from the workpiece.

12. If sawing fiberglass, plaster, wallboard, or spackling compound, clean the 

motor vents frequently with a vacuum or compressed air. Always wear safety 
goggles when cleaning tools using compressed air. These materials are highly 
abrasive and may accelerate the wear on motor bearings and brushes.

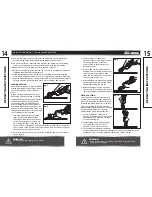
PLUNge CUTTINg

Your reciprocating saw is ideal for plunge 
cutting directly into surfaces that cannot 
be cut from an edge, such as walls or 
floors.

Plunge cutting may be done two ways, 
depending on how the blade is inserted. 

In thick materials and in harder materials, 
such as metal, plunge cutting should 
not be attempted. Such materials can 
be cut with the reciprocating saw only 
by starting the cut from the edge of the 
material or from a hole drilled all the way 
through the material that is large enough 
to accommodate the saw blade.

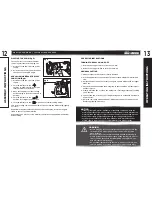
1.  Insert the blade into the tool. If the 

blade was inserted with the teeth 
facing down toward the lower surface 
of the tool, hold the tool as shown in 
fig 7, resting the edge of the shoe on 
the workpiece. If the blade was inserted with the teeth facing up toward the 
upper surface of the tool, hold the tool as shown in fig 8, resting the edge of 
the shoe on the workpiece as shown.

2.  Raise the blade so that it is just above the workpiece and does not contact 

the workpiece.

3.  With the blade just above the 

workpiece, depress the trigger switch. 
Then using the edge of the shoe 
as a pivot, lower the blade into the 
workpiece (fig 9).

4.  As the blade starts cutting, raise the 

handle of the tool slowly until the shoe 
rest firmly on the workpiece. Then 
guide the tool along your cutting line 
to acquire the desired cut.

5.  After the blade has penetrated through 

the workpiece, continue sawing along 
the marked cutting line (fig 10).

6.  Release the trigger switch. Allow the 

saw to come to a complete stop before 
removing the blade from the workpiece.

MeTAL CUTTINg

The saw can be used to cut metals, such 
as sheet steel, pipe, steel rods, aluminium, 
brass, and copper. Be careful not to twist or 
bend the saw blade. Do not force the tool.

The use of cutting oil is recommended 
when cutting soft metals and steel. Cutting 
oil will keep the blade cool, increase 
cutting action, and prolong blade life.

1.  Securely clamp the workpiece in 

position, and make the cut close to the 
clamping point to minimize vibration 
of the work being cut.

2.  When cutting conduit pipe or angle 

iron, clamp the work in a vise, if 
possible, and cut close to the vise.

3.  To cut thin sheet material, “sandwich” 

the material between pieces of hardboard or plywood, and clamp the layers 
together in order to reduce vibration and tearing of the material.

O

P

e

R

A

TIN

INS

TRUCTIONS

O

P

e

R

A

TIN

INS

TRUCTIONS

wARNINg!

• 

Risk of injury, don’t plunge cut in metal.

FPO

fig 8

fig 7

fig 9

fig 10

wARNINg!

• 

Never use gasoline as a cutting oil, because normal sparking 
could ignite the fumes.

FPO

Содержание Maximum 054-8146-8

Страница 1: ...INSTRUCTION MANUAL IMPORTANT Read and understand this instruction manual thoroughly before using the product model no 054 8146 8 Reciprocating Saw ...

Страница 2: ...s 13 15 Maintenance 16 Troubleshooting 17 Part list 18 20 Warranty 21 22 NOTE If any parts are missing or damaged or if you have any questions please call our toll free helpline at 1 800 689 9928 SAVE THESE INSTRUCTIONS This manual contains important safety and operating instructions Read all instructions and follow them with use of this product TABLE OF CONTENTS ...

Страница 3: ...Work area safety Keep the work area clean and well lit Cluttered or dark areas invite accidents Do not operate power tools in explosive atmospheres such as in the presence of flammable liquids gases or dust Power tools create sparks which may ignite the dust or fumes Keep children and bystanders away while operating a power tool Distractions can cause you to lose control Electrical safety Power to...

Страница 4: ...ing the power tool accidentally Store idle power tools out of the reach of children and do not allow persons unfamiliar with the power tool or these instructions to operate the power tool Power tools are dangerous in the hands of untrained users Maintain power tools Check for misalignment or binding of moving parts breakage of parts and any other condition that may affect the power tool s operatio...

Страница 5: ...ur sight Do not use dull or damaged saw blades and accessories Protect your hearing Wear appropriate personal hearing protection during use Under some conditions and duration of use noise from this product may contribute to hearing loss The label on your tool may include the following symbols The symbols and their definitions are as follows V Volts A Amperes Hz Hertz W Watts min Minutes Alternatin...

Страница 6: ...mp BASE SHOE ASSEMBLY Sliding the Shoe in or out fig 4 For maximum control and longer blade life the base assembly slides in or out to adjust the effective stroke length 1 Disconnect the saw from the power supply 2 Press the shoe release button and slide the shoe to the desired position The shoe can be locked in any position 3 Release the shoe release button to lock the shoe in the desired positio...

Страница 7: ...st the pivot shoe as necessary to expose unworn blade teeth for longer blade life 4 Check for clearance behind the workpiece so that the blade will not impact another surface 5 Clearly mark the line of cut on the workpiece If cutting metal apply cutting oil on the line 6 Connect the power cord of your reciprocating saw to a standard household power outlet 7 Hold the saw firmly with both hands Make...

Страница 8: ...with the teeth facing up toward the upper surface of the tool hold the tool as shown in fig 8 resting the edge of the shoe on the workpiece as shown 2 Raise the blade so that it is just above the workpiece and does not contact the workpiece 3 With the blade just above the workpiece depress the trigger switch Then using the edge of the shoe as a pivot lower the blade into the workpiece fig 9 4 As t...

Страница 9: ...ins unsolved after performing the checks described above call the toll free helpline at 1 800 689 9928 TROUBLESHOOTING MAINTENANCE WARNING Do not let brake fluid gasoline petroleum based products penetrating oil etc come into contact with plastic parts These substances contain chemicals that can damage weaken or destroy plastic When servicing use only identical replacement parts The use of any oth...

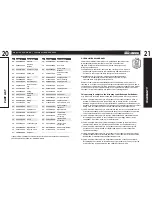
Страница 10: ...g Clamping Plate 39 5670187000 Pin 13 3121057000 Rubber Ring 40 2822478000 Lock Wrench Assembly 14 5650235000 Washer 41 3660350000 Torsion Spring 15 5700015000 Ball Bearing 42 3420666000 Adjusting Pole 16 3700335000 Washer 43 5610062000 Thread Forming Screw 17 5660013000 Circlips for Shaft 44 5630007000 Prevailing Torque Hexagon Nut 18 3123927000 Limit Plate 45 3700671000 Bevel Support 19 56600290...

Страница 11: ...and materials for a period of 1 year from the date of original retail purchase Subject to the conditions and limitations described below this product if returned to us with proof of purchase within the stated warranty period and if covered under this warranty will be repaired or replaced with the same model or one of equal value or specification at our option We will bear the cost of any repair or...

Страница 12: ...or any other expense loss or damage including but not limited to any indirect incidental consequential or exemplary damages arising in connection with the sale use or inability to use this product Notice to Consumer This warranty gives you specific legal rights and you may have other rights which may vary from province to province The provisions contained in this warranty are not intended to limit...

Отзывы: