20V max* LIThIUM-ION CORDLESS IMPACT DRIVER - 054-3175-8
20V max* LIThIUM-ION CORDLESS IMPACT DRIVER - 054-3175-8
13
14
tightening screws or nuts
(fig 8)
1. Install the correct bit.
2. Apply just enough pressure to keep the bit
engaged on the screw or nut.
3. Position the direction-of-rotation selector to the
left of the tool for forward rotation.
4. Apply minimal pressure to the trigger switch
initially. Increase the speed only when full
control can be maintained.
WARNING!
Do not over-tighten, because the force of the impact driver can break the fastener. Keep
the impact driver pointed straight at the fastener to avoid damaging the fastener head.
NOTICE:
Before starting your job, always perform a test operation to determine the proper fastening time.
Loosening screws and nuts
(fig 9)
1. Install the correct bit.
2. Apply just enough pressure to keep the bit
engaged on the screw or nut.
3. Position the direction-of-rotation selector to the
right of the tool for reverse rotation.
4. Apply minimal pressure to the trigger switch
initially. Increase the speed only when full
control can be maintained.
tightening torque
The fastening torque is affected by a wide variety of factors including the following. After fastening,
always check the torque with a torque wrench.
• Voltage:
Low voltage, due to a nearly discharged battery, will reduce fastening torque.
• Socket size:
Failure to use the correct socket size will cause a reduction in fastening torque.
• Bolt Size:
Larger bolt diameters generally require higher fastening torque. Fastening torque will also
vary according to length, grade, and torque coefficient.
• Bolt:
Ensure that all threads are free of rust and other debris to allow proper fastening torque.
• Material:
The type of material and surface finish of the material will affect fastening torque.
oPERA
tin
G
in
St
Ru
Ction
S
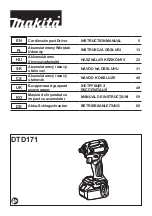
installing a driver bit or socket
bit
(fig 7)
1. Lock the trigger switch by placing the direction-
of-rotation selector in the OFF (centre) position.
2. With one hand, pull the sleeve toward the front
of the tool, and hold it in place.
3. With the other hand, insert the 1/4" (6.35 mm)
bit into the hexagonal hole in the bit retainer.
4. Release the sleeve, and verify that it returns to
its original position.
WARNING!
If the sleeve does not return to its original position, the bit is not correctly installed. Retry
until the bit is properly installed.
WARNING!
Only use sockets designed for impact drivers. Sockets not designed for impact drivers
could break and result in user injury. Inspect sockets prior to use to ensure that they have
no cracks or other visible damage.
Removing a driver bit or socket bit
(fig 7)
1. Lock the trigger switch by placing the direction-of rotation selector in the OFF (centre) position.
2. Pull the sleeve toward the front of the tool, and hold it in place.
3. Remove the bit from the hexagonal hole in the bit retainer.
4. Release the sleeve.
WARNING!
Use protective gloves when removing the bit from the tool, or allow the bit to cool down
first. The bit may be hot after prolonged use.
oPERA
tin
G
in
St
Ru
Ction
S
fig 8
fig 7
fig 9
Содержание 054-3175-8
Страница 1: ...INSTRUCTION MANUAL 20V max Lithium ion CORDLESS IMPACT DRIVER 054 3175 8...
Страница 12: ......