background image


CONTENT 

1. SAFETY AND EMC INSTRUCTIONS ......................................................... 1


1.1


I

NSTALLATION

 ........................................................................................ 1


1.2


O

PERATION

 ........................................................................................... 2


1.3


M

AINTENANCE

,

 SERVICING AND FAULTS

 ................................................... 3


1.4


T

RANSPORT

 .......................................................................................... 4


1.5


S

TORAGE

 .............................................................................................. 4


1.6


S

TANDARDS

 .......................................................................................... 5


2. DESCRIPTION OF COMMONLY USED SYMBOLS .................................. 6


3. INTRODUCTION ......................................................................................... 7


4. PANEL DESCRIPTION ............................................................................... 9


4.1


B

UTTON

 ................................................................................................ 9


4.2


LCD

 DESCRIPTION

 ............................................................................... 10


5. CONNECTION AND OPERATION ............................................................ 13


5.1


I

NSPECTION

:........................................................................................ 13


5.2


C

ONNECTION

: ..................................................................................... 13


5.3


B

ATTERY RECHARGE

: ........................................................................... 16


5.4


T

URN ON THE 

UPS: ............................................................................. 17


5.5


T

EST FUNCTION

: .................................................................................. 17


5.6


T

URN OFF THE 

UPS: ............................................................................ 17


5.7


A

UDIBLE ALARM MUTE FUNCTION

: ......................................................... 18


6. OPERATING MODE FOR ALL MODELS ................................................. 19


6.1


L

INE MODE

 .......................................................................................... 20


6.2


B

ATTERY MODE

 ................................................................................... 20


6.3


B

YPASS MODE

 ..................................................................................... 21


6.4


N

O

UTPUT MODE

 ............................................................................... 21


6.5


EPO


(E

MERGENCY 

P

OWER 

O

FF

) ......................................................... 22


6.6


ECO

 MODE 

(E

CONOMY MODE

) ............................................................. 22


6.7


CVCF

 MODE

 ....................................................................................... 22


6.8


A

BNORMAL MODE

 ................................................................................ 23


7. SETTING BY LCD MODULE .................................................................... 24


8. TROUBLE SHOOTING ............................................................................. 28


9. MAINTENANCE ........................................................................................ 31


9.1


O

PERATION

 ......................................................................................... 31


Содержание Tacoma HT 1K-3KVA

Страница 1: ...USA com Website www MarusonUSA com Copyright 2017 All Rights Reserved Maruson is a registered trademark of Maruson Technology U S Trademark Reg No 3 150 957 All other trademarks are the property of their respective owners Product specifications are subject to change without notice Battery backup time is based on half load and varies with equipment configuration battery age temperature etc ...

Страница 2: ...NNECTION AND OPERATION 13 5 1 INSPECTION 13 5 2 CONNECTION 13 5 3 BATTERY RECHARGE 16 5 4 TURN ON THE UPS 17 5 5 TEST FUNCTION 17 5 6 TURN OFF THE UPS 17 5 7 AUDIBLE ALARM MUTE FUNCTION 18 6 OPERATING MODE FOR ALL MODELS 19 6 1 LINE MODE 20 6 2 BATTERY MODE 20 6 3 BYPASS MODE 21 6 4 NO OUTPUT MODE 21 6 5 EPO EMERGENCY POWER OFF 22 6 6 ECO MODE ECONOMY MODE 22 6 7 CVCF MODE 22 6 8 ABNORMAL MODE 23 ...

Страница 3: ...10 3 DIMENSIONS AND WEIGHTS 33 11 COMMUNICATION PORT 34 11 1 USB AND RS 232 COMMUNICATION PORTS 34 11 2 USB FOR HID POWER DEVICE 34 11 3 AS400 INTERFACE OPTIONAL 34 11 4 CMC INTERFACE OPTIONAL 34 11 5 NMC INTERFACE OPTIONAL 34 12 SOFTWARE 35 APPENDIX 1 REAR PANEL SCHUKO 36 APPENDIX 2 REAR PANEL IEC 38 ...

Страница 4: ...ght or near heat Do not connect appliances or items of equipment which would overload the UPS e g laser printers etc to the UPS output Place cables properly to avoid someone treaded or tripped over them Assure to connect with the earth reliably Connect the UPS only to a socket outlet which is earthed shockproof type The building wiring socket outlet shockproof socket outlet must be easily accessib...

Страница 5: ...rounded shockproof socket during operation the grounding for the UPS and all loads connected will be disconnected The UPS features its own internal current source batteries You may be electric shocked when you touch the UPS output sockets or output terminal block even if the UPS is not connected to the building wiring socket In order to fully disconnect the UPS first press the OFF button to turn o...

Страница 6: ...ls Batteries must be replaced only by qualified person Caution risk of electric shock The battery circuit is not isolated from the input voltage Hazardous voltages may occur between the battery terminals and the ground Verify that no voltage is present before servicing Batteries have a high short circuited current and pose a risk of shock Take all precautionary measures specified below and any oth...

Страница 7: ... fuse only by a fuse of the same type and of the same amperage in order to avoid fire hazards Do not dismantle the UPS except the qualified maintenance person 1 4 Transport Please transport the UPS only in the original packaging to protect against shock and impact 1 5 Storage The UPS must be stockpiled in the room where it is ventilated and dry ...

Страница 8: ...IEC EN 62040 2 Harmonic Current IEC EN 61000 3 2 Voltage Fluctuation and Flicker IEC EN 61000 3 3 EMS ESD IEC EN 61000 4 2 RS IEC EN 61000 4 3 EFT IEC EN 61000 4 4 SURGE IEC EN 61000 4 5 CS IEC EN 61000 4 6 MS IEC EN 61000 4 8 Voltage Dips IEC EN 61000 4 11 Low Frequency Signals IEC EN 61000 2 2 ...

Страница 9: ... 6 2 Description of Commonly Used Symbols Some or all of the following symbols may be used in this manual It is advisable to familiarize yourself with them and understand their meaning ...

Страница 10: ...rter This manual covers the UPS listed as follows Please confirm whether it is the model you intend to purchase by performing a visual inspection of the Model No on the rear panel of the UPS The Model List Item Model name Power Rating Model type Model description Other 1 TAC HT1K 1000VA 900W Tower Standard model Single Phase input Single Phase Output 2 TAC HT1KL 1000VA 900W Tower Long Backup time ...

Страница 11: ... 8 UPS Block Diagram ...

Страница 12: ...utton an acoustic alarm can be deactivated in the battery mode By short touch this Button all acoustic alarms can be deactivated in all modes Do the battery test By pressing this Button the UPS can do the battery test in the Line mode or ECO mode or CVCF mode OFF Button When mains power is normal the UPS system switches to No output or Bypass mode by pressing OFF Button and the inverter is off At ...

Страница 13: ...ass mode External Battery pack number Battery remain time display disable enable and Charger current in all mode could be selected by pressing Select Button and confirmed by pressing Enter Button Enter Button Note External Battery pack number cannot be select for Standard model 1K 2K 3K 4 2 LCD description Figure 4 2 The LCD Display LCD icon Function Display Function Input Information It indicates...

Страница 14: ... level of 20 One grid would be displayed if the level is 0 20 Battery Information It indicates the battery capacity Every grid represents the capacity of 20 If the battery low alarm occurs the lowest grid will flash to remind you Mode Fault Warning Information It Indicates the operating mode or Fault kind or Warning kind or battery remain time several warning kinds at the same time could be displa...

Страница 15: ...D background idle function When UPS is off to standby mode LCD background will be turned off within 5 seconds After any key pressed the LCD background will be lighted on Otherwise when UPS is working in battery mode or bypass mode the LCD blue background will flash twice every seconds to remind you ...

Страница 16: ...ith protection against electric current and pay attention to the capacity of the socket The UPS System has an input breaker on the standard cabinet 2 UPS Output Connection The output sockets and types of the UPS are shown below Model No Output Socket SCHUKO pcs Output Socket IEC pcs TAC HT1K 3 Schuko 4 C13 TAC HT1KL 2 Schuko 3 C13 TAC HT2K 4 Schuko 4 C13 TAC HT2KL 2 Schuko 1 C13 6 C13 TAC HT3K 4 S...

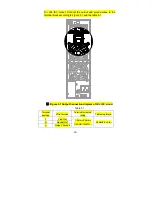
Страница 17: ...nal block according to Figure 5 1 and the table 5 1 Figure 5 1 Output Connection diagram of 3KL IEC model Table 5 1 Terminal position Wire function Terminal wire size rating Tightening torque L Line Out 1 5mm2 2 5mm2 14AWG 12AWG 0 5Nm 4 4 Lb In N Neutral Out Output Ground ...

Страница 18: ... battery connection procedure is very important Any incompliance may result in the risk of electric shock Therefore the following steps must be strictly complied with Prepare the battery cable with Standard type connector which should be able to carry the current If there is a battery breaker then turn it off first Then connect the battery cable to the Standard type battery connector on the real p...

Страница 19: ...ed with a wire the UPS will stop output until EPO status is reset Disable EPO status Enable EPO status Normally close Normally EPO connector is closed with a wire on the rear panel Once the connector is open the UPS will stop output until EPO status is disabled Enable EPO status Disable EPO status 5 3 Battery recharge Fully charge the batteries external of the UPS system by leaving the UPS system ...

Страница 20: ...n This can be configurable 5 5 Test function Test function is checking battery performance of the UPS system by pressing the On Switch for more than 1 second while UPS is operating in Line mode the UPS would detect whether the battery is connected or the battery is weak And the UPS could also implement this test automatically and periodically the period time is configurable 5 6 Turn off the UPS 1 ...

Страница 21: ...arm In any mode if the warning or fault alarm is too annoying you can mute it by press ON button less than 0 5 second and enable it by press ON button less than 0 5 second again If the new warning or fault alarm is appeared the buzzer will beep again Using the CVCF mode you may use it without batteries if the open battery alarm is too annoying you can mute it through software Alarm Table List NO S...

Страница 22: ...n this case the normal operating mode string and the warning string will be shown circularly Once a fault comes forth all previous warnings will not be shown again only the fault string will be presented Table 6 1 Operating Mode Operating mode Code No output mode STbY Bypass mode bYPA Line mode LINE Battery mode bATT Battery test mode TEST ECO mode ECO Converter mode CVCF Table 6 2 Warning Fault C...

Страница 23: ... mode The LCD display in Line mode is shown as figure6 1 The information about the mains power the battery level the UPS output and the load level will be displayed The LINE string indicates UPS working in Line mode Figure 6 1 The Line mode 6 2 Battery mode The LCD display in battery mode is shown as figure6 2 The information about the battery voltage the battery level the UPS output and the load ...

Страница 24: ...r more than 1 second to resume the alarm function Figure 6 2 The Battery mode 6 3 Bypass mode The LCD display in bypass mode is shown as figure6 3 The information about the mains power the battery level the UPS output and the load level will be displayed The UPS will beep once every 2 minutes in bypass mode The bYPA string indicates UPS working in the bypass mode Figure 6 3 The Bypass mode 6 4 No ...

Страница 25: ...rom mains power directly via internal filter while the mains power is in certain range so the high efficiency performance would be gained in ECO mode Once the mains power is loss or out of range the UPS will transfer to battery mode and the load will be supplied continuously by the battery 1 ECO mode can be enabled through the LCD setting or the software Winpower etc 2 The transfer time of UPS out...

Страница 26: ... mode 6 8 Abnormal mode In abnormal mode such as Bus fault etc the corresponding fault string would be shown on LCD display to indicate the status of the UPS and the background light will become red color For example SHOR would be shown when the connected load or the UPS output is in short circuited the LCD display is shown as figure6 5 followings Figure 6 5 The Fault mode ...

Страница 27: ... if the Enter button is pressed again the string 220 turn to flickerless the output volt is changed to 220V if the Select button is pressed for more than 1 second the next flickering string 230 appear the order of flickering string is 220 230 240 220 230 Press Enter button to confirm the output volt what you want Figure 7 1 Setting by LCD To exit the setting mode that requests a pressing once on t...

Страница 28: ...turned on External Battery Pack Number could be selected from 000 to 009 Here 009 means 9 external battery pack Charger Current could be selected 3 0 6 0 for 1KL and 1 5 3 0 4 5 6 0 for 2KL 3KL Here 3 0 means 3A charger The battery remaining time function could be selected in 000 or 001 Here 000 means battery remaining time function is disabled then the battery remaining time could not display on ...

Страница 29: ... 26 Step 4 MOdE after pressing the Select button UPS is flickering after pressing the Enter button Step 2 OPF after pressing the Select button Step 3 bYPA after pressing the Select button ...

Страница 30: ... 27 Step 5 ECO flickering after pressing the Select button Step 6 CVF flickering after pressing the Select button Press the Enter button Short touch Enter button exit setting mode ...

Страница 31: ...ower supply 1 No input voltage 2 Breaker open 1 Check building wiring socket outlet and input cable 2 Check the Breaker No Communication data 1 RS232 wire is not matched 2 USB wire is not matched 1 check or change the RS232 wire 2 check or change the USB wire Emergency supply period shorter than nominal value 1 Batteries not fully charged 2 Batteries defect 1 Charge the batteries until the Batteri...

Страница 32: ...harge is broken Notify dealer bUSH Bus high UPS internal fault Notify dealer bUSL Bus low UPS internal fault Notify dealer bSFT Bus soft start fail UPS internal fault Notify dealer bUSS Bus short UPS internal fault Notify dealer TEPH Inverter temperature high Inside temperature of the UPS is too high Check the ventilation of the UPS check the ambient temperature ITPH Inner Ambient temperature high...

Страница 33: ...ther some loads are failed SITE Site fail Phase and neutral conductor at input of UPS system are reversed Rotate mains power socket by 180 or connect UPS system EPO EPO active EPO function is enabled Plug into the EPO switch Please have the following information at hand before calling the After Sales Service Department 1 Model number serial number 2 Date on which the problem occurred 3 LCD display...

Страница 34: ...arts 9 2 Storage If the batteries are stored in temperate climatic zones it is recommended to recharge those batteries every three months for 1 2 hours It is highly suggested to shorten the recharging intervals in every two months at locations where subjects to high temperatures ...

Страница 35: ...S Model No TAC HT1K TAC HT1KL TAC HT2K TAC HT2KL TAC HT3K TAC HT3KL Voltage 24V 24V 48V 48V 72V 72V Capacity 9Ah 5Ah 120Ah 9Ah 5Ah 120Ah 9Ah 5Ah 120Ah Note 1 the Capacity of external batteries can be set to 300Ah maximum but it may need more time to fully charge the batteries 2 For 1KL 2KL 3KL With EBM connector models the capacity is 9Ah 120Ah 10 2 Operating Environment Ambient Temperature 0 o C ...

Страница 36: ...and weights Model No Dimensions W H D mm Net Weight kg TAC HT1K 144 228 356 9 2kg TAC HT1KL 102 228 346 3 9kg TAC HT2K 190 327 399 17 4kg TAC HT2KL 102 327 390 6 4kg TAC HT3K 190 327 399 22 7kg TAC HT3KL 102 327 390 6 4kg ...

Страница 37: ... Battery and user can configure the alarm action in the event of low battery such as shutting down the computer automatically UPS with this feature is also ideal as a back up power for NAS Network Attached Storage 11 3 AS400 Interface Optional It owns isolated dry contact relay outputs for UPS status such as Mains Utility failure Battery low UPS alarm OK or on Bypass and so on To see more detail a...

Страница 38: ...itor and control any UPS on the same LAN no matter how far from the UPSs Installation procedure 1 Go to the website http www ups software download com winpower htm 2 Choose the operation system you need and follow the instruction described on the website to download the software 3 When downloading all required files from the internet enter the serial No 511C1 01220 0100 478DF2A to install the soft...

Страница 39: ... 36 Appendix 1 Rear panel Schuko 1K 1KL 2K 2KL ...

Страница 40: ... 37 3K 3KL ...

Страница 41: ... 38 Appendix 2 Rear panel IEC 1K 1KL 2K 2KL ...

Страница 42: ... 39 3K 3KL 3K TB ...

Страница 43: ... 40 ...

Страница 44: ... 41 ...

Отзывы: