


VAC-12HU3 Manual
www.marshall-usa.com
3
4
5
3
4
6
7
1
2
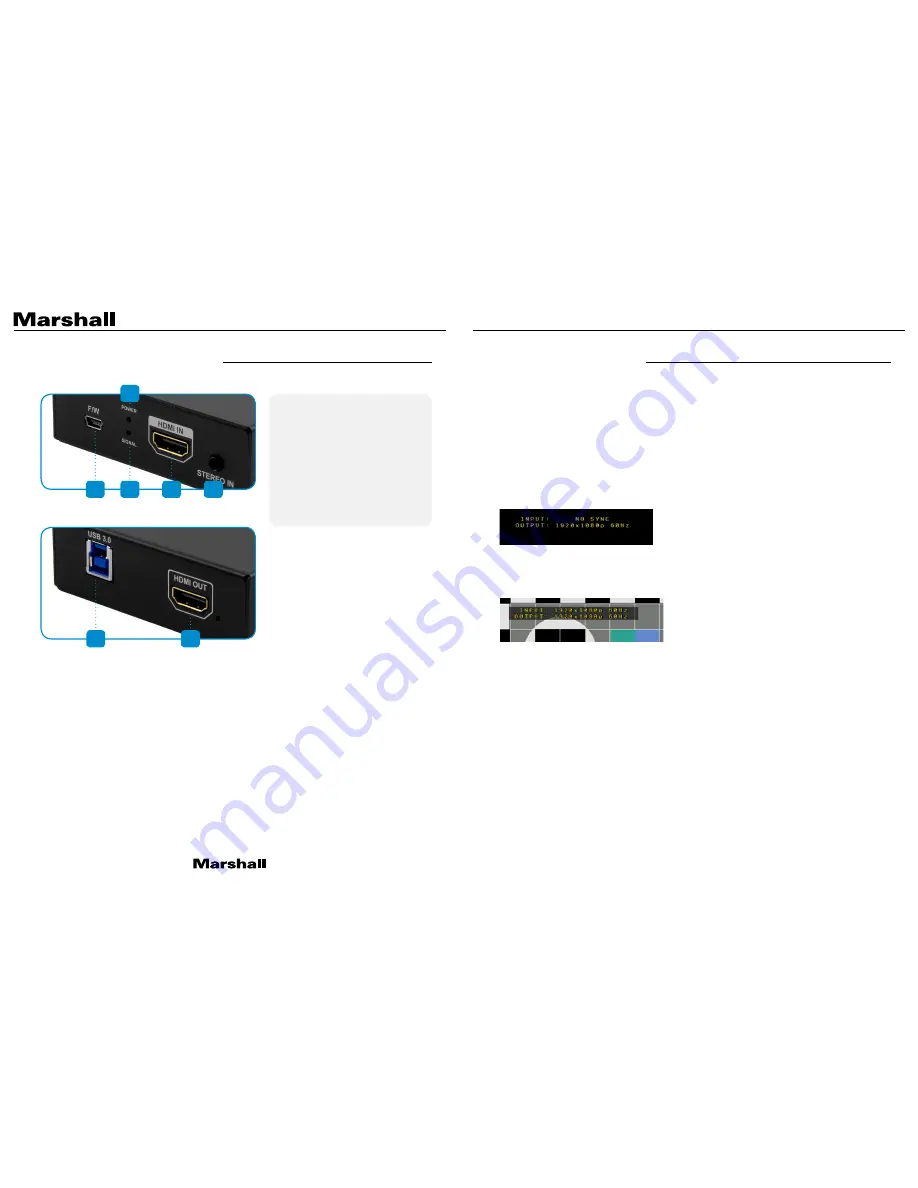
1. HDMI Input
2. Analog Stereo Line Input
3. Power LED – USB Power Connected
4. Signal LED – HDMI Video Available
5. Firmware Update USB 2.0 Connector
6. HDMI Loop Output
7. USB 3.0 Output to Computer
1. Computer should be powered and operating. Connect the VAC-12HU3 to the host computer using
the USB 3.0 cable provided. The first time the unit is used, please allow about one minute for the
computer to identify the unit and setup the drivers. The red LED on Input Side of the unit will light
after about 3 seconds.
2. Open an application such as Zoom, Skype, OBS Studio, etc. and select the Video and Audio
devices. The VAC-12HU3 adapter will identify itself as “MEI USB3.0 Capture Device”. Depending
on the application used, the unit may appear as a Camera or a Capture Device.
3. Before the HDMI input is attached, a message similar to the one shown below will appear in the
application’s video preview window. This message will display until a video source is connected.
(The Output format and frame rate may be different depending on the application software).
4. Next, connect a video source. The green LED on the Input Side will light indicating that a compatible
video source is attached. The on-screen message will change like the one below. This message will
disappear after about 8 seconds.
At this point, the VAC-12HU3 is operating and ready to use! Control of the VAC-12HU3 depends on the
capabilities of the software being used for conferencing, recording, streaming, etc.
Note:
Most video conferencing applications will automatically set the USB output format to 720p. This
does not affect the HDMI loop through output which will remain the same as the input.
5. External audio (Optional). If desired, audio may be provided from a source other than the HDMI
input. Simply plug the audio source into the 3.5mm audio jack on the unit. When the plug is fully
inserted, the incoming HDMI audio will be muted and the new analog audio will take its place. This
audio will appear at BOTH the USB output AND the HDMI output.
6. Setup and Quick Start
5. Connections and Indicators
Input Side
Output Side


