background image


23 

4. 

Maintenance And Adjustment 

4-1 Cleaning The Print Head


Dirt on the print head or ribbon, or glue residue from the label stock may result in inadequate print quality. The printer 

cover must therefore always be closed during printing. Keeping dirt and dust away from the paper or labels ensures a 

good print quality and a longer lifespan of the print head. 


Cleaning Steps 

Here is how you clean the print head. 

1. Switch off the printer. 

2. Open the printer cover. 

3. Release the printing mechanism and lift it. 

4. Remove the ribbon. 

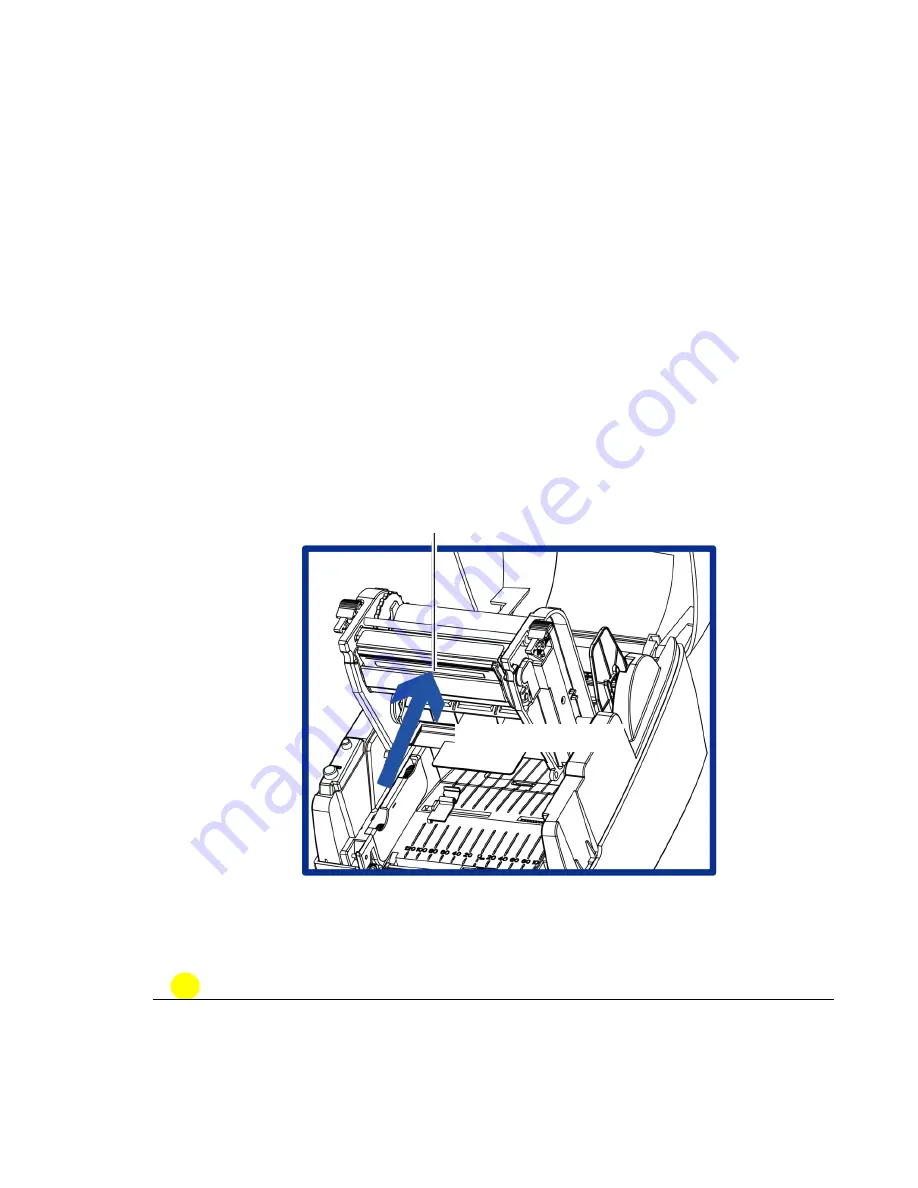
5. To remove any label residue or other dirt from the print head (see blue arrow), please use a soft 

lint-free cloth dipped in alcohol. 


 NOTE


*  The print head should be cleaned once a week. 

*  Please make sure that there are no metal fragments or other hard particles on the soft cloth 

used to clean the print head. 


PRINT HEAD


To clean the print head 

Содержание MD Series

Страница 1: ...MD ME Series USER MANUAL User Manual MD ME series Version A Issue Date 2016 01 P N 920 016511 00 ...

Страница 2: ...10 2 6 Preparing For Tag Printing 11 2 7 Connecting The Printer To The Host Computer 12 2 8 Wizard CD Standard Installation 13 2 10 Wizard CD Other Choice Installation 16 3 Operation Panel 19 3 1 LED Operation Panel 19 3 2 Error Alerts 20 3 3 Label size calibration and Self Test Page 21 3 4 Operation Panel 22 4 Maintenance And Adjustment 23 4 1 Cleaning The Print Head 23 4 2 Adjusting The Print He...

Страница 3: ...tested and passed with the requirements relating to electromagnetic compatibility based on the standards EN 55022 2006 A1 2007 Class A EN61000 3 2 2006 EN 61000 3 3 2008 and EN55024 1998 A1 2001 A2 2003 IEC 61000 4 2 2008 series The equipment also tested and passed in accordance with the European Standard EN55022 for the both Radiated and Conducted emissions limits TO WHICH THIS DECLARATION RELATE...

Страница 4: ...ul not to get liquid on the equipment to avoid electrical shock 6 For safety and warranty reasons ONLY qualified service personnel should open the equipment 7 Do not repair or adjust energized equipment under any circumstances CAUTION Danger of explosion if battery is incorrectly replaced Replace only with the equivalent type recommended by the manufacturer Dispose of used batteries according to t...

Страница 5: ...k that all of the following items are included with your printer Barcode Printer Ribbon Hubs set of 2 Power Adapter AC Adapter Label Supply Hub USB Cable Label Guide Plates set of 2 Quick Guide Empty Ribbon Core CD with LabelPro software user manual ...

Страница 6: ...2 1 2 Getting To Know Your Printer Front View Rear View TOP COVER LED INDICATOR FEED BUTTON FRONT COVER COVER OPEN BUTTONS POWER SWITCH FAN FOLD LABEL INSERT USB PORT POWER JACK ...

Страница 7: ...HUB LABEL GUIDE PLATES SET of 2 ADJUSTMENT SCREW RIGHT Screw for adjusting the print head pressure RIBBON MODULE RIBBON FEED MECHANISM RIBBON HUB EMPTY RIBBON CORE LABEL GUIDE LEFT ADJUSTMENT SCREW Screw for adjusting the print line LABEL GUIDE RIGHT PLATEN LABEL SENSOR Movable RIBBON SUPPLY HUB PRINTING MECHANISM RELEASE CATCH RIGHT RELEASE CATCH LEFT ...

Страница 8: ...ace the printer on a flat surface Open the printer cover by pressing the release buttons on both sides of the printer housing and lift the cover COVER OPEN BUTTONS Release buttons for opening the printer cover Pressing the button Pressing the button Lift the printer cover backward ...

Страница 9: ...5 2 2 Open The Printing Mechanism Pressing The Release Catches Release and lift the printing mechanism Pressing Pressing Lift the printing mechanism RELEASE CATCHES ...

Страница 10: ...lace the empty ribbon core on the hub which forms a ribbon rewind hub Stick the ribbon supply hub on the ribbon rewind hub and wind the rewind hub 2 3 circles NEW RIBBON RIBBON HUB Place on the hub RIBBON SUPPLY HUB EMPTY RIBBON CORE RIBBON HUB Place on the hub RIBBON FEED MODULE Wind the ribbon around the core 2 3 circles ...

Страница 11: ...ng mechanism Pass the ribbon supply hub under the print head Insert the ribbon rewind hub on the ribbon feed mechanism Close the printing mechanism making sure that it clicks into place Insert into the printing mechanism Place on the printing mechanism RIBBON FEED MECHANISM Wind to the back ...

Страница 12: ...e the label stock on the label supply hub attach the guide plates to the label stock holder Install The Label Roll Module On The Printer Now load the label stock into the printer LABEL STOCK Place on the ribbon hub Place on the printer LABEL SUPPLY HUB LABEL GUIDE PLATES ...

Страница 13: ...e printing mechanism and lift it Pass the labels through the label guides up to the tear off plate Adjust the label guides to the label width Close the printing mechanism Through the label guides LABEL GUIDES Close ...

Страница 14: ...alling The Label Supply Hub Base On Internal Diameter 1 Cores Installing the label supply hub for 1 cores 1 5 Cores Installing the label supply hub for 1 5 cores 3 Cores Installing the label supply hub for 3 cores ...

Страница 15: ...ring For Tag Printing In tag printing the tag hole indicates the height of a label During adjustment the sensor must therefore be positioned directly below the tag hole as shown in the illustration SENSOR POSITION ...

Страница 16: ... and connect the adapter to the printer Connect the USB parallel cable to the printer and host computer USB parallel cable s type depends on the printer which you purchase Switch on the printer The LED indicator should now lights up B1 USB PORT B1 USB PORT A1 POWER SLOT A1 POWER JACK A2 PLUG A2 THE SOCKET OF THE WALL B2 USB PORT B2 USB PORT ...

Страница 17: ...ALLATION Step 02 The wizard will then ask you to make sure your USB and power cables are connected and that the power is turned on Then click NEXT Step 03 The next screen you will see is Install the LabelPro Software and Windows driver Click NEXT to continue Note If the Super Wizard program did not run automatically you can either turn on the Auto run setting for your CD DVD driver or double click...

Страница 18: ... you will see Installation completed Click NEXT to continue Step 05 You can also print a test label If don t print a test label the screen display as step 6 Note If you need more resources tools or reference documents you can also find them on Super Wizard CD Just click Other Choices on the Welcome Screen to access the files ...

Страница 19: ...15 Step 06 Once the installation is complete you can start to make and print labels with LabelPro or through the printer driver ...

Страница 20: ...1 Click OTHER CHOICES to next screen and select PRINTER DRIVERS Step 02 Click INSTALL SEAGULL SCIENTIFIC WINDOWS DRIVER to next screen and click NEXT Step 03 Select I accept the terms in the license agreement and click Next then click Finish to step 4 ...

Страница 21: ... printer drivers and click Next Step 05 With a USB connection search models such as the right diagram printer device Specify your printer model and click Next Step 06 Enter the printer name you can use default then click Next to display as right diagram Click Finish button to start installation ...

Страница 22: ...18 Step 07 Driver installation completed ...

Страница 23: ...re using individual labels pressing the FEED button will move only one label If the label does not stop at the correct position please run the auto calibration See Section 3 2 for the label size calibration function on the label stock LED Indicators LED indicator Status Description Green Standby mode The printer is ready for operation Red Orange Error mode The printer has detected an error See Sec...

Страница 24: ...printing mode 1 To work in thermal transfer mode load a ribbon 2 Alternatively select the direct thermal printing mode First 2 beeps than 3 beeps Memory Error The memory is full The printer prints the message File System full Delete unnecessary data from memory Unable to find file The printer prints the message File Name Not found Use the X4 command to print all files Then check whether the files ...

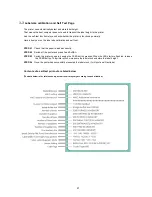
Страница 25: ...test STEP 01 Check that the paper is loaded correctly STEP 02 Switch off the printer and press Feed button STEP 03 Switch the printer on again keeping the FEED button pressed When the LED starts to flash red release the FEED button The printer will now measure the label stock and store the label height STEP 04 Once the printer has successfully measured the label stock it will print a self test lab...

Страница 26: ...ingle beep Release FEED key when heard the 3 rd beep STEP 2 Make sure Printer ready for print a label STEP 3 Send a label or commands which met problem to the printer STEP 4 Printer will print out a label with letters and numbers please take a picture on them and send us by email To cancel get out of the Dump Mode please press the FEED key and then the printer will automatically print OUT OF DUMP ...

Страница 27: ...lifespan of the print head Cleaning Steps Here is how you clean the print head 1 Switch off the printer 2 Open the printer cover 3 Release the printing mechanism and lift it 4 Remove the ribbon 5 To remove any label residue or other dirt from the print head see blue arrow please use a soft lint free cloth dipped in alcohol NOTE The print head should be cleaned once a week Please make sure that the...

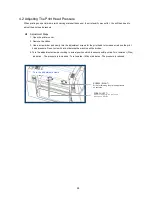
Страница 28: ...tment screws for the print head to increase or reduce the print head pressure Do not screw it hard otherwise the machine will be broken 4 Turn the adjustment screws according to actual position which is unsuccessful printed Turn towards Plus indicates The pressure is increased Turn towards Minus indicates The pressure is reduced Turn the adjustment screws SCREW RIGHT Screw for adjusting the print ...

Страница 29: ...positioned parallel to the paper feed roller Adjustment Methods 1 To move the print head in direction A as indicated by the blue arrow turn the adjustment wheel anticlockwise see arrow 1 2 To move the print head in direction B as indicated by the blue arrow turn the adjustment wheel clockwise see arrow 2 Direction A Direction B Turn the adjustment wheel ADJUSTMENT WHEEL PRINT HEAD ...

Страница 30: ...bon residue Check for errors in the application software Check the ribbon for wrinkles Check the power supply Run a self test Section 3 2 and check the test print pattern to see whether the print head prints over the entire width of the medium Check the quality of the print medium The printed image is positioned incorrectly or a label is missed out during printing Run the Label size calibration fu...

Страница 31: ...PC E with EAN 2 or 5 digit extension Interleaved 2 of 5 I 2 of 5 Interleaved 2 o f 5 with Shipping Bearer Bars Codabar Code 128 subset A B C EAN 128 RPS 128 UCC 128 UCC EAN 128 K Mart Random Weight Postnet ITF 14 China Postal Code HIBC MSI Plessey Telepen FIM GS1 DataBar German Post Code Planet 11 13 digit Japanese Postnet Standard 2 of 5 Industrial 2 of 5 Logmars Code 11 ISBT 128 Code 32 2 D Bar ...

Отзывы: