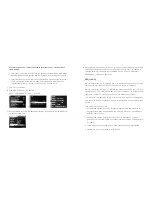
For cameras with a rubber accessory terminal cover on the side of
their bodies:
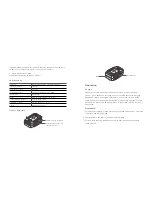
• Insert the end of the N3 cable into the data port of the MX-G20 MKII When
inserting, please be sure that the end is oriented correctly and do not use force.
• Insert the end of the N3 cable into the accessory port under the terminal
cover on the side of the camera body. When inserting, please be sure
that the end of N3 is oriented correctly and do not use force.
5. Turn on your camera.
6. View GPS position on the camera
Menu-->SETUP MENU-->GPS-->Position
7. Once you begin shooting, the geotag information of each photo will be displayed
on the camera's LCD.
8. Geotag information can be viewed on a computer when images are uploaded
to photo sharing sites like Nikon’s my Picturetown and Flickr, or opened in
imaging software, such as Nikon ViewNX2, Picasa, ACDsee, GEOsetter,
Opanda EXIF, Lightroom, FSviewer.
Warranty
Marrex Technology Co., provides a one-year warranty under normal use and
lifelong paid maintenance from the date you purchase this product.
Marrex Technology will repair or replace the product under warranty for free
during the one-year valid period, but customers should pay for shipping and
insurance charges for returning the product to Marrex Technology.
This warranty only applies where a defect has arisen, wholly or substantially,
as a result of faulty manufacture, parts or workmanship during the warranty
period.
This warranty does not cover:
• Any damage caused by human factors, including using the products in
abnormal conditions and operating the device in ways not in accordance
with the user manual.
• Any damage caused by incorrect use or poor maintenance, or when
persons not authorized by Marrex Technology have carried out alterations
or repairs.
• Force majeure events such as fire, flood, lightning strike, earthquake.
• Customers who cannot show a valid invoice.

