


Rutland FM1803-2
Installation & Operation
Document No: SM-146 Issue G 01.11.20
Marlec Engineering Co Ltd
20
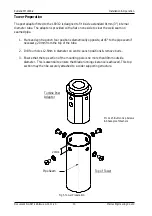
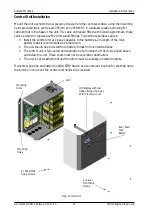
FITTING THE GENERATOR TO THE TOWER
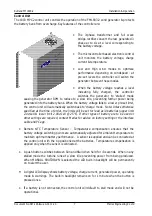
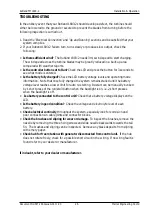
1. Connect the wind generator flying leads to the cable protruding from the tower using
the connector block supplied or another suitable connector. The generator output is 3
phase ac and earth. The 3 phases may be connected in any sequence.
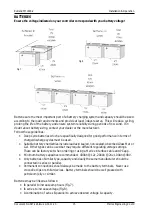
2. Wrap the connection with insulation tape to secure/protect from the environment. It is
recommended that cable restraint is fitted to prevent the weight of cable applying
excessive load to the connections, a simple method of achieving this is shown in Fig 12.
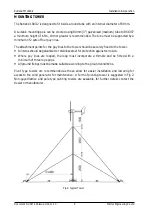
3.
Carefully locate the wind generator post adaptor into the top of the tower ensuring the
flat on the post adaptor aligns with the pipe seam if necessary
.
4. Push the adaptor into the tower while the cable is gently pulled from the tower base to
ensure it is not trapped, continue until the post adaptor is fully inserted into the tower
and the fixing holes align.
5. Secure the wind generator to the tower using the four M12 x 25mm screws and shake
proof washers provided. Tighten using an 8mm Allen key.
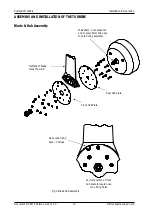
Final Mechanical Check
1. Check the tightness of the blade screws and nose cone.
2. Check the free rotation of the hub and yaw axis.
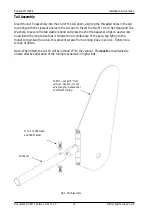
3. Check for free movement of the tail fin.
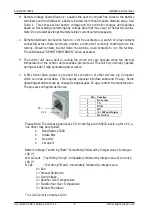
Connector Block
supplied
Fig 10. Cable strain relief
Cable Tie
Cable From WG
Fig 12. Cable strain relief
Cable to Controller


