background image

-6 -

Safety Information

To ensure reliable and safe operation of this equipment, please read carefully all the
instructions in this user guide, especially the safety information below.

Electrical safety

x

The TV set should only be connected to a mains supply which matches that stated on
the label on the mains adaptor

x

To prevent overload, don't share the same mains supply socket with too many other
items of equipment.

-

Do not place any connecting wires where they may be stepped on or tripped over.

-

Do not place heavy items, which may damage the leads, on them.

-

Hold the Mains plug, not the wires, when removing from a socket.

-

During a thunderstorm or while leaving the TV for long periods, disconnect the
aerial (if outdoor) and mains adaptor from the supply.

-

Do not allow water or moisture to enter the TV or mains adaptor. Do NOT use in
wet or moist areas such as Bathrooms, steamy kitchens or near swimming pools.

x

Pull the plug out immediately, and seek professional help if:

-

the mains plug or cable is damaged

-

liquid is spilt onto the set, or if it is accidentally exposed to water or moisture

-

anything accidentally penetrates the ventilation slots

-

the set doesn't work normally.

-

Do NOT remove the safety covers. There are no user serviceable parts inside. You
may invalidate the warranty.  Qualified personnel must only service this apparatus.

-

To avoid battery leakage, remove exhausted batteries from the remote control
handset, or when not using for a long period.

-

Do NOT break open or throw exhausted batteries on a fire.

Physical safety

x

Do NOT block ventilation slots in the back cover. You may place the TV in a cabinet,
but ensure at least 5cm (2") clearance all around.

x

Do NOT tap or shake the TV screen, you may damage the internal circuits. Take good
care of the remote control, do not drop.

x

To clean the TV use a soft dry cloth. Do NOT use solvents or petrol based fluids. For
stubborn stains, you may use a damp soft cloth with dilute detergent.

Содержание MS 1906F

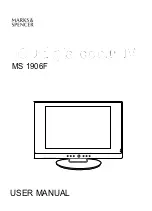
Страница 1: ...LCD digital colour TV MS 1906F USER MANUAL...

Страница 2: ...2...

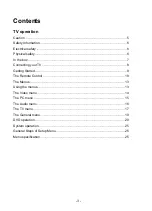
Страница 3: ...ety 6 In the box 7 Connecting your TV 8 Getting Started 9 The Remote Control 10 The Menus 13 Using the menus 13 The Video menu 14 The PC menu 15 The Audio menu 16 The TV menu 17 The General menu 19 DV...

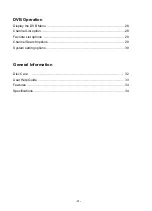
Страница 4: ...ation Display the DVB Menu 28 Channel List option 28 Favorite List options 29 Channel Search options 29 System setting options 30 General Information Care 32 User Help Guide 33 Features 34 Specificati...

Страница 5: ...waste disposal please keep separate from other household waste and recycle it responsibly to promote the sustainable reuse of material resources Household users should contact either the retailer whe...

Страница 6: ...teamy kitchens or near swimming pools x Pull the plug out immediately and seek professional help if the mains plug or cable is damaged liquid is spilt onto the set or if it is accidentally exposed to...

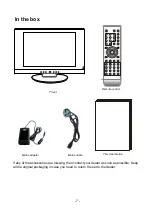
Страница 7: ...f the accessories are missing then contact your dealer as soon as possible Keep all the original packaging in case you need to return the set to the dealer Remote control Mains adaptor Mains cable Thi...

Страница 8: ...al input Video Video signal input AV L AV R Audio signal input for AV PC in PC audio input Headphone Connect it to your headphone or other audio equipment RF Connect to antenna or cable source COAX Ou...

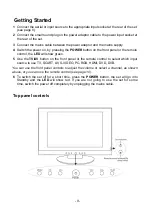
Страница 9: ...n the front panel or the remote control the LED will show green 5 Use the TV AV button on the front panel or the remote control to select which input source to use TV SCART AV S VIDEO PC RGB HDMI DVD...

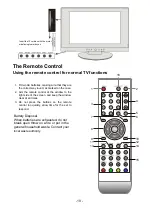
Страница 10: ...ght side of the screen and keep the window clear at all times 3 Do not press the buttons on the remote control too quickly allow time for the set to respond Battery Disposal When batteries are exhaust...

Страница 11: ...CANCEL Cancel the Teletext display REVEAL Reveal any hidden text HOLD Hold or carry on the current subpage SIZE Press to see top half of page double size Press again to see the bottom half of page do...

Страница 12: ...subtitle GOTO play your favorite title chapter track SET DVD setup menu MENU PBC DVD play list Disc menu ANG select DVD picture angle TITLE DVD title DVD fast forward DVD fast reverse DVD previous ch...

Страница 13: ...tton again to see the other menus another press to see the AUDIO menu another press to see the TV menu only when switched to TV another press to see the GENERAL menu another press to turn the menus of...

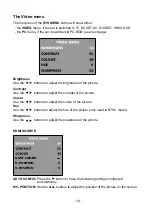
Страница 14: ...t Use the buttons to adjust the contrast of the picture Colour Use the buttons to adjust the colour of the picture Hue Use the buttons to adjust the hue of the picture only used in NTSC mode Sharpness...

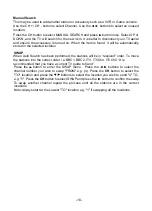
Страница 15: ...K 9300K or USER If you select USER you can use the buttons to adjust the RED GREEN and BLUE values individually Press SYS MENU when you have finished adjusting Auto configuration Press the button to h...

Страница 16: ...djust the volume of the sound Balance Use the buttons to adjust the left right balance of the sound Audio Preset Use the buttons to select from PERSONAL VOICE MUSIC or THEATRE If you select PERSONAL y...

Страница 17: ...ng the CH buttons OFF this channel will be included when changing channel using the CH buttons Automatic Frequency Control Use the buttons to turn AFC ON or OFF Fine Tune Use the buttons to fine tune...

Страница 18: ...Search has been performed the stations will be in received order To move the stations into the correct order i e BBC1 BBC2 ITV ITVCh4 ITVCh5 It is recommended that you have a current TV guide to hand...

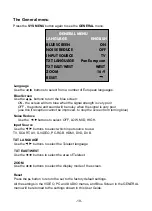
Страница 19: ...LOW MID HIGH Input Source Use the buttons to select which input source to use TV SCART AV S VIDEO PC RGB HDMI DVD DVB TXT LANGUAGE Use the buttons to select the Teletext language TXT EAST WEST Use the...

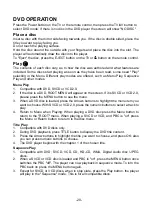
Страница 20: ...SVCD or VCD 2 0 please press the MENU button to see the menu 3 When a DVD disc is loaded press the Arrows buttons to highlight the menu item you want to choose With SVCD or VCD 2 0 press the numeric...

Страница 21: ...ns to highlight the item you are changing and enter the new chapter track you want to program directly 8 The program indicator in the screen and the playing chapter track illuminate Additional operati...

Страница 22: ...utton once and the repeat banner appears to show current repeat mode a In SVCD VCD CD HD CD WMA or Digital Audio disc JPEG sequence playback mode Press REPEAT button again to turn on repeat mode Press...

Страница 23: ...button again the display menu fades out Using the Search Feature 1 Compatible with DVD SVCD VCD CD HD CD discs 2 You can use Search feature to select a title chapter track number or go to a specific p...

Страница 24: ...n allows you to reduce sound to an inaudible level and the icon of MUTE will be displayed on screen Press the button again or press the Vol button to return to the normal condition 3 If the player has...

Страница 25: ...Press the CH CH buttons to select the Icon of the desired section e g TV System and press to open that section 3 Press CH CH to select the desired feature and again press to open that section 4 Press...

Страница 26: ...r a new 4 digit number Please remember or write down the new Password and keep safe RATING The Rating feature is a rating limit feature like movie ratings This helps you to control what DVD the family...

Страница 27: ...and SPDIF PCM SPDIF RAW is for amplifiers with a built in digital decoder SPDIF PCM is selected for amplifiers with no built in digital decoder TONE Use the CH button to move the scroll and adjust th...

Страница 28: ...select Press CH button to select the channel on the channel list then press the yellow button on the remote control to delete it Press CH button to select the channel on the channel list press the blu...

Страница 29: ...MENU to exit Channel Search options Press button to select the one of search type as manual scan or auto scan Manual Scan see picture left when you select Manual Scan press CH button to move to Chann...

Страница 30: ...option that you want to adjust and then use the OK button to confirm it First Time Installation System Information Change Pin Code Press digital button on the remote control to enter the pin code Ente...

Страница 31: ...mode and manual mode you can press CH to select one of it Manual mode Press to select one of the ON or OFF and then press OK to confirm it use to start scan or cancel it EPG menu Use EPG button on the...

Страница 32: ...s high density compressed data that needs proper handling 1 Hold the disc with fingers by outer edge and or the center spindle hole Do not touch the discs surface 2 Do not bend or press the disc 3 Do...

Страница 33: ...k volume settings No sound External leads not connected if used Check all external leads are connected Bright dot s on screen Pixel turned on fully Occasionally one or two pixels may fail this is norm...

Страница 34: ...cations TV TV System PAL BG DK I SECAM BG DK Screen size 19 diagonal Resolution 1440x900 pixels RGB Response time 8 ms Aerial input 75 unbalanced Audio output power 2x3 W Mains power DC 12V 5A Power c...

Страница 35: ...ill arrange for the product to be repaired Should a repair not be possible we will exchange the product for a new one or the nearest equivalent In the unlikely event of being unable to exchange we wil...

Отзывы: