www.MarCumtech.com
- 3 -
Getting Started
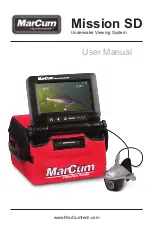
The MISSION SD has been set-up and tested at the factory before being placed into its retail
packaging. Remove the MISSION SD from the packaging and place it on a level surface with the
MarCum Technologies logo facing towards you and right side up. Once opened, loosen the
knobs on either side of the gimbal bracket (at the base of the monitor) by turning each one
counter-clockwise. Make sure to loosen the knobs a considerable distance. Then depress both
knobs by pushing inwards and hold in place. This releases the lock on the monitor angle. While
depressing the knobs with the base of your palms use the index fingers of each hand and gently
lift the monitor up to the desired viewing position and release tension on the gimbal knobs. Once
you have set the monitor to the desired viewing angle, gently tighten the knobs until they are
snug. The battery, camera and cable are now accessible behind the monitor. It’s easiest to
remove the hook and loop straps and unzip the soft pack case.
The battery has a wiring harness with “piggyback” terminals attached. The power cord from the
monitor attaches to this; the positive (red) terminal should already be attached. You should only
have to attach the negative (black) wire to the negative terminal, and you’re ready to go. The
other cord coming from the battery is the port to attach your battery charger, more on that in the
section on charging. There is no reason for you to disconnect any of these wires unless you are
going to remove/replace the battery.
To turn ON the MISSION SD, press the power key which is located on the keypad on the lower
left side on the front of the monitor. After pressing the power key, a small red LED indicator light
(located next to the power button) will turn ON. The monitor should now be displaying the image
being transmitted from the camera. The camera can now be unwrapped from the cable spool
and deployed into the water to the desired depth.
The depth of field (distance the camera can see underwater) depends on the clarity of the water
and available light at the depth the camera is used. In clear water, the depth of field can be many
feet but in cloudy or muddy water the depth of view can be reduced to only a few inches due to
particles suspended in the water. Dirty or muddy water and/or low light penetration can detract
from the quality of the color picture. Optimum color quality will result from clear water and
adequate light penetration.
Adjusting the Monitor and On-Screen Display (OSD) Settings
MONITOR SCREEN ADJUSTMENTS
The MISSION SD monitor has
four
different adjustments that can be made to enhance the
image on the monitor to the user’s preference. (Note: The MISSION SD has been pre-set
with factory defaults for normal viewing) To access the settings menu, press the menu key on
the digital keypad. The settings menu will be displayed on the screen (Note: if you wait too
long before selecting and adjustment, the menu screen will time out and disappear).
To change between on-screen adjustment choices
When making adjustments fo
r Birghtness, Color Kill, Color, Contrast, Reset and Exit
press the
menu key to get to your desired monitor adjustment option. The selected on-screen adjustment
will be highlighted on the LCD screen. To change the settings within a selected menu, use the
UP and DOWN arrows located on the far right of the digital keypad. After pressing your selected
menu option, the main menu will disappear from the center of the screen, and your selected
menu option will appear on the bottom of the screen. You will now be able to easily adjust and
see the screen adjustments you are making. As you select UP or DOWN to make your
adjustments, you will see the numbers of the selected adjustment increase or decrease
depending on the arrow direction you are depressing. To accept the changes, release the
UP/DOWN arrow and settings will be saved. Once the settings are adjusted properly, the
on-screen menu will shut off automatically.
Occasionally, you may find that one of your settings will not adjust. By simply scrolling through
the menu options and coming back to the setting that wouldn’t adjust a second time, you will
automatically reset the internal timer, enabling that setting to be adjusted.


