background image

8

ENGLISH

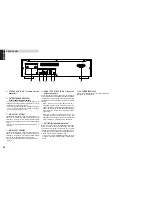
OUT

AUDIO OUT

EXT.

DIGITAL AUDIO OUT

INT.

REMOTE CONTROL

IN

L

R

OPT. COAX.

STAN-
DARD

CUS-
TOM

FILTER

AC IN

INPUT SELECTOR

VOLUME

POWER ON/OFF

1

2

SPEAKERS

STANDBY

PHONES

OFF

REC SELECTOR

TAPE

PHONO

CD

TUNER

AUX1

AUX2

TAPE

CD-R/MD

CD-R/MD

MUTE

BASS

SOURCE

SOURCE DIRECT

OFF

ON

OFF

ON

+

-

R

L

+

-

TREBLE

BALANCE

MAX

MIN

CLASS  A

OFF

ON

COPY

TAPE    CD-R

CD-R   TAPE    

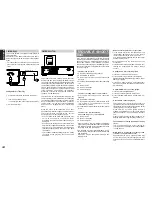
CONNECTIONS

Depending on your amplifier/receiver/Stereo System, there are various ways to connect to this player. For
correct connection please refer to instruction manuals of stereo system to be connected.

Caution: Do not connect output from this unit to PHONO input of your audio system.

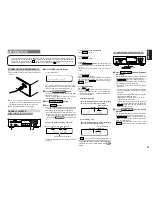
1.

Connect the audio cable 

q

 to this unit’s front speaker outputs and the stereo inputs on your amplifier,

receiver or stereo system.

2.

Connect the optical cable 

w

, coaxial cable 

e

 to the digital input on your AV amplifier, D/A converter, CD-

R, etc..

* Signal will be output from the digital audio out jacks (OPT./COAX.) only when a CD disc is played. When

playing a Super Audio CD disc, no signal will be output.

To Analog Audio output

(white)

(red)

To Digital Audio output

Left
speaker

Right

speaker

Audio cable 

q

(Supplied)

To audio input
terminals on amplifier

w

(Optional)

e

(Optional)

Connect to digital input
terminals of receiver, D/A
converter or CD recorder,
etc..

Example)
PM7200

Содержание SA8400

Страница 1: ...Model SA8400 User Guide Super Audio CD Player CLASS 1 LASER PRODUCT LUOKAN 1 LASERLAITE KLASS 1 LASERAPPARAT ...

Страница 2: ...s English WARNINGS Do not expose the equipment to rain or moisture Do not remove the cover from the equipment Do not insert anything into the equipment through the ventilation holes Do not handle the mains lead with wet hands Do not cover the ventilation with any items such as tablecloths newspapers curtains etc No naked flame sources such as lighted candles should be placed on the equipment When ...

Страница 3: ...oles are not covered air is allowed to circulate freely around the equipment it is placed on a vibration free surface it will not be exposed to excessive heat cold moisture or dust it will not be exposed to direct sunlight it will not be exposed to electrostatic discharges In addition never place heavy objects on the equipment If a foreign object or water does enter the equipment contact your near...

Страница 4: ...he figure below Do not attach pieces of paper or stickers to the label surfaces of the discs When a disc has a piece of plastic tape or rental CD label with paste protruding from the edge or when a disc still bears traces of sticky tape or adhesive labels do not attempt to play it If such a disc is played on the CD player you may find that you cannot remove it or that some other kind of malfunctio...

Страница 5: ...to a warm room Since in cases like this the track numbers may not be read and the player is prevented from operating properly wait about 30 minutes and then operate the player This player may cause interference on a tuner or TV set If this is the case place it further away from the tuner or TV set Compact discs have much less noise than analog records and hardly any noise is heard before play star...

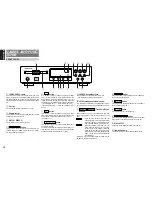
Страница 6: ...sed to turn lighting ON and OFF of the display window Pressing this button once darkens the display The third time this button is pressed the display will be extinguished and the indicator in 6 lights PHONES headphones jack The headphones are connected to this jack Use headphones with a standard plug 0 LEVEL headphone volume control This control is used to adjust the headphone volume Turn it clock...

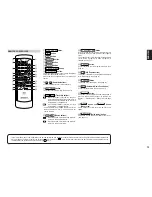
Страница 7: ... for checking the programmed tracks during a program or when a program is stopped See page 11 3 CANCEL button Use this button to cancel a programmed track See page 11 4 A B A B Repeat button This button is to determine starting and ending points for A B repeat play See page 10 5 RANDOM button This button is for random play See page 10 6 AMS Automatic Music Scan button Use this button for AMS play ...

Страница 8: ... the remote control connectors on the player and on a Marantz AV component are connected using the accessory remote control connecting cables the components can be operated as a system by remote control When connecting to a component which is equipped with remote control connectors the player s REMOTE CONTROL IN connector must always be connected to the REMOTE CONTROL OUT connector on the other co...

Страница 9: ...ights during program play e TRK track indicator This lights above the display of the track number now playing for instance f A B A B repeat indicator This lights during A B repeat play g ALL 1 repeat indicator This lights during repeat play h TOTAL total time indicator When the total remaining time or the total program time is displayed this lights above the display i 8 8 8 8 8 pause indicator Thi...

Страница 10: ... connected Caution Do not connect output from this unit to PHONO input of your audio system 1 Connect the audio cable q to this unit s front speaker outputs and the stereo inputs on your amplifier receiver or stereo system 2 Connect the optical cable w coaxial cable e to the digital input on your AV amplifier D A converter CD R etc Signal will be output from the digital audio out jacks OPT COAX on...

Страница 11: ...cator will light and playback is paused at the point that the button is pressed To restart playback press PAUSE button again or press PLAY button To change time display Press TIME button Each time TIME button is pressed display will change in the following order Track elapsed time Track remaining time Total remaining time Track elapsed time Track remaining time The remaining playing time from the ...

Страница 12: ... Exit from One Track Repeat Press REPEAT button 1 indicator will disappear repeat mode will be off and it returns to normal play mode A B REPEAT qPress A B button on the remote at your chosen starting point The A B indicator will blink wPress A B button again at your chosen end point A B indicator will light up and the chosen section will be played repeatedly To Exit from A B Repeat Press A B butt...

Страница 13: ... AMS button is pressed during playback the PLAY indicator 3 will blink and the program will jump to the next track after a display time of approximately 10 seconds TRK 1 2 3 4 5 6 7 8 9 10 11 12 13 14 15 When you find a song that you want to listen to press the AMS button again or press the PLAY button PLAY indicator will light up constantly and normal playback will begin from the current track If...

Страница 14: ...rrect position on the disc tray 4 Is the disc placed properly with the label side facing up 5 Is the disc dirty 6 Is the disc scratched 7 Is the disc warped The disc is rotating but no sound is heard 1 Are the amplifier and speakers connected properly 2 Is the amplifier switch ON 3 Is the amplifier s function or selector switch set to CD or AUX or such to whatever you have connected this unit to 4...

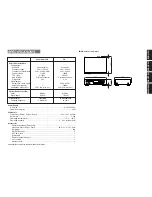
Страница 15: ...lGaAs AlGaAs Wave length 650nm 780nm Signal format 1 bit DSD 16 bit linear PCM Sampling frequency 2 8224MHz 44 1kHz Power Supply N Version AC 230V 50Hz Power Consumption 20W Cabinet etc Dimensions Width Height Depth 440 113 335mm Net weight 7 5kg Operating temperatures 5 C 35 C Operating humidity 5 90 without dew Accessories Remote control unit RC8400SA 1 Dimensions Width Height Depth 48 5 21 5 15...

Страница 16: ...ind your nearest authorized distributor or dealer on our website JAPAN Marantz Japan Inc 35 1 Sagami Ohno 7 Chome Sagamihara shi Kanagawa 228 8505 Japan U S A Marantz America Inc 1100 Maplewood Drive Itasca IL 60143 U S A EUROPE Marantz Europe B V P O Box 8744 5605 LS Eindhoven The Netherlands ...

Отзывы: