Your Industrial Control Solutions Source
_____________________
www.maplesystems.com
Maple Systems, Inc. | 808 134
th
St. SW, Suite 120, Everett, WA 98204 | 425.745.3229
OMI Operations Manual
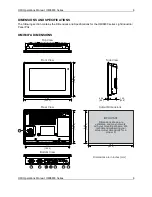
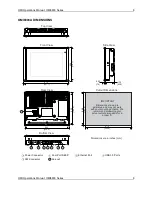
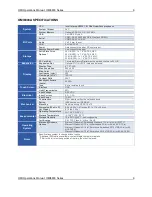
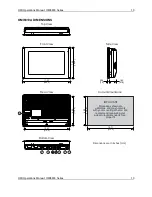
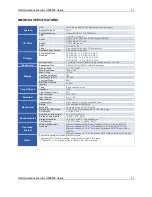
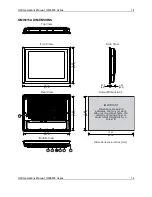
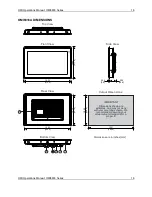
OMI6800 Light Industrial Panel PC Series
For use with the following:
OMI6800 Series