background image

OPERATOR / PARTS MANUAL

CLASSIC 4-CYCLE TILLER

IMPORTANT!

Assembly Instructions Start on Page 6!

Please review the Warnings & Safety Information on pages 3-5

and the Assembly Instructions before unpacking the box.

7262

Содержание 7262

Страница 1: ...TOR PARTS MANUAL CLASSIC 4 CYCLE TILLER IMPORTANT Assembly Instructions Start on Page 6 Please review the Warnings Safety Information on pages 3 5 and the Assembly Instructions before unpacking the box 7262 ...

Страница 2: ...d hand machines must make sure that this manual is provided with the machine IMPORTANT MESSAGE Thank you for purchasing this Schiller Grounds Care Inc product You have purchased a world class product one of the best designed and built anywhere This machine comes with Operation and Safety instructions Parts and Service instructions and Engine instructions The useful life and good service you receiv...

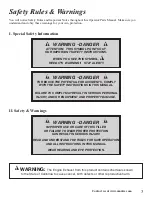
Страница 3: ...R ACCIDENTS COMPLY WITH THE SAFETY INSTRUCTIONS IN THIS MANUAL FAILURE TO COMPLY MAY RESULT IN SERIOUS PERSONAL INJURY AND OR EQUIPMENT AND PROPERTY DAMAGE WARNING DANGER IMPROPER USE OR CARE OF THIS TILLER OR FAILURE TO WEAR PROPER PROTECTION CAN RESULT IN SERIOUS INJURY READ AND UNDERSTAND THE RULES FOR SAFE OPERATION AND ALL INSTRUCTIONS IN THIS MANUAL WEAR HEARING AND EYE PROTECTION II Safety ...

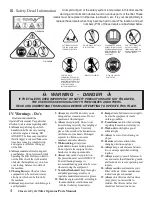
Страница 4: ...ooting balance or control of the machine 3 Thoroughly inspect the area where equipment is to be used and remove all objects which can be thrown by the machine 4 Always keep area clear of children pets and bystanders 5 Always stay alert Watch what you are doing and use common sense Do not operate unit when fatigued 6 Always dress properly Do not wear loose clothing or jewelry they might get caught ...

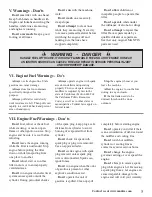
Страница 5: ...l lands Stop the engine whenever you leave the machine Allow the engine to cool before storing in any enclosure If the fuel tank needs to be drained this should be done outdoors Don t fuel refuel or check fuel while smoking or near an open flame or other ignition source Stop engine and be sure it is cool before refueling Don t leave the engine running while the tiller is unattended Stop engine bef...

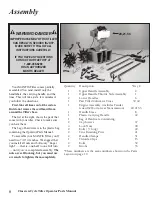
Страница 6: ...elf locking but you must use a wrench to tighten them completely 40 39 8 42 20 21 55 1 2 6 53 Assembly WARNING DANGER IMPROPER ASSEMBLY OF THIS TILLER CAN RESULT IN SERIOUS INJURY MAKE SURE TO FOLLOW ALL INSTRUCTIONS CAREFULLY IF YOU HAVE ANY QUESTIONS CONTACT OUR FACTORY AT 1 800 366 6268 OR AN AUTHORIZED MANTIS DEALER Quantity Description Key 1 Upper Handle Assembly 2 1 Upper Handle Throttle Sid...

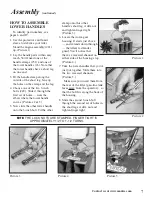
Страница 7: ...o the 3 inch bolt Fit the other clamp onto this other handle s short leg Add a nut and tighten finger tight Picture 3 6 Locate the worm gear housing It starts just above and extends down through the tiller s red fender guard You ll notice that there s a recessed channel on either side of the housing s top Picture 4 7 Take the lower handles that you ve just put together Slide them into the two rece...

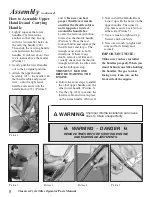
Страница 8: ...e the throttle lever and let go The triangle must click in both directions If there is any doubt remove air filter and visually check that the throttle triangle hits both the idle screw and the full open stop THIS MUST BE DONE BEFORE STARTING THE ENGINE 4 Follow the same steps to install the other upper handle onto the other lower handle Picture 3 5 Use the clip 13 to secure the throttle cable and...

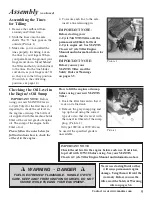
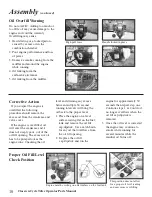
Страница 9: ...e first time it is important to check the oil level in the engines oil sump The bottle of oil supplied with this machine holds 80ml of the correct grade of engine oil The sump of the engine holds 80ml of oil Please follow the notes below for full instructions how to check the oil level in the engine How to fill the engines oil sump before using your new MANTIS Tiller 1 Rock the tiller forward so t...

Страница 10: ...nkcase and valve cover If the engine is overfilled oil will enter the crankcase and it does not simply pour out of the oil fill opening The excessive oil has to be pumped out as the engine runs Checking the oil level and draining any excess between multiple 30 second running intervals will bring the oil back to the proper level 1 Place the engine on a level surface resting flat on the fuel tank an...

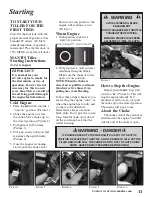
Страница 11: ... cord more than four or five times Over pulling may cause flooding Follow these steps whenever you are starting the engine cold or when the engine has run dry and you have just added fuel Remember always use short brisk pulls Don t give the cord a long forceful yank And do not let the cord snap back into the starter housing Picture 4 Picture 5 Picture 6 Picture 1 Picture 2 Picture 3 Starting How t...

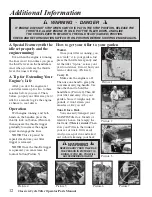
Страница 12: ... truck It fits easily And you can put it in and take it out without straining your back How to get your tiller to your garden Picture 1 Picture 2 Picture 3 Picture 4 Picture 5 A Tip for Extending Your Engine s Life After you start the engine let your tiller warm up for two to three minutes before you use it Then before you put your tiller away let it idle for a minute to give the engine a chance t...

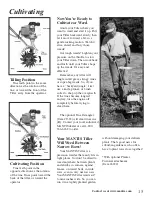
Страница 13: ...ard again This will help you till deeper Keep repeating these steps until you ve tilled an entire row Start again on the next row It s much like running a vacuum cleaner Picture 2 You Can Even Control Depth For Deeper Tilling Move your Tiller slowly back and forth as you would a vacuum cleaner Work the same area over and over until you ve dug to your desired depth Picture 3 For Shallow Tilling Swi...

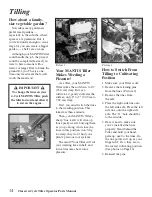
Страница 14: ... up those pesky weeds burying them as you go along And since the tines in this position won t dig too deep they won t hurt your plants precious root systems The result Your Tiller will cut your weeding time in half and turn a tiresome chore into a pleasure How to Switch From Tilling to Cultivating Position 1 Make sure your Tiller is off 2 Remove the retaining pins from the tines Picture 2 3 Remove...

Страница 15: ...ct your local authorized MANTIS dealer or call 1 800 366 6268 to order Your MANTIS Tiller Will Weed Between Narrow Rows Your MANTIS Tiller is a precision weeder that easily fits in tight places So don t be afraid to weed anywhere between plants and shrubs in corners against fences on raised beds in wide rows even in very narrow rows Your MANTIS Tiller weeds six to nine inches wide So you can run i...

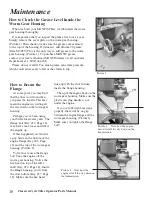
Страница 16: ...the way down on the worm gear housing Perhaps you ve been using your Tiller for several years The flange bolt Key 12 Page 18 may have come loose and lifted the engine up If this happened you ll notice a gap between the bottom of the engine flange Key 43 Page 18 and the top of the worm gear housing Picture 2 To fix this loosen the flange bolt Take the engine off the worm gear housing Notice the hex...

Страница 17: ... WD 40 to prevent rusting 9 Oil the throttle cable and all visible moving parts Do not remove the engine cover 10 Replace the fuel filter 11 Check the grease level in the worm gear housing as described on page 15 12 Order new MANTIS parts to replace any that are badly worn or broken call 1 800 366 6268 For Honda engine parts please contact your nearest Honda dealer 13 Store your Tiller in an uprig...

Страница 18: ...de forward 4 Insert retaining pins on both left and right axles Around walkways and garden beds you ll want to edge more deeply 3 to 4 deep Here s how to install the Border Edger for that purpose 1 Remove the Tilling Cultivating tines 2 Slide the Edger s blade onto the right axle The blade s pointed face should hit the ground when you spin the blade forward 3 Slide the wheel onto the left axle 4 I...

Страница 19: ...Tiller Parts Assembly 19 Contact us at www mantis com ...

Страница 20: ...NOB 54 2 400230 PLUG 55 1 400010 TRANSMISSION ASSEMBLY 56 1 400132 BEARING 57 1 400131 CLUTCH DRUM 60 4 400511 M6 X 12 FLANGED BOLT Also in Key 55 KEY QTY MATERIAL 1 1 400257 TRIGGER HANDLE ASSM RH 2 1 400255 HANDLE ASSM LH 6 2 400224 LOWER HANDLE FOLD DOWN 7 1 400620 LABEL 8 1 148 HANDLE BRACE 12 1 910502 10 32 X 3 4 FLANGED BOLT 13 2 478 THROTTLE CLIP 20 1 465 FENDER GUARD 21 1 400911 ENGINE ASS...

Страница 21: ...esponsibility in the event that the product was not assembled or used in compliance with any assembly care safety or operating instructions contained in the Operator Parts Manual or accompanying the product was not used with reasonable care or requires replacement or repair due to accidents or lack of proper maintenance or was misused altered used for other than normal or intended purposes This wa...

Отзывы: