17
skin of the child – check before placing the child in the seat.
• Do not use the car seat without its fabric covering,
which cannot be replaced with one not approved by the
manufacturer since it is an integral part of the car seat and
the safety system.
• Do not use the car seat without the protective padding for
the shoulder straps as they are an integral part of the car
seat and the safety system.
• If you are unsure of anything, contact the manufacturer or
the retailer of this car seat.
• Do not remove the adhesive and stitched labels as this might
mean the product is no longer compliant with standards.
• Do not use the car seat if it shows signs of breakage
or missing parts, if it is second hand, or if it has been
subjected to violent stress in an accident, because it might
have suffered extremely dangerous structural damage.
• Do not modify the product.
• For any repairs, replacement parts or information on the
product, contact the post-sales assistance service. The relevant
information is provided on the last page of this manual.
• The car seat should always be secured in the vehicle, even
when the child is not present. In the event of sudden
braking, it could injure the occupants of the vehicle.
• Do not use this car seat after five years from the date of
production indicated on the structure. The natural ageing of the
materials may mean that it is no longer compliant with standards.
• Do not use accessories that are not approved by the
manufacturer or by the competent authorities.
Instructions for use
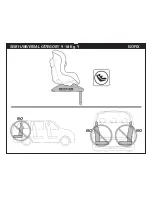
UNIVERSAL CATEGORY
Attachment in vehicles with safety belts
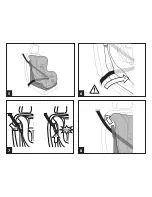
1• Place the Vito car seat on the vehicle’s seat, facing in the
normal direction of travel of the vehicle, as shown in the
figure. The car seat is equipped with a protective base.
Do not remove it when fitting the car seat with the
safety belts.
2• To make it easier to pass the vehicle’s safety belts through the
back of the car seat, it is necessary to recline the seat to the
lowest position by operating the lever, as shown in the figure.
3• Pass the vehicle’s safety belt between the frame and the
shell of the car seat.
4• The lap belt must pass through the low slots marked in red.
Fasten the belt, ensuring that it clicks into place.
5• The figure shows Vito fitted in a vehicle.
6• Check that the lap belt has gone through the low slots
marked in red and tighten it (Fig. a).
7• To complete the securing procedure in a vehicle, use the
Steady Fix device. Open the clip and pass the diagonal
strap through it, ensuring that it is taut and not twisted
(Fig. b). Close the safety tab (Fig. c).
8•
IMPORTANT: Take hold of the safety belt and pull it
upwards firmly to fit Vito more closely to the seat of
the vehicle
(Fig. d)
.
Once the procedure is complete, it is possible to recline the
seat to the desired position (See Point 2).
Instructions for use
SEMI-UNIVERSAL CATEGORY
Attachment in vehicles with an Isofix
Base 0+1
Before attaching Vito to the Isofix Base, fit the Base on the
seat of the vehicle by following the instructions provided
with the base.
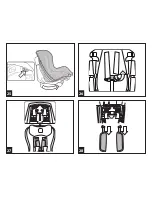
9• If the base is already attached in the vehicle, ensure that its
Isofix attachments are extended to their maximum length.
10• Remove the protective base attached to the car seat with
the special release switches (Arrows A and B).
11• Position the car seat on the Isofix Base 0+1 and secure the
rear connectors of the car seat to the attachment points
of the base nearest to the vehicle seat (Arrow A). Press the
front part of the car seat until it clicks into place (Arrow B).
12•
IMPORTANT:
The two signals behind the Isofix Base go
from red to green to indicate that the car seat is properly
attached to the base.
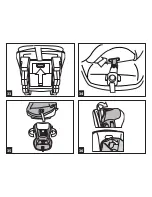
13• Pull the handle on the base (Arrow A) and push the base
with the car seat against the vehicle’s seat until they can go
no further (Arrow B).
IMPORTANT:
It is possible to check that the Isofix base
is correctly positioned by looking at the signals on the
handle. OK (green) indicates that the position is correct,
NO (red) indicates that the procedure has been carried out
incorrectly and must be repeated until the handle only
shows the term “OK”.
IMPORTANT:
Once the procedure is complete, move the
base to check that both Isofix points are actually attached.
Содержание Vito
Страница 1: ...VitoTT VOTT_0118_1011_V1 Vito instruction for safe use...
Страница 3: ...OK NO NO NO NO NO UNIVERSAL CATEGORY 9 18 Kg Y BELTED...
Страница 4: ...B A 1 2 3 4...
Страница 5: ...B C A D 5 7 8 6...
Страница 6: ...NO NO O N NO SEMI UNIVERSAL CATEGORY 9 18 Kg Y ISOFIX...
Страница 7: ...OK B A click B A 10 9 11 12...
Страница 8: ...OK A B A C C B 13 14 15 16...
Страница 9: ...A B A 18 17 19 20...
Страница 10: ...OK 21 22 24 23 NO NO 1 1 2 3 4 5 6 7 2 3 4 5 6 7...
Страница 11: ...A B 26 27 28 25 A...
Страница 12: ...29 30 31 32 B A A B...
Страница 13: ...33 34 35 36...
Страница 14: ...37 38 39 40...
Страница 15: ...0409 42 41 43 44 A...
Страница 21: ...21...
Страница 22: ......
Страница 23: ......


