background image


WARNUNG: VERWENDEN SIE NIEMALS PRODUKTE MIT BLEICHMITTEL ODER CHLOR ODER 
ANDEREN ÄTZENDEN STOFFEN, EINSCHLIESSLICH LÖSUNGSMITTELHALTIGER FLÜSSIGKEITEN 
(Z. B. GAS, ÖLE USW.), TRINATRIUMPHOSPHAT-PRODUKTE, AMMONIAK ODER 
REINIGUNGSMITTEL AUF SÄUREBASIS. DIESE CHEMIKALIEN KÖNNEN DAS GERÄT 
BESCHÄDIGEN UND DIE ZU REINIGENDE OBERFLÄCHE BESCHÄDIGEN. LESEN SIE IMMER DAS 
ETIKETT.

REINIGUNG UND LAGERUNG

Ausschalten des Hochdruckreinigers

WENN SIE IHREN HOCHDRUCKREINIGER NICHT MEHR BENUTZEN, GEHEN SIE WIE FOLGT VOR,

UM DAS GERÄT AUSZUSCHALTEN:

Stellen Sie den Hochdruckreiniger auf die Position OFF.

Stellen Sie die Wasserversorgung ab.

 Bevor Sie den Hochdruckschlauch abziehen, richten Sie die Pistole in eine sichere Richtung 
und lassen Sie das Hochdruckwasser ab.

Trennen Sie den Hochdruckschlauch vom Hochdruckreiniger und der Pistole.

Ziehen Sie den Gartenschlauch vom Hochdruckreiniger ab.

Entfernen Sie die Schnellkupplung vom Gartenschlauch und befestigen Sie sie an dem 
Kupplungsstück, das zur Aufbewahrung am Hochdruckreiniger installiert ist.

Entfernen Sie überschüssiges Wasser aus der Pumpe, indem Sie das Gerät auf beide Seiten 
kippen, um das restliche Wasser aus den Ein- und Auslassanschlüssen abzulassen.

Nehmen Sie den Wasserzulauffilter heraus und spülen Sie ihn mit Wasser aus, um Schmutz 
oder Ablagerungen zu entfernen. Geben Sie den Filter nach der Reinigung zurück.

Leeren Sie den Waschmittelbehälter und spülen Sie ihn unter fließendem Wasser aus.

Wischen Sie alle Wasserreste von allen Teilen und Armaturen ab.

Aktivieren Sie die Sicherheitssperre an der Waffe.

Lagern Sie den Hochdruckreiniger, die Teile und das Zubehör an einem Ort mit einer Temperatur
über 0  (32 ).

39/42

Содержание M7.2500-IND

Страница 1: ...MalTec Myjka M7 2500 IND Turbo Regulacja Mocy Instrukcja Obsługi ...

Страница 2: ...od wysokim ciśnieniem 8 Utrzymuj obszar czyszczenia z dala od ludzi 9 Zawsze zachowuj dobrą postawę i równowagę nie wychylaj się za bardzo ani nie stawaj na niestabilnej podporze 10 Miejsce pracy powinno mieć odpowiedni drenaż aby zmniejszyć możliwość upadku z powodu śliskich powierzchni 11 Postępuj zgodnie z instrukcjami konserwacji określonymi w instrukcji 12 Aby zmniejszyć ryzyko porażenia prąd...

Страница 3: ...lary ochronne lub okulary ochronne z osłonami bocznymi oraz w razie potrzeby pełną osłonę twarzy Aby zmniejszyć ryzyko wstrzyknięcia lub obrażeń nigdy nie kieruj strumienia wody w kierunku ludzi lub zwierząt domowych ani umieszczać jakiejkolwiek części ciała w strumieniu Nieszczelne węże i złączki mogą również powodować obrażenia w wyniku wtrysku Nie trzymaj za wąż ani złączki Aby zmniejszyć ryzyk...

Страница 4: ...uche i nie dotykać ziemi Nie dotykaj wtyczki mokrymi rękami Nie używaj urządzenia jeśli przewód zasilający lub ważne części urządzenia są uszkodzone np urządzenia zabezpieczające węże wysokociśnieniowe pistolet spustowy Jeśli używany jest przedłużacz wtyczka i gniazdo muszą być wodoszczelne OSTRZEŻENIE Nieodpowiednie przedłużacze mogą być niebezpieczne Wyjmij wtyczkę z gniazdka podczas czyszczenia...

Страница 5: ...ntować dołączone części postępuj zgodnie z poniższymi krokami Krok 1 Podłącz wąż wysokociśnieniowy C do pistoletu H Włóż i szybko połącz aby uniknąć wycieków Gdy elementy są prawidłowo połączone nie można rozdzielić dwóch elementów wyciągając je z pistoletu H Krok 2 Mocno przykręcić uchwyt podkładki do korpusu głównego jak na rys Śruby zostaną zapakowane razem z korpusem głównym prosimy o sprawdze...

Страница 6: ...ich po rozpakowaniu Krok 4 Włóż regulowaną dyszę natryskową J do pistoletu H Wciśnij i obróć regulowaną dyszę J w kierunku zgodnym z ruchem wskazówek zegara do pistoletu H aż do dokręcenia ręką aby zablokować ją na miejscu Gdy elementy są prawidłowo połączone nie można rozdzielić tych dwóch elementów wyciągając prosto na regulowaną dyszę Wszystkie nasadki muszą być włożone do pistoletu H w celu pr...

Страница 7: ...iągając je prosto z odpływu wody Krok 6 Podłącz złącze węża do myjki ciśnieniowej Przed podłączeniem złącza do złączki męskiej zdejmij plastikową nasadkę którą zakłada się na złączkę męską myjki ciśnieniowej Po zdjęciu plastikową nasadkę można wyrzucić Po zainstalowaniu obu elementów przymocuj wąż ogrodowy za pomocą śruby łączącej do myjki ciśnieniowej Podłącz wąż ogrodowy do dyszy wodnej 7 42 ...

Страница 8: ...st pistoletu aby wypuścić całe pozostałe powietrze z pompy i węża Uruchom myjkę ciśnieniową przestawiając włącznik wyłącznik do pozycji włączonej i naciśnij spust PRZYPOMNIENIE Silnik nie pracuje w sposób ciągły tylko po wciśnięciu spustu OSTRZEŻENIE RYZYKO OBRAŻEŃ Urządzenie rozpocznie natryskiwanie po naciśnięciu spustu Podczas wyłączania urządzenia po użyciu w wężu i urządzeniu nadal panuje wys...

Страница 9: ...Blokada bezpieczeństwa pistoletu Ta myjka ciśnieniowa jest wyposażona w blokadę bezpieczeństwa spustu pistoletu Gdy nie używasz myjki ciśnieniowej użyj blokady zabezpieczającej aby zapobiec przypadkowemu włączeniu spryskiwacza pod wysokim ciśnieniem Regulowana dysza natryskowa Regulowana dysza pozwala na użycie dowolnego rodzaju natrysku od pełnego strumienia diagram 1 do strumienia bezpośredniego...

Страница 10: ... pozwoli na aplikowanie wielu form detergentu w płynie na powierzchnię roboczą Aplikacja detergentu odbywa się tylko pod niskim ciśnieniem Włóż regulowaną dyszę do pistoletu i dociśnij ją do końca tak aby myjka ciśnieniowa była w trybie niskiego ciśnienia patrz Rysunek A poniżej Zdejmij korek ze zbiornika detergentu i napełnij go wyłącznie detergentem w płynie patrz Rysunek B poniżej Nie wlewaj wo...

Страница 11: ...pistoletu Odłącz wąż ogrodowy od myjki ciśnieniowej Zdejmij szybkozłączkę z węża ogrodowego i przymocuj do złączki złączki zainstalowanej na myjce ciśnieniowej w celu przechowywania Usuń nadmiar wody z pompy przechylając urządzenie po obu stronach aby spuścić pozostałą wodę ze złączek wlotowych i wylotowych Wyjmij filtr wlotu wody i spłucz wodą aby usunąć brud lub zanieczyszczenia Po wyczyszczeniu...

Страница 12: ...mniej 6 9 cali od czyszczonej powierzchni Zachowaj dalszą odległość od czyszczonego obszaru podczas używania bezpośredniego spryskiwania Uwaga W przypadku bardziej miękkiego drewna zwiększ odległość od obszaru czyszczenia Cementowe tarasy kamień i cegła Spłucz świeżą wodą Jeśli używasz detergentu napełnij zbiornik detergentu i nałóż na czyszczony obszar pod niskim ciśnieniem Spłucz pod wysokim ciś...

Страница 13: ...prawdź czy napięcie jest odpowiednie Przewód zasilający nie jest podłączony Podłącz przewód zasilający POMPA NIE OSIĄGA ODPOWIEDNIEGO CIŚNIENIA LUB FALUJE PRAWDOPODOBNA PRZYCZYNA ROZWIĄZANIE Filtr wlotu wody jest zatkany Wyjmij i wyczyść filtr Pompa zasysa powietrze Dokręcić połączenia odpowietrzyć system Zawory ssące są zatkane zużyte Oczyścić lub wymienić zawory Zbyt mała średnica węża ogrodoweg...

Страница 14: ...je że urządzenie Maltec Myjka Ciśnieniowa M7 2500 IND Turbo Regulacja Mocy spełnia wszelkie wymogi dotyczące dyrektywy LVD 2014 35 EU EC 2014 30 EU oraz spełnia następujące standardy EN 60335 1 2012 A2 2019 EN 60335 2 79 2012 EN 62233 2008 AfPS GS 2019 01 PAK Importer Malis B Machoński sp k ul Zbożowa 2E Wysogotowo 62 081 Przeźmierowo www maltec pl 14 42 ...

Страница 15: ...Pressure Washer M7 2500 IND Turbo Regulation Instruction Manual 15 42 ...

Страница 16: ...rols 7 Stay alert always be aware of where you are directing the high pressure spray 8 Keep cleaning area clear of all people 9 Keep good footing and balance at all times do not overreach or stand on an unstable support 10 The work area should have adequate drainage to reduce the possibility of a fall due to slippery surfaces 11 Follow the maintenance instructions specified in the manual 12 To red...

Страница 17: ...e risk of injury user must read and understand owner s manual before using this product Always wear safety goggles or safety glasses with side shields and as necessary A full face shield when operating this product To reduce the risk of injection or injury never direct a water stream towards people or pets or place any body part in the stream Leaking hoses and fittings are also capable of causing ...

Страница 18: ...e manufacturer or customer service representatives WARNING To reduce the risk of electrocution keep all connections dry and off the ground Do not touch the plug with wet hands Do not use the appliance if a supply cord or important parts of the appliance are damaged e g safety devices high pressure hoses trigger gun If an extension cord is used the plug and socket must be of watertight construction...

Страница 19: ...G Hose Pressure Hose B Water inlet filter H High Pressure Hose Clip C Gun holder J Gun D Gun saddle K Adjustable Nozzle E Cable Hook L Cleaning pin F Hose Reel W Hose To assemble the enclosed parts please refer to the steps that follow Step 1 Attach the high pressure hose C to the gun H Insert and quick connect it tight to avoid leakage When the pieces are joined properly you cannot separate the t...

Страница 20: ...low fig The screws will be packed together with the main body pls kindly check and find it when unpacked for both model A B C Step 4 Insert the adjustable spray nozzle J into the gun H Push and turn the adjustable nozzle J clockwise onto the gun H until hand tight to lock it in place When the pieces are joined properly you cannot separate the two components by pulling straight out on the adjustabl...

Страница 21: ...rom the water outlet Step 6 Attach the hose connector to pressure washer Before attaching the connector to the male fitting remove the plastic cap which is inserted onto the male fitting on the pressure washer before shipping This plastic cap can be discarded once removed After both components have been installed attach the garden hose with connector screw on the pressure washer Connect the garden...

Страница 22: ...to bleed all the remaining air out of the pump and hose Start the pressure cleaner by turning the on off switch to the on position and squeeze the trigger REMINDER Motor does not run continuously only when the trigger is squeezed WARNING RISK OF INJECTION Unit will start spraying when trigger is squeezed When turning the unit off after use high pressure still exists inside the hose and unit Point ...

Страница 23: ...r is equipped with a gun trigger safety lock When not using the pressure cleaner use the safety lock to keep from accidentally engaging the high pressure spray Adjustable Spray Nozzle The adjustable nozzle will allow you to use any variety of spray patterns from a full fan spray diagram 1 to a direct stream spray diagram 2 When using the pressure cleaner to clean wood decks siding vehicles etc alw...

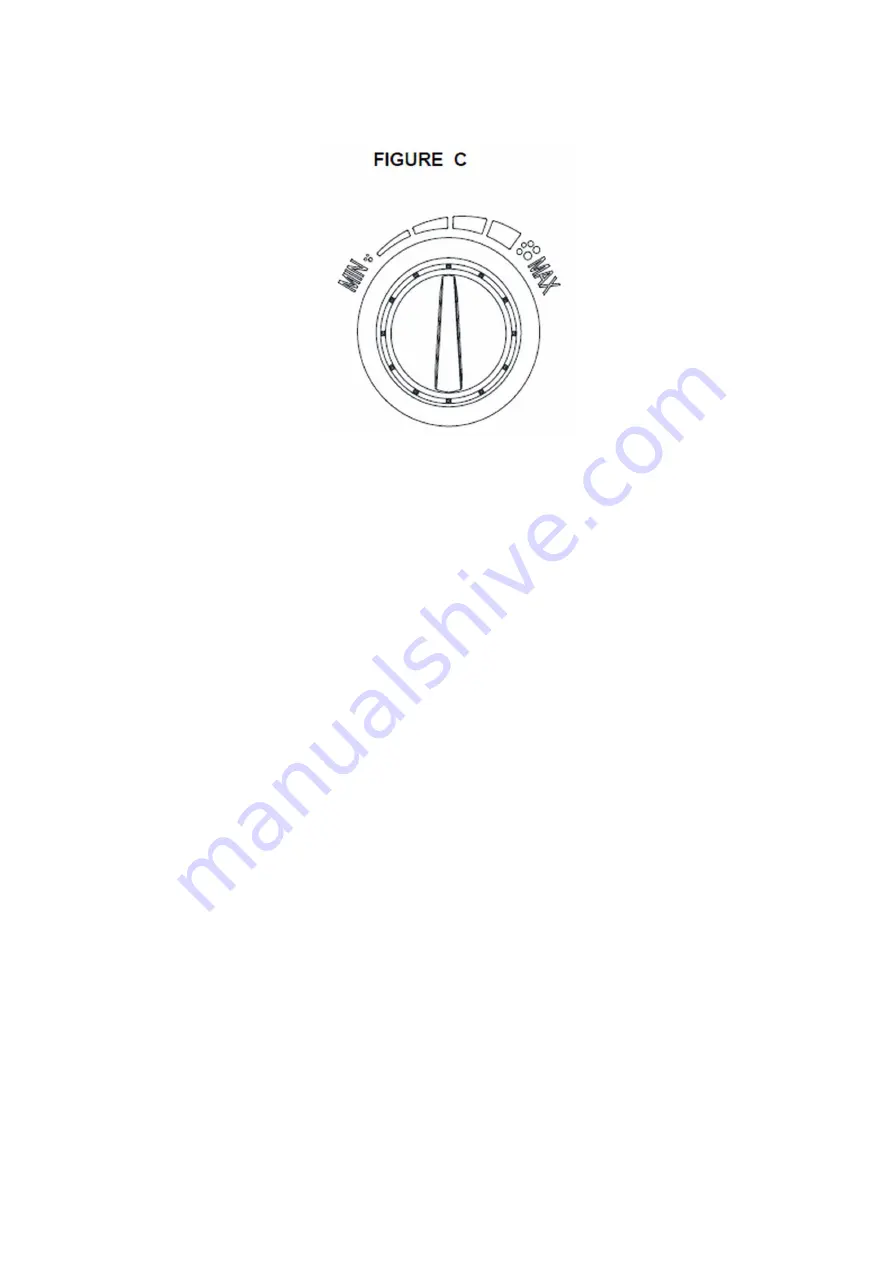
Страница 24: ...u to apply many forms of liquid detergent onto the work surface Detergent application happens at low pressure only Insert the adjustable nozzle onto the gun and push it toward end of so that the pressure washer is in low pressure mode see Figure A below Remove the cap on the detergent reservoir and fill with liquid detergent only see Figure B below Do not put any water into the reservoir The press...

Страница 25: ...re water Disconnect high pressure hose from the pressure cleaner and gun Disconnect garden hose from the pressure cleaner Remove quick coupler fitting from garden hose and attach to the nipple portion of the fitting installed on the pressure cleaner for storage Remove excess water from the pump by tipping the unit on both sides to drain any remaining water from inlet and outlet fittings Remove Wat...

Страница 26: ...ttom for best results Rinse at high pressure using the fan spray keeping the tip of the spray nozzle at least 6 9 inches from the cleaning surface Maintain a further distance from the cleaning area when using a direct spray Caution For softer woods increase the distance from the cleaning area Cement Patios Stone and Brick Rinse cleaning and surrounding area with fresh water If using detergent fill...

Страница 27: ... fuses Voltage is inadequate Check whether the voltage is adequate Power cord is not plugged in Plug in power cord THE PUMP DOES NOT REACH ADEQUATE PRESSURE OR FLUCTUATES PROBABLE CAUSE SOLUTION Water inlet filter is clogged Remove and clean filter Pump is drawing air Tighten connections bleed system Suction valves are clogged worn Clean or replace valves Diameter of garden hose too small Replace ...

Страница 28: ...oński sp K Declares that the Maltec M7 2500 IND Turbo Regulation Pressure Washer meets all the requirements of the LVD 2014 35 EU EC 2014 30 EU directive and meets the following standards EN 60335 1 2012 A2 2019 EN 60335 2 79 2012 EN 62233 2008 AfPS GS 2019 01 PAK Importer Malis B Machoński sp k ul Zbożowa 2E Wysogotowo 62 081 Przeźmierowo www maltec pl 28 42 ...

Страница 29: ...Hochdruckreiniger M7 2500 IND Turbo Bedienungsanleitung 29 42 ...

Страница 30: ...Sie den Reinigungsbereich frei von Menschen 9 Achten Sie stets auf eine gute Körperhaltung und ein gutes Gleichgewicht lehnen Sie sich nicht zu weit vor oder stellen Sie sich nicht auf eine instabile Unterlage 10 Der Arbeitsbereich sollte über eine ausreichende Entwässerung verfügen um die Gefahr von Stürzen aufgrund von rutschigen Oberflächen zu verringern 11 Befolgen Sie die Wartungsanweisungen ...

Страница 31: ...sen und verstehen bevor er dieses Produkt benutzt Tragen Sie beim Umgang mit diesem Produkt immer eine Schutzbrille oder eine Schutzbrille mit Seitenschutz und falls erforderlich einen vollständigen Gesichtsschutz Wasserstrahl niemals auf Menschen oder Haustiere und halten Sie keine Körperteile in den Strahl Auch undichte Schläuche und Armaturen können zu Verletzungen führen Halten Sie sich nicht ...

Страница 32: ...s elektrischen Schlages zu verringern sollten alle Anschlüsse trocken sein und den Boden nicht berühren Fassen Sie den Stecker nicht mit nassen Händen an Verwenden Sie das Gerät nicht wenn das Netzkabel oder wichtige Teile des Geräts beschädigt sind z B Sicherheitsvorrichtungen Hochdruckschläuche Abzugspistole Wenn ein Verlängerungskabel verwendet wird müssen Stecker und Steckdose wasserdicht sein...

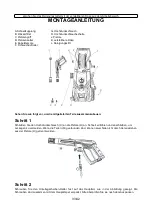
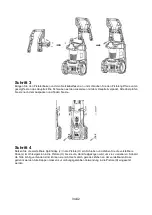
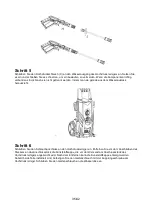
Страница 33: ...e folgt vor um die mitgelieferten Teile zusammenzubauen Schritt 1 Schließen Sie den Hochdruckschlauch C an die Pistole H an Schnell einführen und anschließen um Leckagen zu vermeiden Wenn die Teile richtig verbunden sind können zwei Teile nicht durch Herausziehen aus der Pistole H getrennt werden Schritt 2 Schrauben Sie den Unterlegscheiben Halter fest auf das Hauptteil wie in der Abbildung gezeig...

Страница 34: ... und finden Sie sie Schritt 4 Setzen Sie die verstellbare Sprühdüse J in die Pistole H ein Schieben und drehen Sie die verstellbare Düse J im Uhrzeigersinn in die Pistole H bis sie von Hand festgezogen wird um sie zu arretieren Sobald die Teile richtig verbunden sind können sie nicht mehr durch gerades Ziehen an der verstellbaren Düse getrennt werden Alle Kappen müssen zur ordnungsgemäßen Verwendu...

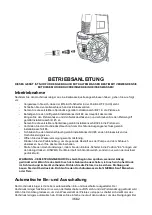
Страница 35: ...ass herauszieht Schritt 6 Schließen Sie den Schlauchanschluss an den Hochdruckreiniger an Entfernen Sie vor dem Anschließen des Steckers an das Anschlussstück die Kunststoffkappe die vor dem Versand am Anschlussstück des Hochdruckreinigers angebracht wird Nach dem Entfernen kann die Kunststoffkappe entsorgt werden Sobald beide Teile installiert sind befestigen Sie den Gartenschlauch mit der Kupplu...

Страница 36: ...reinigers an Öffnen Sie das Wasserversorgungsventil vollständig Drücken Sie den Pistolenabzug um die gesamte Restluft aus der Pumpe und dem Schlauch abzulassen bevor Sie das Gerät einschalten Starten Sie den Hochdruckreiniger indem Sie den Ein Aus Schalter in die Position Ein bringen und den Abzug drücken HINWEIS Der Motor läuft nicht kontinuierlich sondern nur wenn der Auslöser gedrückt wird WARN...

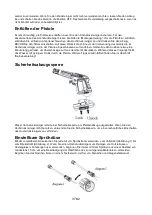
Страница 37: ...kt um überschüssige Luft aus dem Gerät abzulassen Während dieses Vorgangs fließt das Wasser mit geringem Druck durch die Pistole Weitere Tipps zum Entlüften finden Sie im Abschnitt Betriebsanleitung Sicherheitsabzugssperre Dieser Hochdruckreiniger ist mit einer Sicherheitssperre am Pistolenabzug ausgestattet Wenn Sie den Hochdruckreiniger nicht benutzen verwenden Sie die Sicherheitssperre um ein v...

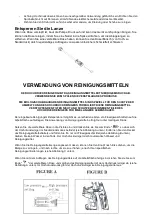
Страница 38: ...ZEN DIE INNEREN TEILE DES HOCHDRUCKREINIGERS FÜR EINE LÄNGERE LEBENSDAUER Der eingebaute Reinigungsmittelspender ermöglicht es verschiedene Arten von Flüssigwaschmitteln auf die Arbeitsfläche aufzutragen Die Anwendung von Reinigungsmitteln erfolgt nur unter niedrigem Druck Setzen Sie die verstellbare Düse in die Pistole ein und drücken Sie sie bis zum Ende so dass sich der Hochdruckreiniger im Nie...

Страница 39: ...ruckwasser ab Trennen Sie den Hochdruckschlauch vom Hochdruckreiniger und der Pistole Ziehen Sie den Gartenschlauch vom Hochdruckreiniger ab Entfernen Sie die Schnellkupplung vom Gartenschlauch und befestigen Sie sie an dem Kupplungsstück das zur Aufbewahrung am Hochdruckreiniger installiert ist Entfernen Sie überschüssiges Wasser aus der Pumpe indem Sie das Gerät auf beide Seiten kippen um das re...

Страница 40: ...r Oberfläche einwirken und spülen Sie es dann mit Hochdruck ab LASSEN SIE DAS REINIGUNGSMITTEL NICHT EINTROCKNEN Reinigen Sie immer von links nach rechts und von oben nach unten um beste Ergebnisse zu erzielen Spülen Sie unter Hochdruck mit einem Fächerspray wobei die Spitze der Sprühdüse mindestens 6 9 cm von der zu reinigenden Oberfläche entfernt sein muss Halten Sie einen größeren Abstand zu de...

Страница 41: ...ION I STEHT STARTET DAS GERÄT NICHT MÖGLICHE URSACHE LÖSUNG Steckdose ist defekt Stecker Steckdose Sicherungen prüfen Unzureichende Spannung Überprüfen Sie ob die Spannung korrekt ist Netzkabel ist nicht angeschlossen Netzkabel anschließen DIE PUMPE ERREICHT NICHT DEN RICHTIGEN DRUCK ODER SCHWANKT MÖGLICHE URSACHE LÖSUNG Wasserzulauffilter ist verstopft Filter entfernen und reinigen Pumpe saugt Lu...

Страница 42: ... korrekte Spannung EU Konformitätserklärung Malis B Machoński sp k erklärt dass das Gerät Maltec Hochdruckreiniger M7 2500 IND Turbo mit allen Anforderungen bezüglich LVD 2014 35 EU EC 2014 30 EU übereinstimmt und die folgenden Normen erfüllt EN 60335 1 2012 A2 2019 EN 60335 2 79 2012 EN 62233 2008 AfPS GS 2019 01 PAK Importer Malis B Machoński sp k ul Zbożowa 2E Wysogotowo 62 081 Przeźmierowo www...

Отзывы: