manualshive.com logo in svg
background image


INSTRUCTION MANUAL


MANUEL D'INSTRUCTION


MANUAL DE INSTRUCCIONES


IMPORTANT: 

Read Before Using. 

IMPORTANT: 

Lire avant usage. 

IMPORTANTE: 

Leer antes de usar. 

Cordless Hammer Driver Drill

Perceuse Percussion-Visseuse sans

Fil 

Rotomartillo Atornillador 

Inalámbrico 

XPH03 
   

012713 

Содержание XPH03Z

Страница 1: ...RUCTION MANUAL DE INSTRUCCIONES IMPORTANT Read Before Using IMPORTANT Lire avant usage IMPORTANTE Leer antes de usar Cordless Hammer Driver Drill Perceuse Percussion Visseuse sans Fil Rotomartillo Ato...

Страница 2: ...a power tool Distractions can cause you to lose control Electrical Safety 4 Power tool plugs must match the outlet Never modify the plug in any way Do not use any adapter plugs with earthed grounded...

Страница 3: ...and clean Properly maintained cutting tools with sharp cutting edges are less likely to bind and are easier to control 23 Use the power tool accessories and tool bits etc in accordance with these inst...

Страница 4: ...ately It may result in a risk of overheating possible burns and even an explosion 4 If electrolyte gets into your eyes rinse them out with clear water and seek medical attention right away It may resu...

Страница 5: ...ibly If the cartridge does not slide in easily it is not being inserted correctly Battery protection system Lithium ion battery with star marking 1 012128 Lithium ion batteries with a star marking are...

Страница 6: ...1 012702 To change the speed first switch off the tool and then slide the speed change lever to the 2 side for high speed or 1 side for low speed Be sure that the speed change lever is set to the cor...

Страница 7: ...with the tool stopped press the button on the switch panel and the remaining battery capacity will be signaled on the panel The status displayed on the switch panel and the remaining battery capacity...

Страница 8: ...riking reinforcing rods embedded in the concrete Always use the side grip auxiliary handle and firmly hold the tool by both side grip and switch handle during operations Failure to do so may result in...

Страница 9: ...ow the tool to rest for 15 minutes before proceeding with a fresh battery First slide the action mode change lever so that it points to the marking The adjusting ring can be aligned in any torque leve...

Страница 10: ...ughly inspected and tested before leaving the factory It is warranted to be free of defects from workmanship and materials for the period of ONE YEAR from the date of original purchase Should any trou...

Страница 11: ...nts 2 N utilisez pas les outils lectriques dans les atmosph res explosives par exemple en pr sence de liquides gaz ou poussi res inflammables Les outils lectriques produisent des tincelles au contact...

Страница 12: ...s outils lectriques 17 Ne forcez pas l outil lectrique Utilisez l outil lectrique ad quat suivant le type de travail effectuer Si vous utilisez l outil lectrique ad quat et respectez le r gime pour le...

Страница 13: ...transmettre une d charge lectrique l utilisateur 4 Tenez l outil par ses surfaces de prise isol es pendant toute op ration o l accessoire de fixation pourrait venir en contact avec un c blage dissimu...

Страница 14: ...duit la dur e de service de la batterie 3 Rechargez la batterie une temp rature ambiante comprise entre 10 C et 40 C 50 F 104 F Si la batterie est chaude laissez la refroidir avant de la recharger 4 R...

Страница 15: ...uyez simplement sur la g chette La vitesse de l outil augmente mesure que l on accro t la pression exerc e sur la g chette Pour l arr ter rel chez la g chette Allumage de la lampe avant 1 012700 ATTEN...

Страница 16: ...la fl che pointe vers l indication de l anneau ATTENTION R glez toujours l anneau parfaitement sur le symbole du mode d sir Si vous faites fonctionner l outil alors que l anneau se trouve mi course e...

Страница 17: ...retirez la poign e puis tournez la et ins rez la de nouveau Installation ou retrait de l embout ou du foret 1 012697 Tournez le manchon dans le sens inverse des aiguilles d une montre pour ouvrir les...

Страница 18: ...tourner l outil au ralenti puis retirez partiellement le foret du trou En r p tant cette op ration quelques fois le trou se d bouchera et vous pourrez poursuivre le per age normalement Poire soufflant...

Страница 19: ...toujours que l outil est hors tension et que la batterie est retir e avant d y effectuer tout travail d inspection ou d entretien N utilisez jamais d essence de benzine de solvant d alcool ou d autre...

Страница 20: ...initial Si un probl me quelconque devait survenir au cours de cette p riode d un an veuillez retourner l outil COMPLET port pay une usine ou un centre de service apr s vente Makita Makita r parera l o...

Страница 21: ...ica Seguridad en el rea de trabajo 1 Mantenga el rea de trabajo limpia y bien iluminada Las reas oscuras o desordenadas son propensas a accidentes 2 No utilice las herramientas el ctricas en atm sfera...

Страница 22: ...arlos debidamente La utilizaci n de estos dispositivos reduce los riesgos relacionados con el polvo Mantenimiento y uso de la herramienta el ctrica 17 No fuerce la herramienta el ctrica Utilice la her...

Страница 23: ...ca por las superficies de agarre aisladas al realizar una operaci n en la que el porta til pueda entrar en contacto con cables ocultos Si el porta til entra en contacto con un cable con corriente las...

Страница 24: ...rtucho de bater a a temperatura ambiente de 10 C 40 C 50 F 104 F Si un cartucho de bater a est caliente d jelo enfriar antes de cargarlo 4 Recargue el cartucho de la bater a una vez cada seis meses si...

Страница 25: ...ue el gatillo interruptor se acciona debidamente y que vuelve a la posici n OFF apagado cuando lo suelta Para poner en marcha la herramienta simplemente apriete el gatillo interruptor La velocidad de...

Страница 26: ...e la flecha apunte hacia la marca del anillo PRECAUCI N Ponga siempre el anillo correctamente en la marca del modo que desee Si utiliza la herramienta con el anillo puesto a medias entre las marcas de...

Страница 27: ...a las agujas del reloj Al girar la empu adura lateral afl jela y ret rela para as voltearla y reinsertarla de nuevo Instalaci n o desmontaje de la punta de atornillar o la broca 1 012697 Gire el mand...

Страница 28: ...cuando el agujero se atore con virutas y part culas En su lugar haga funcionar la herramienta sin presi n despu s saque parcialmente la broca del agujero Repitiendo esto varias veces se limpiar el ag...

Страница 29: ...adrar Coloque la punta de la broca en la mella y comience a taladrar Emplee un lubricante para operaciones de corte cuando taladre metales Las excepciones son hierro y lat n que deber n ser taladrados...

Страница 30: ...austivamente antes de salir de f brica Se garantiza que va a estar libre de defectos de mano de obra y materiales por el periodo de UN A O a partir de la fecha de adquisici n original Si durante este...

Страница 31: ...31...
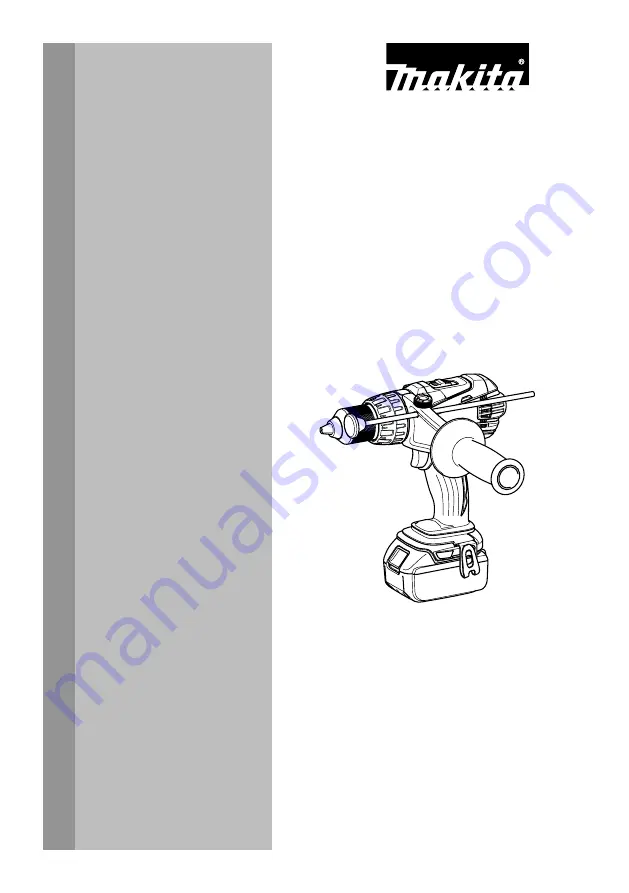
Страница 32: ...polvos creados por el lijado aserrado esmerilado taladrado y otras actividades de la construcci n contienen sustancias qu micas reconocidas por el Estado de California como causantes de c ncer defecto...

Отзывы: