background image

8 ENGLISH

Tool / battery protection system

The tool is equipped with a tool/battery protection sys-

tem. This system automatically cuts off power to the 

motor to extend tool and battery life. The tool will auto-

matically stop during operation if the tool or battery is 

placed under one of the following conditions:

Overload protection

When the tool is operated in a manner that causes it to 

draw an abnormally high current, the tool automatically 

stops without any indication. In this situation, turn the 

tool off and stop the application that caused the tool to 

become overloaded. Then turn the tool on to restart.

Overheat protection

 On

 Blinking

When the tool is overheated, the tool stops automati-

cally, and the battery indicator blinks about 60 seconds. 

In this situation, let the tool cool down before turning the 

tool on again.

Overdischarge protection

When the battery capacity becomes low, the tool stops 

automatically. If the product does not operate even 

when the switches are operated, remove the batteries 

from the tool and charge the batteries.

Switch action

2

1

3

►    

1.

 Stand-by switch 

2.

 Power button 

3.

 Suction force 

adjusting knob

To start the cleaner:
1.  Set the stand-by switch to the "I" side. The cleaner 

gets into stand-by state.

2.  Press the power button.

To make the cleaner get into stand-by mode, press the 

power button again.

To turn off the cleaner, set the stand-by switch to the 

"O" side.
The suction power can be adjusted according to your 

work need.

Suction power can be increased by turning the suc-
tion force adjusting knob from the 

 symbol to 

the 

 symbol.

NOTICE:

 Always set the stand-by switch to the "O" 

side when not using the cleaner for long time. The 

cleaner consumes power during stand-by state.

Auto-suction stop during wet 

suction operation

Only for the cloth filter model

WARNING:


Do not use for a long time while 

the float is at work.

 Using the cleaner with its float at 

work for a long time can cause overheat, resulting in 

the cleaner deformation.

WARNING:


Do not pick up foam or soapy 

liquid.

 Picking up foam or soapy liquid can cause 

foam to come out of air exit before the float works. 

Continuing to using in this condition may cause an 

electric shock and breakage of the cleaner.

Auto-suction stop works only when using with the float 

and float cage.

The cleaner has a float mechanism that prevents water 

from immersing into the motor when picking up more 

than a certain amount of water. When the tank is full 

and the cleaner no longer picks up water, switch off the 

cleaner and empty the tank.

Locking or unlocking the caster

1

2

3

4

►    

1.

 Caster 

2.

 Stopper lever 

3.

 FREE position 

4.

 LOCK position

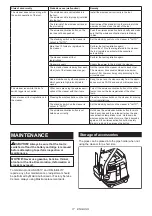
Locking the caster is convenient when storing the 

cleaner, stopping the work on the way and keeping the 

cleaner still.

To operate the stopper, move it by hand.

To lock the caster with a stopper, lower the stopper 

lever and the caster no longer will rotate. To release the 

caster from the locked position, raise the stopper lever.

NOTE:

 When moving the cleaner, make sure that 

the caster is unlocked. Moving the cleaner with the 

caster in the locked position may cause damage to 

the caster.

Содержание XCV14

Страница 1: ...INSTRUCTION MANUAL MANUAL DE INSTRUCCIONES Cordless Vacuum Cleaner Aspiradora Inalámbrica XCV14 XCV15 XCV16 IMPORTANT Read Before Using IMPORTANTE Lea antes de usar ...

Страница 2: ...eight does not include accessories but battery cartridge s The lightest and heaviest combination weight of the appliance and battery cartridge s are shown in the table For wet dust the float and the water filter or cloth filter are required The Bluetooth word mark and logos are registered trademarks owned by the Bluetooth SIG Inc and any use of such marks by Makita is under license Other trademark...

Страница 3: ...tdoors 15 For the powder filter models Do not use on wet surfaces Do not expose to rain Store indoors 16 For the cloth filter models Do not expose to rain Store indoors 17 Always install float before any wet pick up operation 18 Do not use the cleaner as a stool or work bench The machine may fall down and may result in personal injury 19 Do not vacuum the following Flammable liquid kerosene gasoli...

Страница 4: ...n make a connection from one terminal to another Shorting the battery terminals together may cause burns or a fire 6 Under abusive conditions liquid may be ejected from the battery avoid contact If contact acciden tally occurs flush with water If liq uid contacts eyes additionally seek medical help Liquid ejected from the battery may cause irritation or burns 7 Do not use a battery pack or applian...

Страница 5: ...national regulations Tape or mask off open contacts and pack up the battery in such a manner that it cannot move around in the packaging 11 Follow your local regulations relat ing to disposal of battery 12 Use the batteries only with the prod ucts specified by Makita Installing the batteries to non compliant products may result in a fire excessive heat explosion or leak of electrolyte SAVE THESE I...

Страница 6: ...Hold the cleaner and the battery cartridge firmly when installing or removing bat tery cartridge Failure to hold the cleaner and the battery cartridge firmly may cause them to slip off your hands and result in damage to the cleaner and battery cartridge and a personal injury CAUTION Be careful not to pinch your fin gers when opening or closing the battery cover Failure to do so may cause personal ...

Страница 7: ... the check button on the battery cartridge to indi cate the remaining battery capacity The indicator lamps light up for a few seconds Indicator lamps Remaining capacity Lighted Off Blinking 75 to 100 50 to 75 25 to 50 0 to 25 Charge the battery The battery may have malfunctioned NOTE Depending on the conditions of use and the ambient temperature the indication may differ slightly from the actual c...

Страница 8: ...r work need Suction power can be increased by turning the suc tion force adjusting knob from the symbol to the symbol NOTICE Always set the stand by switch to the O side when not using the cleaner for long time The cleaner consumes power during stand by state Auto suction stop during wet suction operation Only for the cloth filter model WARNING Do not use for a long time while the float is at work...

Страница 9: ...ing the mounting position markings 3 Mount the damper on the powder filter and then place them in the prefilter with aligning the mounting position markings 4 Finally mount the tank cover and lock it 1 2 3 4 5 6 6 6 1 Tank cover 2 Powder filter HEPA 3 Damper 4 Prefilter 5 Tank 6 Mounting position marking NOTICE Before using the powder filter make sure that prefilter and damper are always used toge...

Страница 10: ... paper pack Picking up such things may cause the paper pack breakage Before using the paper pack make sure that powder filter optional accessory damper optional accessory and prefilter are always used together CAUTION For the powder filter model Before using the paper pack make sure that powder filter damper and prefilter are always used together 1 Remove the rubber holder 1 1 Rubber holder 2 Exte...

Страница 11: ...ok may cause the hook to break Unhook and lift up the tank cover Shake off the dust from the cloth filter prefilter and then take the polyethylene bag out of the tank NOTE Take the polyethylene bag carefully out of the tank so that the polyethylene bag cannot be caught and torn by the protrusion inside the tank when emp tying it NOTE Empty the polyethylene bag before it becomes full Too much dust ...

Страница 12: ...he tool registration is required Once the registration is finished with the tool the re registration is not required unless it is cancelled NOTE Before registration be sure that the wireless unit is properly inserted into the tool NOTE One cleaner can register up to 10 tools If more than 10 tools are registered to the cleaner the tool registered earliest will be cancelled automatically NOTE The po...

Страница 13: ...aner finish the tool registration one by one Starting the wireless activation function NOTE Finish the tool registration for the cleaner for wireless activation NOTE Always place the cleaner so that you can see the status of the wireless activation lamp NOTE Refer to the instruction manual of the tool too After registering a tool to the cleaner the cleaner will automatically runs along with the sw...

Страница 14: ...e batteries to the cleaner and the tool 2 Set the stand by switch on the cleaner to AUTO 1 1 Stand by switch 3 Press the wireless activation button on the cleaner for 6 seconds The wireless activation lamp blinks in green and then become red After that press the wire less activation button on the tool in the same way 2 1 2 1 1 Wireless activation button 2 Wireless activation lamp If the cancellati...

Страница 15: ...ation lamp Description Color On Blinking Duration Standby Blue Cleaner con tinuing Tool 2 hours Waiting for the tool registration or the wireless activation function is available The lamp on the cleaner blinks when the stand by switch is set in AUTO The lamp on the tool blinks when the wireless activation button is pushed The lamp on the tool will automatically turn off when no operation is perfor...

Страница 16: ...mproperly installed into the tool Install the wireless unit correctly in the tool The terminal of the wireless unit and or the slot is dirty Gently wipe off dust and dirt on the terminal of the wireless unit and clean the slot of the tool The stand by switch on the cleaner is not set to AUTO Set the stand by switch on the cleaner to AUTO No power supply Supply the power to the tool and the cleaner...

Страница 17: ...sity radio waves Keep the tool and the cleaner away from the appli ances such as Wi Fi devices and microwave ovens The cleaner runs while the tool s switch trigger is not pulled Other users are using the wireless acti vation of the cleaner with their tools Turn off the wireless activation button of the other tools or cancel the tool registration of the other tools Cannot erase all tool registratio...

Страница 18: ...n the shade before use Never wash filters in a washing machine NOTE Do not rub or scratch the powder filter the prefilter or the damper with hard objects such as a brush and a paddle NOTE The filters wear out in course of time It is recommended to have some spares for them OPTIONAL ACCESSORIES CAUTION These accessories or attachments are recommended for use with your Makita tool specified in this ...

Страница 19: ...LIMITED WARRANTY Please refer to the annexed warranty sheet for the most current warranty terms applicable to this product If annexed warranty sheet is not available refer to the warranty details set forth at below website for your respective country United States of America www makitatools com Canada www makita ca Other countries www makita com ...

Страница 20: ...bio sin previo aviso Las especificaciones y el cartucho de batería pueden variar de país a país El peso incluye el o los cartuchos de batería pero no los accesorios La combinación de menor y mayor peso del aparato y del o los cartuchos de batería se muestra en la tabla Para polvo húmedo se requieren el flotador y el filtro de agua o de tela El término Bluetooth así como su marca y logo son marcas ...

Страница 21: ...e todos los controles antes de retirar el cartucho de batería 9 Tenga especial cuidado cuando lim pie en escaleras 10 No lo utilice para recoger líquidos inflamables o combustibles tal como gasolina ni en áreas donde puedan estar presentes 11 Utilice solamente el cargador sumi nistrado por el fabricante para recargar 12 No recoja nada que se esté que mando o desprenda humo tal como cigarros fósfor...

Страница 22: ...uyas capacidades físicas sensoria les o mentales sean diferentes o estén reducidas o carezcan de experiencia o de conocimiento a menos que dichas personas reciban una supervisión o capacitación para el funcionamiento del aparato por una persona respon sable de su seguridad 21 Los niños deben supervisarse para asegurar que ellos no empleen los aparatos como juguete Uso y cuidado de la herramienta a...

Страница 23: ...ificado y que utilice únicamente piezas de repuesto idénticas a las originales Esto garantizará que se mantenga la seguridad del producto 11 No modifique ni intente reparar el aparato ni el paquete de baterías salvo como se indique en las ins trucciones para el uso y cuidado GUARDE ESTAS INSTRUCCIONES Este aparato está diseñado para uso comercial Símbolos A continuación se muestran los símbolos ut...

Страница 24: ...talar las baterías en pro ductos que no cumplen con los requi sitos podría ocasionar un incendio un calentamiento excesivo una explosión o una fuga de electrolito GUARDE ESTAS INSTRUCCIONES PRECAUCIÓN Utilice únicamente baterías originales de Makita El uso de baterías no origina les de Makita o de baterías alteradas puede ocasio nar que las baterías exploten causando un incendio lesiones personale...

Страница 25: ...ía PRECAUCIÓN Sujete la aspiradora y el car tucho de batería con firmeza al colocar o quitar el cartucho Si no se sujeta con firmeza la aspiradora y el cartucho de batería puede ocasionar que se res balen de sus manos resultando en daños a la aspira dora y al cartucho así como lesiones a la persona PRECAUCIÓN Tenga cuidado de no pellizcar sus dedos al abrir o cerrar la cubierta de la bate ría El n...

Страница 26: ...ón de verificación en el cartucho de la batería para que indique la capacidad restante de la batería Las luces indicadoras se iluminarán por algunos segundos Luces indicadoras Capacidad restante Iluminadas Apagadas Parpadeando 75 a 100 50 a 75 25 a 50 0 a 25 Cargar la batería La batería pudo haber funcionado mal NOTA Dependiendo de las condiciones de uso y la temperatura ambiente la indicación pod...

Страница 27: ... el estado de modo en espera 2 Oprima el botón de encendido apagado Para poner la aspiradora en el modo en espera oprima nuevamente el botón de encendido apagado Para apagar la aspiradora ajuste el interruptor de modo en espera en el lado O La potencia de succión se puede ajustar según sus necesidades de trabajo La potencia de succión se puede incrementar girando la perilla de ajuste de la fuerza ...

Страница 28: ...ilice siempre una más cara contra el polvo durante el ensamblado o mantenimiento Instalación del filtro de polvo HEPA y el prefiltro para polvo seco Accesorio opcional para el modelo con filtro de tela PRECAUCIÓN Nunca aspire agua ni otros líquidos o polvo húmedo cuando utilice el filtro de polvo El aspirar este tipo de objetos podría causar la avería del filtro de polvo Para usar el filtro de pol...

Страница 29: ...cesorio opcional ADVERTENCIA Cuando use la bolsa de papel para polvo utilice también junto con ésta el filtro de tela o el prefiltro preinstalado en la aspi radora El no utilizar junto con ésta el filtro de tela prefiltro podría ocasionar un ruido y calentamiento anormales provocando un incendio PRECAUCIÓN Para el modelo con filtro de tela Nunca aspire agua ni otros líquidos o polvo húmedo cuando ...

Страница 30: ... sido extraído antes de vaciar la bolsa de polietileno El no hacerlo podría ocasionar una descarga eléctrica y lesiones personales graves PRECAUCIÓN Evite los impactos fuertes sobre la caja del flotador y el tanque Un impacto fuerte podría deformar y dañar las piezas PRECAUCIÓN Vacíe el tanque por lo menos una vez al día aunque esto dependerá del volu men de polvo aspirado en el tanque De lo contr...

Страница 31: ... del reloj hasta que quede asegurada FUNCIÓN DE ACTIVACIÓN INALÁMBRICA Para el modelo XCV16 únicamente Lo que puede hacer con la función de activación inalámbrica La función de activación inalámbrica permite una ope ración limpia y cómoda Si conecta a la aspiradora una herramienta compatible podrá hacer que la aspiradora funcione automáticamente al activar el interruptor de la herramienta AVISO As...

Страница 32: ...s de la herramienta Si desea activar la aspiradora junto con el interruptor de activación de la herramienta termine antes con el registro de la herramienta 1 Instale las baterías en la aspiradora y en la herramienta 2 Ajuste el interruptor de modo en espera en la aspi radora en AUTO 1 1 Interruptor de modo en espera 3 Oprima el botón de activación inalámbrica en la aspiradora durante 3 segundos ha...

Страница 33: ...ndicadora de activación inalámbrica en la herramienta dejará de parpadear en azul cuando no haya operación durante 2 horas En este caso ajuste el interruptor de modo en espera en la aspi radora en AUTO y oprima el botón de activación inalámbrica en la herramienta nuevamente NOTA La aspiradora se pondrá en marcha deten drá con un retraso Existirá un desfase cuando la aspiradora detecte la activació...

Страница 34: ...ted puede borrar todos los registros de herramientas de la aspiradora como se indica a continuación 3 2 1 1 Interruptor de modo en espera 2 Botón de acti vación inalámbrica 3 Luz indicadora de activación inalámbrica 1 Instale las baterías en la aspiradora 2 Ajuste el interruptor de modo en espera en AUTO 3 Mantenga oprimido el botón de activación inalám brica durante aproximadamente 6 segundos has...

Страница 35: ...a ninguna operación durante 2 horas Cuando la herra mienta está funcionando La activación inalámbrica de la aspiradora está disponible y la herramienta está funcionando Registro de la herramienta Verde 20 segundos Ya se puede realizar el registro de la herramienta Se está bus cando la herramienta que se va a registrar 2 segundos El registro de la herramienta ha terminado La luz indicadora de activ...

Страница 36: ...tamente en la herramienta Instale la unidad inalámbrica de forma correcta en la herramienta La terminal de la unidad inalámbrica y o la ranura está sucia Retire con cuidado el polvo y la suciedad en la terminal de la unidad inalámbrica y limpie la ranura de la herramienta El interruptor de modo en espera en la aspiradora no está ajustado en AUTO Ajuste el interruptor de modo en espera en la aspira...

Страница 37: ...ta y la aspiradora lejos de aparatos tales como dispositivos Wi Fi y hornos de microondas La aspiradora funciona aun cuando el gatillo interruptor de la herra mienta no ha sido jalado Otros usuarios están usando la activa ción inalámbrica de la aspiradora con sus herramientas Apague el botón de activación inalámbrica de las demás herramientas o cancele el registro de dichas herramientas No se pued...

Страница 38: ... parte inferior del marco De vez en cuando lave el filtro de polvo con agua enjuáguelo y séquelo bien a la sombra antes de usarlo Nunca lave los filtros en la lavadora NOTA No frote ni raye el filtro de polvo el prefiltro o el amortiguador con objetos duros tales como un cepillo y una pala NOTA Los filtros se desgastan con el tiempo Se recomienda contar con piezas de repuesto ACCESORIOS OPCIONALES...

Страница 39: ...s estándar Éstos pueden variar de país a país GARANTÍA LIMITADA DE MAKITA Ésta Garantía no aplica para México Consulte la hoja de la garantía anexa para ver los términos más vigentes de la garantía aplicable a este producto En caso de no disponer de esta hoja de garantía anexa consulte los detalles sobre la garantía descritos en el sitio web de su país respectivo indicado a continuación Estados Un...

Страница 40: ...ados por el lijado aserrado esmerilado taladrado y otras actividades de la construcción contienen sustancias químicas reconocidas por el Estado de California como causantes de cáncer defectos de nacimiento y otros peligros de reproducción Algunos ejemplos de estos productos químicos son plomo de pinturas a base de plomo sílice cristalino de ladrillos y cemento y otros productos de albañilería y ar...

Отзывы: