17 ENGLISH
3.
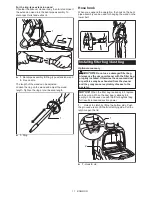
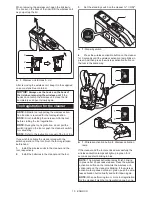
Set the stand-by switch on the cleaner to " I (ON)".
1
►
1.
Stand-by switch
4.
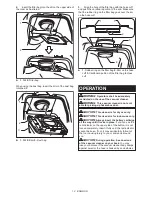
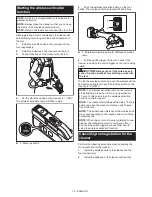
Press the wireless activation button on the cleaner
for 6 seconds. The wireless activation lamp blinks in
green and then become red. After that, press the wire-
less activation button on the tool in the same way.
2
1
1
2
►
1.
Wireless activation button
2.
Wireless activation
lamp
If the cancellation is performed successfully, the wire-
less activation lamps will light up in red for 2 seconds
and start blinking in blue.
NOTE:
The wireless activation lamps finish blinking in
red after 20 seconds elapsed. Press the wireless acti-
vation button on the tool while the wireless activation
lamp on the cleaner is blinking. If the wireless acti-
vation lamp does not blink in red, push the wireless
activation button briefly and hold it down again.
Erasing all tool registrations
You can erase all tool registrations from the cleaner as
follows.
3
1
2
►
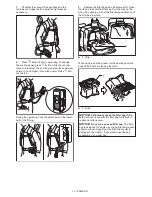
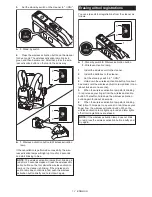
1.
Stand-by switch
2.
Wireless activation button
3.
Wireless activation lamp
1.
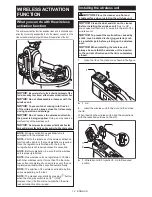
Install the wireless unit to the cleaner.
2.
Install the batteries to the cleaner.
3.
Set the stand-by switch to " I (ON)".
4.
Hold down the wireless activation button for about
6 seconds until the wireless activation lamp blinks in red
(about twice per one second).
5.
When the wireless activation lamp starts blinking
in red, release your finger from the wireless activation
button. Thereafter, hold down the wireless activation
button again for about 6 seconds.
6.
When the wireless activation lamp starts blinking
fast (about 5 times per one second) in red, release your
finger from the wireless activation button. When the
wireless activation lamp lights up in red and later lights
off, all tool registrations are erased.
NOTE:
If the wireless activation lamp does not blink
in red, press the wireless activation button briefly and
try again.

