14 ENGLISH
OPERATION
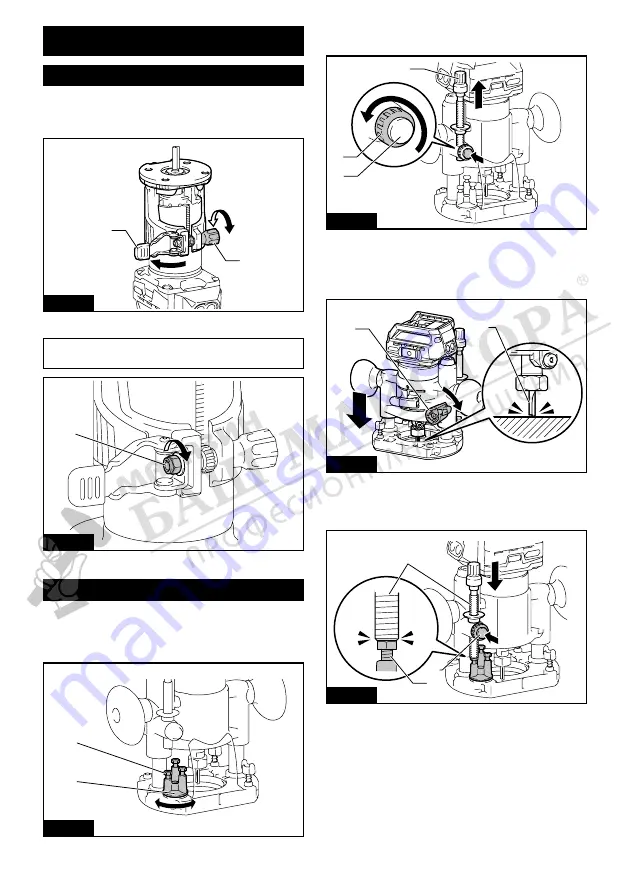
Adjusting cutting depth
To adjust the cutting depth, open the lock lever, then
move the tool base up or down by turning the adjusting
screw. After the adjustment, close the lock lever firmly.
1
2
Fig.30
►
1.
Lock lever
2.
Adjusting screw
NOTICE:
If the tool is not secured after closing the lock
lever, tighten the hex nut, and then close the lock lever.
1
Fig.31
►
1.
Hex nut
Adjusting cutting depth with the plunge base
Optional accessory
1.
Place the tool on the flat surface.
2.
Select the stopper screw by rotating the stopper base.
1
2
Fig.32
►
1.
Stopper screw
2.
Stopper base
3.
Loosen the fixing nut, then pull up the stopper pole
while pressing the feed button.
1
2
3
Fig.33
►
1.
Stopper pole
2.
Fixing nut
3.
Feed button
4.
Push down the tool until the tip of the trimmer bit
touches the flat surface, and then turn the fixing lever to
secure the tool.
1
2
Fig.34
►
1.
Fixing lever
2.
Trimmer bit
5.
Press down the stopper pole while pressing the
feed button until it contacts the stopper screw.
1
2
3
Fig.35
►
1.
Stopper pole
2.
Stopper screw
3.
Feed button


