13 ENGLISH
Connecting the tool
NOTE:
If the bent pipe assembly is attached to the
hose, remove it beforehand.
To connect a tool to the cleaner, the dedicated hose and/or addi-
tional parts are required. Depending on your cleaner model, you
need to replace the hose and/or prepare additional parts.
Refer to the following table for details.
Supplied
hose
diameter
Hose end type
Action
ø28 mm
without part
Attach the front cuff.
with snap-on part
Replace the hose end
(snap-on part) with the front
cuff.
The hose end can be removed
by turning it counterclockwise.
ø32 mm
with snap-on part
Replace the hose with the one
for dust extraction (ø28 mm,
with front cuff).
ø38 mm
with snap-on part
Replace the hose with the one
for dust extraction (ø28 mm,
with front cuff).
with front cuff 38
Attach the joint 22-38 or the
front cuff 24.
NOTE:
Always use a suitable front cuff. When using the front
cuff 24, attach it to the front cuff 22 that is connected to the hose.
►
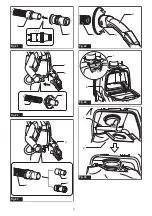
Fig.21:
1.
Front cuff 22
2.
Front cuff 24
When using ø28 mm dust extraction hose
1.
Attach the front cuff to the hose for dust extraction.
When connecting the front cuff, make sure that it is
securely screwed on the hose.
2.
Connect the front cuff to the tool's extraction outlet.
►
Fig.22:
1.
Front cuff
2.
Extraction outlet
3.
Hose
The front cuff can be detached by turning it counter-
clockwise while holding the hose.
When using ø38 mm hose with front
cuff 38
1.
Twist and insert the joint or the front cuff to the
inlet part on the hose, depending on the tool that you
are going to connect.
2.
Connect the front cuff to the tool's extraction outlet.
►
Fig.23:
1.
Joint
2.
Front cuff
3.
Extraction outlet
4.
Hose
To remove the joint and the front cuff, follow the installa
-
tion procedures in reverse.
Attaching bent pipe assembly
Optional accessory
NOTE:
You don't need to perform this procedure if your model
comes with the bent pipe assembly attached to the hose.
NOTE:
There are two types of bent pipe assembly; the
one for slide-type extension wand and the one for ring-
type extension wand. If you prepare the bent pipe assem-
bly, choose the one for your desired extension wand type.
The bent pipe assembly is used for connecting the exten-
sion wand or nozzle for vacuum cleaning to this product.
If you want to use this product as the vacuum cleaner,
attach the bent pipe assembly to the hose.
To attach, unscrew the front cuff from the hose and
fasten the sleeve of bent pipe assembly onto the hose.
To remove, loosen the sleeve of bent pipe assembly
from the hose.
►
Fig.24:
1.
Hose
2.
Bent pipe assembly
3.
Sleeve
Installing filter bag / dust bag
Optional accessory
CAUTION:
Do not use a damaged filter bag.
Always use the vacuum cleaner with the filter bag
properly installed. Otherwise the vacuumed dust or
particles may be exhausted from the cleaner and
they may cause respiratory disease to the operator.
NOTICE:
When the filter bag is already full, replace
with new one. When the dust bag is already full,
empty it. Continuous use with the filter bag/dust bag
full results in reduced suction power.
1.
Unlock the latch by lifting the bottom side. Push
the grooved area to lift the front latching side. Pull the
latch to open the lid.
►
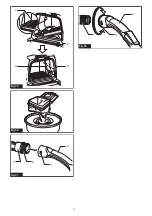
Fig.25:
1.
Hook
2.
Lid
2.
Insert the filter bag into the slit on the upper side of
the room as illustrated.
►
Fig.26:
1.
Slit
2.
Filter bag
When using the dust bag, insert the brim of the dust bag
into the slit.
►
Fig.27:
1.
Slit
2.
Brim
3.
Dust bag
3.
Align the hole of the filter bag with the hose cuff and
push the cardboard portion to the end. Make sure that the
rubber ring on the filter bag goes over the rim on the hose cuff.
►
Fig.28:
1.
Rubber ring on the filter bag
2.
Rim on
the hose cuff
3.
Cardboard portion of the
filter bag
4.
Hose cuff
Содержание DVC261ZX4
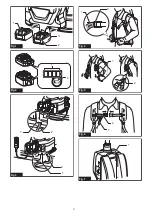
Страница 2: ...1 2 3 Fig 1 1 2 Fig 2 1 2 1 2 Fig 3 1 2 Fig 4 2 1 Fig 5 1 2 Fig 6 1 Fig 7 2 ...
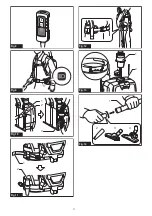
Страница 3: ...Fig 8 Fig 9 1 2 3 Fig 10 1 2 Fig 11 Fig 12 1 2 Fig 13 1 2 3 4 Fig 14 3 ...
Страница 4: ...2 1 3 4 Fig 15 1 Fig 16 1 2 3 Fig 17 1 Fig 18 1 2 3 4 4 Fig 19 2 3 1 Fig 20 4 ...
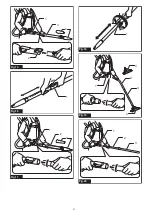
Страница 5: ...1 2 Fig 21 2 1 1 3 Fig 22 4 1 3 2 Fig 23 1 2 3 Fig 24 1 2 Fig 25 1 2 Fig 26 5 ...
Страница 6: ...2 1 3 Fig 27 3 2 1 4 1 Fig 28 Fig 29 Fig 30 2 1 Fig 31 1 Fig 32 1 Fig 33 Fig 34 6 ...
Страница 7: ...1 2 3 4 Fig 35 Fig 36 4 1 3 2 Fig 37 1 2 3 Fig 38 7 ...
Страница 78: ...78 ...
Страница 79: ...79 ...

