background image

2 ENGLISH

ENGLISH (Original instructions)

SPECIFICATIONS

Model:

DT04

Fastening capacities

Machine screw

4 mm - 8 mm (5/32" - 5/16")

Standard bolt

5 mm - 14 mm (3/16" - 9/16")

High tensile bolt

5 mm - 12 mm (3/16" - 1/2")

No load speed (RPM)

Hard impact mode

0 - 3,000 /min

Soft impact mode

0 - 1,300 /min

Impacts per minute

Hard impact mode

0 - 3,900 /min

Soft impact mode

0 - 1,600 /min

Rated voltage

D.C. 10.8 V - 12 V max

Overall length

135 mm (5-5/16″)

Standard battery cartridge

BL1016, BL1021B

BL1041B

Net weight

0.97 kg (2.1 lbs)

1.1 kg (2.5 lbs)

• 

Due to our continuing program of research and development, the specifications herein are subject to change 

without notice.

• 

Specifications and battery cartridge may differ from country to country.

• 

Weight, with battery cartridge, according to EPTA-Procedure 01/2003

SAFETY WARNINGS

General power tool safety warnings

WARNING:


Read all safety warnings and all 

instructions. 

Failure to follow the warnings and instruc-

tions may result in electric shock, fire and/or serious injury.

Save all warnings and instruc-

tions for future reference.

The term "power tool" in the warnings refers to your 

mains-operated (corded) power tool or battery-operated 

(cordless) power tool.

Work area safety

1. 

Keep work area clean and well lit.

 Cluttered or 

dark areas invite accidents.

2. 

Do not operate power tools in explosive atmo-

spheres, such as in the presence of flammable 

liquids, gases or dust.

 Power tools create sparks 

which may ignite the dust or fumes.

3. 

Keep children and bystanders away while 

operating a power tool.

 Distractions can cause 

you to lose control.

Electrical Safety

1. 

Power tool plugs must match the outlet. Never 

modify the plug in any way. Do not use any 

adapter plugs with earthed (grounded) power 

tools. 

Unmodified plugs and matching outlets will 

reduce risk of electric shock.

2. 

Avoid body contact with earthed or grounded 

surfaces such as pipes, radiators, ranges and 

refrigerators.

 There is an increased risk of elec

-

tric shock if your body is earthed or grounded.

3. 

Do not expose power tools to rain or wet con-

ditions.

 Water entering a power tool will increase 

the risk of electric shock.

4. 

Do not abuse the cord. Never use the cord for 

carrying, pulling or unplugging the power tool. 

Keep cord away from heat, oil, sharp edges 

or moving parts.

 Damaged or entangled cords 

increase the risk of electric shock.

5. 

When operating a power tool outdoors, use an 

extension cord suitable for outdoor use.

 Use of 

a cord suitable for outdoor use reduces the risk of 

electric shock.

6. 

If operating a power tool in a damp location is 

unavoidable, use a ground fault circuit inter-

rupter (GFCI) protected supply.

 Use of a GFCI 

reduces the risk of electric shock.

Personal Safety

1. 

Stay alert, watch what you are doing and use 

common sense when operating a power tool. 

Do not use a power tool while you are tired or 

under the influence of drugs, alcohol or med

-

ication.

 A moment of inattention while operating 

power tools may result in serious personal injury.

2. 

Use personal protective equipment. Always 

wear eye protection.

 Protective equipment such 

as dust mask, non-skid safety shoes, hard hat, or 

hearing protection used for appropriate conditions 

will reduce personal injuries.

3. 

Prevent unintentional starting. Ensure the 

switch is in the off-position before connecting 

to power source and/or battery pack, picking 

up or carrying the tool.

 Carrying power tools with 

your finger on the switch or energising power tools 

that have the switch on invites accidents.

Содержание DT04R1

Страница 1: ...INSTRUCTION MANUAL MANUAL DE INSTRUCCIONES Cordless Impact Driver Atornillador de Impacto Inalámbrico DT04 IMPORTANT Read Before Using IMPORTANTE Lea antes de usar ...

Страница 2: ... the plug in any way Do not use any adapter plugs with earthed grounded power tools Unmodified plugs and matching outlets will reduce risk of electric shock 2 Avoid body contact with earthed or grounded surfaces such as pipes radiators ranges and refrigerators There is an increased risk of elec tric shock if your body is earthed or grounded 3 Do not expose power tools to rain or wet con ditions Wa...

Страница 3: ...rformed Use of the power tool for operations different from those intended could result in a hazardous situation Battery tool use and care 1 Recharge only with the charger specified by the manufacturer A charger that is suitable for one type of battery pack may create a risk of fire when used with another battery pack 2 Use power tools only with specifically desig nated battery packs Use of any ot...

Страница 4: ...g causing fires personal injury and damage It will also void the Makita warranty for the Makita tool and charger Tips for maintaining maximum battery life 1 Charge the battery cartridge before completely dis charged Always stop tool operation and charge the battery cartridge when you notice less tool power 2 Never recharge a fully charged battery cartridge Overcharging shortens the battery service...

Страница 5: ...The indicator lamps light up for few seconds Indicator lamps Remaining capacity Lighted Off 75 to 100 50 to 75 25 to 50 0 to 25 NOTE Depending on the conditions of use and the ambient temperature the indication may differ slightly from the actual capacity Switch action 1 1 Switch trigger CAUTION Before installing the battery car tridge into the tool always check to see that the switch trigger actu...

Страница 6: ...n before operation CAUTION Use the reversing switch only after the tool comes to a complete stop Changing the direction of rotation before the tool stops may dam age the tool CAUTION When not operating the tool always set the reversing switch lever to the neu tral position This tool has a reversing switch to change the direction of rotation Depress the reversing switch lever from the A side for cl...

Страница 7: ... trigger the impact force grade cannot be changed ASSEMBLY CAUTION Always be sure that the tool is switched off and the battery cartridge is removed before carrying out any work on the tool Installing or removing driver bit socket bit Optional accessory 12 mm 15 32 9 mm 3 8 Use only the driver bit socket bit shown in the figure Do not use any other driver bit socket bit 1 2 1 Driver bit 2 Sleeve T...

Страница 8: ...t lbs 2 1 2 0 1 0 3 0 0 100 72 120 87 80 58 60 43 40 29 20 14 M12 1 2 M14 9 16 M10 3 8 M12 1 2 M14 9 16 M10 3 8 M8 5 16 M8 5 16 3 1 Fastening time second 2 Fastening torque 3 Proper fastening torque corresponding to each bolt diameter High tensile bolt 3 2 1 2 0 1 0 0 3 0 M10 3 8 M12 1 2 M12 1 2 M8 5 16 M8 5 16 M10 3 8 N m ft lbs 100 72 120 87 80 58 60 43 40 29 20 14 1 Fastening time second 2 Fast...

Страница 9: ...of bolt Even though the diameters of bolts are the same the proper fastening torque will differ according to the torque coefficient the class of bolt and the bolt length 4 The manner of holding the tool or the material of driving position to be fastened will affect the torque 5 Operating the tool at low speed will cause a reduc tion in the fastening torque Using holster Optional accessory CAUTION ...

Страница 10: ...aid to one of Makita s Factory or Authorized Service Centers If inspection shows the trouble is caused by defective workmanship or material Makita will repair or at our option replace without charge This Warranty does not apply where repairs have been made or attempted by others repairs are required because of normal wear and tear the tool has been abused misused or improperly maintained alteratio...

Страница 11: ...on propensas a accidentes 2 No utilice las herramientas eléctricas en atmósferas explosivas tal como en la presen cia de líquidos gases o polvo inflamables Las herramientas eléctricas crean chispas que pueden prender fuego al polvo o los humos 3 Mantenga a los niños y curiosos alejados mientras utiliza una herramienta eléctrica Las distracciones le pueden hacer perder el control Seguridad eléctric...

Страница 12: ...ebe ser reemplazada 3 Desconecte la clavija de la fuente de energía y o la batería de la herramienta eléctrica antes de realizar ajustes cambiar accesorios o guar dar las herramientas eléctricas Dichas medidas de seguridad preventivas reducen el riesgo de que la herramienta se inicie accidentalmente 4 Guarde la herramienta eléctrica que no use fuera del alcance de los niños y no permita que las pe...

Страница 13: ... 1 No toque las terminales con ningún mate rial conductor 2 Evite guardar el cartucho de batería en un cajón junto con otros objetos metálicos tales como clavos monedas etc 3 No exponga el cartucho de batería al agua o la lluvia Un cortocircuito en la batería puede causar un flujo grande de corriente sobrecalentamiento posibles quemaduras e incluso una descompostura 6 No guarde la herramienta ni e...

Страница 14: ...e el cartucho de batería a la fuerza Si el cartucho no se desliza al interior fácilmente se debe a que no está siendo insertado correctamente Sistema de protección de batería La herramienta está equipada con un sistema de pro tección de batería Este sistema corta en forma auto mática el suministro de energía al motor para prolongar la vida útil de la batería La herramienta se detendrá automáticame...

Страница 15: ...te de luz directamente 1 1 Luz 1 1 Botón Jale el gatillo interruptor para encender la lámpara Para apagarla suéltelo La lámpara se apagará aproxi madamente 10 segundos después de haber soltado el gatillo interruptor Para mantener la lámpara apagada desactive el estado de la lámpara Para desactivar el estado de la lámpara primero jale y suelte el gatillo interruptor Y luego oprima el botón durante ...

Страница 16: ...uen control En este modo la herramienta inserta un tornillo con una rotación menos rápida al principio Una vez que la herramienta empieza el impacto la velocidad de rota ción aumenta y alcanza la velocidad máxima Aproximadamente un minuto después de haber sol tado el gatillo interruptor la fuerza de impacto puede cambiarse Grado de la fuerza de impacto mostrado en el panel Golpes máximos Propósito...

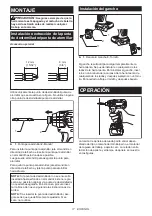
Страница 17: ... hacia afuera NOTA Si la punta de destornillador no se encuentra insertada hasta el fondo en el mandril éste no regre sará a su posición original y la punta de destornillador no quedará asegurada En este caso procure inser tar la broca de nuevo siguiendo las instrucciones de arriba NOTA Tras insertar la punta de destornillador ase gúrese de que quede firmemente ajustada Si se sale no la utilice In...

Страница 18: ...trado en las ilustracio nes el tornillo o la punta de la punta de destornillador pueden sobrecargarse barrerse dañarse etc Antes de comenzar la labor siempre realice una operación de prueba para determi nar el tiempo adecuado de fijación para sus tornillos La torsión de apriete se ve afectada por una amplia variedad de factores incluyendo los siguientes Después del apriete compruebe siempre la tor...

Страница 19: ...antía Cada herramienta Makita es inspeccionada y probada exhaustivamente antes de salir de la fábrica Se garan tiza que está libre de defectos de mano de obra y mate riales por el período de UN AÑO a partir de la fecha ori ginal de compra Si durante este período de un año se desarrollara algún problema devuelva la herramienta COMPLETA con el envío prepagado a un centro de servicio autorizado o de ...

Страница 20: ...eados por el lijado aserrado esmerilado taladrado y otras actividades de la construcción contienen sustancias químicas reconocidas por el Estado de California como causantes de cáncer defectos de nacimiento y otros peligros de reproducción Algunos ejemplos de estos productos químicos son plomo de pinturas a base de plomo sílice cristalino de ladrillos y cemento y otros productos de albañilería y a...

Страница 21: ...GB Battery Charger 3 F Chargeur 5 E Cargador de Batería 8 DC10SB DC10WD IMPORTANT Read Before Using IMPORTANT Lire ce qui suit avant d utiliser cet outil IMPORTANTE Leer antes de usar ...

Страница 22: ...15mm 4 17 32 110mm 4 11 32 30mm 1 3 16 30mm 1 3 16 8mm 5 16 180mm 7 3 32 69mm 2 23 32 90mm 3 9 16 DC10WD 30mm 1 3 16 40mm 1 19 32 50mm 1 31 32 105mm 4 5 32 65mm 2 9 16 113mm 4 15 32 55mm 2 3 16 35mm 1 3 8 4mm 5 32 113mm 4 15 32 115mm 4 17 32 1 2 3 4 ...

Страница 23: ...cannot be charged with this battery charger 5 Use a power source with the voltage specified on the nameplate of the charger 6 Do not charge the battery cartridge in presence of flammable liquids or gases 7 Do not expose charger to rain or snow 8 Never carry charger by cord or yank it to disconnect from receptacle 9 After charging or before attempting any maintenance or cleaning unplug the charger ...

Страница 24: ... of cooling fan vent on the charger and battery which can be sometime clogged with dust The cooling system is in order although no sound of cooling fan comes out if the yellow warning light will not flash Always keep clean the vent on charger and battery for cooling The products should be sent to repair or maintenance if the yellow warning light will frequently flash Charging 1 Plug the battery ch...

Страница 25: ...One more screw only for DC10SB 4mm 5 32 x more than 40mm 1 9 16 for supporting the charger Tools for tightening screws You can mount the charger on the wall either horizontal or vertical direction Fig 1 2 1 Fix the two screws for hanging on the wall as illustrated Fig 3 2 Hang the charger with the screws fixed in step 1 3 Mount the charger on the wall by tightening the anchor screw completely Fig ...

Страница 26: ...adroit peut entraîner un risque de choc électrique ou d incendie 13 Ce chargeur ne doit pas être utilisé sans supervision par les jeunes enfants et par les personnes handicapées 14 Les jeunes enfants doivent être surveillés pour s assurer qu ils ne jouent pas avec le chargeur 15 Ne chargez pas la batterie lorsque la température de la pièce est INFÉRIEURE à 10 C 50 F ou SUPÉRIEURE à 40 C 104 F À ba...

Страница 27: ...de refroidissement Toujours garder les évents du chargeur et de la batterie propres pour permettre le refroidissement Si le témoin jaune d avertissement clignote souvent les produits doivent êtres envoyés pour réparation ou entretien Montage mural Avertissement Vous devez utiliser deux vis pour suspendre le chargeur au mur et ancrer le chargeur au mur avec une autre vis Autrement le chargeur risqu...

Страница 28: ... alimentación cuya tensión sea igual a la especificada en la placa de características del cargador 6 No cargue el cartucho de batería en presencia de líquidos o gases inflamables 7 No exponga el cargador a la lluvia ni a la nieve 8 No coja nunca el cargador por el cable ni tire del cable para desconectarlo de la toma de corriente 9 Después de la carga o antes de intentar cualquier mantenimiento o ...

Страница 29: ...e Verifique el sonido del ventilador de enfriamiento la ventilación en el cargador y la batería ya que en ocasiones puede haber obstrucción por polvo Si la luz amarilla de aviso no parpadea el sistema de enfriamiento estará bien aunque no se escuche el sonido del ventilador de enfriamiento Mantenga siempre limpios los orificios de ventilación del cargador y la batería Las productos deberán ser lle...

Страница 30: ...jo de montaje o la operación de carga El peso bruto del cargador y la batería llega a ser de aproximadamente 1 1 kg 2 43 lb DC10SB 0 8 kg 1 76 lb DC10WD proporcione un refuerzo adecuado para la pared en caso de ser necesario Cosas que necesita tener Dos tornillos para colgar el cargador Tamaño de los tornillos 4 mm más de 20 mm 5 32 más de 13 16 Tamaño de la cabeza de los tornillos ø9 0 mm o menos...

Страница 31: ...11 ...

Страница 32: ...Makita Corporation 3 11 8 Sumiyoshi cho Anjo Aichi 446 8502 Japan www makita com 885431A949 IDE ...

Отзывы: