15 ENGLISH
Indicating the remaining battery
capacity
Only for battery cartridges with the indicator
►
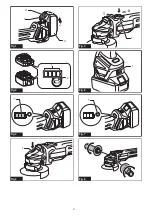
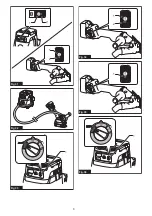
Fig.2:
1.
Indicator lamps
2.
Check button
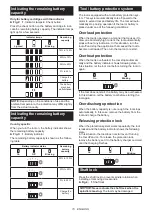
Press the check button on the battery cartridge to indi-
cate the remaining battery capacity. The indicator lamps
light up for a few seconds.
Indicator lamps
Remaining
capacity
Lighted
Off
Blinking
75% to 100%
50% to 75%
25% to 50%
0% to 25%
Charge the
battery.
The battery
may have
malfunctioned.
NOTE:
Depending on the conditions of use and the
ambient temperature, the indication may differ slightly
from the actual capacity.
Indicating the remaining battery
capacity
Country specific
When you turn the tool on, the battery indicator shows
the remaining battery capacity.
►
Fig.3:
1.
Battery indicator
The remaining battery capacity is shown as the follow-
ing table.
Battery indicator status
Remaining
battery
capacity
On
Off
Blinking
50% to 100%
20% to 50%
0% to 20%
Charge the
battery
Tool / battery protection system
The tool is equipped with a tool/battery protection sys-
tem. This system automatically cuts off power to the
motor to extend tool and battery life. The tool will auto-
matically stop during operation if the tool or battery is
placed under one of the following conditions:
Overload protection
When the tool is operated in a manner that causes it to
draw an abnormally high current, the tool automatically
stops without any indication. In this situation, turn the
tool off and stop the application that caused the tool to
become overloaded. Then turn the tool on to restart.
Overheat protection
When the tool is overheated, the tool stops automati-
cally and the battery indicator shows following state. In
this situation, let the tool cool before turning the tool on
again.
On
Blinking
If the tool does not start, the battery may be overheated.
In this situation, let the battery cool before starting the
tool again.
Overdischarge protection
When the battery capacity is not enough, the tool stops
automatically. In this case, remove the battery from the
tool and charge the battery.
Releasing protection lock
When the protection system works repeatedly, the tool
is locked and the battery indicator shows the following
state.
In this situation, the tool does not start even if turning
the tool off and on. To release the protection lock,
remove the battery, set it to the battery charger and wait
until the charging finishes.
On
Off
Blinking
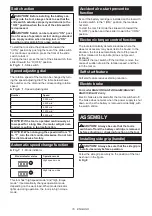
Shaft lock
Press the shaft lock to prevent spindle rotation when
installing or removing accessories.
►
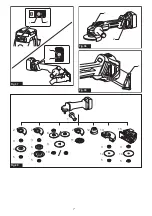
Fig.4:
1.
Shaft lock
NOTICE:
Never actuate the shaft lock when the
spindle is moving.
The tool may be damaged.
Содержание DGA463
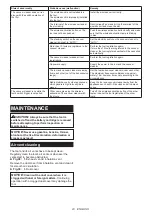
Страница 2: ...2 1 3 Fig 1 1 2 Fig 2 1 Fig 3 1 Fig 4 1 Fig 5 1 Fig 6 1 Fig 7 Fig 8 2 ...
Страница 5: ...1 Fig 25 Fig 26 1 Fig 27 2 1 3 4 Fig 28 1 2 3 Fig 29 1 Fig 30 5 ...
Страница 6: ...1 2 1 2 Fig 31 Fig 32 1 Fig 33 1 2 Fig 34 1 Fig 35 1 Fig 36 6 ...
Страница 7: ...1 2 1 2 Fig 37 1 2 Fig 38 1 Fig 39 1 2 5 2 2 11 12 4 3 5 6 7 8 9 10 13 15 3 14 5 3 14 5 3 Fig 40 7 ...
Страница 99: ...99 ...
Страница 100: ...Makita Corporation 3 11 8 Sumiyoshi cho Anjo Aichi 446 8502 Japan www makita com 885615A379 EN ZHCN ID VI TH 20191015 ...


