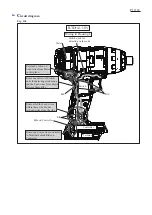
[3]-1 Impact Assembly, Anvil
Pin guide
with Pin 1.2-3.5
Pin guide
with Pin 1.2-3.5
ASSEMBLING
(3) Assemble Change case, Change sleeve, Pin guides with Pin 1.2-3.5, Compression spring 2 and Hammer change ring
to Gear case assembly (
Fig. 11
,
Fig. 12
).
Fig. 12
Fig. 11
Notch for Speed change
lever
Tail of Change case
1. Assemble Change case while locating its Tail
to the opposite side of Notch for Speed change
lever.
2. Insert Change sleeve into Gear case assembly while facing
the groove of Change sleeve to motor side.
Note:
Make sure to assemble Change sleeve in the correct
direction (the groove is faced to motor side) so as to fit
Pin 1.2-3.5 to the groove of Change sleeve in the next step.
Change case
Elliptical hole
1. Align the elliptical hole of Change case to that of
Gear case assembly by turning Change case.
The groove of Change sleeve is seen through the elliptical holes
of Change case and Gear case assembly.
Elliptical hole
Groove of
Change sleeve
Change sleeve
Change sleeve
Groove of Change sleeve
Change case
3. Mount 2 pcs of Compression spring 2 to
Gear case assembly and assemble Hammer
change ring to Gear case assembly by fitting
its two holes to the Compression springs.
Gear case
assembly
Groove of
Change sleeve
2. Apply grease to the elliptical holes of
Change case so that the Pin guide sticks
on the elliptical holes of Change case.
Mount Pin guide with Pin 1.2-3.5 to
the groove of Change sleeve.
Hammer change ring
Compression
spring 2
(4) Assemble Hammer change plates while pressing Hammer change ring with your fingers at its two points.
Refer to
Fig. 6
.
NG
R
epair
P
9
/
18


