background image

Содержание 5016N8

Страница 1: ...verall Net Chain speed Length of Saw chain Pitch Gauge length weight IFPM guide bar 1 300 6 kg 340 mm 9 5 mm 1 27 mm 760 mm 13 318 1318 0 050 130 13 2 Ibs 375 mm 9 5 mm 1 27 mm 795 mm 1 300 14 314 318 10 050 131 114 13 9 Ibs 6 3 kg INSTRUCTION MANUAL I DOUBLE INSULATION I SPECIFICATIONS ...

Страница 2: ...released Don t expose chain saw to rain Don t use chain saw in damp or wet locations Do not use chain saw in presence of flammable liquids or gases Guard Against Electric Shock Prevent body contact with grounded surfaces For example metal pipes wire fences Keep Children Away Do not let visitors contact chain saw or extension cord All visitors should be kept away from work area Store Idle Chain Saw...

Страница 3: ...d be carefully checked to determine that it will operate properly and perform its intended function Check for alignment of moving parts binding of moving parts breakage of parts mounting and any other conditions that may affect its operation A guard or other part that is damaged should be properly repaired or replaced by an authorized service center unless other wise indicated elsewhere in this in...

Страница 4: ...19 Wear ear protectors during operation 20 Before making a felling cut remove dirt stones loose bark nails staples 21 Secure the log so that it will not roll or move suddenly during operation 22 AVOID UNINTENTIONAL STARTING Don t carry plugged in tool with finger 23 Attention Do not expose this tool to rain and pull plug immediately if the 24 The chain saw must not be left outdoors during rain and...

Страница 5: ...xten sion cord is in good condition before using Keep the cord away from the cut ting area and to position cord so that it will not be caught on branches and the like during cutting Use the table below to determine the proper wire size re quired in the extension cord Ampere rating on nameplate 0 5 0 5 1 10 0 10 1 13 0 13 1 15 0 Ext Cord Length 25 Ft 50 Ft 75 Ft 100 Ft 125 Ft 150 Ft Contact Makita ...

Страница 6: ...into lengths Chain Brake A device used to stop the chain saw Chain Saw Powerhead A chain saw without the saw chain and guide bar Clutch A mechanism for connecting and disconnecting a driven member to and from a rotating source of power Drive Sprocket or Sprocket The toothed part that drives the saw chain Felling The process of cutting down a tree Felling Back Cut The final cut in a tree felling op...

Страница 7: ... requirements of ANSI B175 1 when tested on a representative sample of chain saws Normal Cutting Position Those positions assumed in performing the bucking and felling cuts Notching Undercut A notch cut in a tree that directs the tree s fall Oiler Control A system for oiling the guide bar and saw chain Rear Handle The support handle located at or toward the rear of the saw Reduced Kickback Guide B...

Страница 8: ...e chain cover 1 Fig 2 Fit one end of the chain over the sprocket and the other over the end of the guide bar Notice that the cutters must be in the direction of the arrow in Fig 3 and 4 Keep the chain in the guide bar grooves Install the guide bar so that the lower hole in the guide bar is just over the adjusting pin Install the chain cover and tighten the hex bolt only tight enough to hold the gu...

Страница 9: ...1 8 5 32 Fig 5 If the gap is not about 3mm to 4mm 1 8 5 32 adjust the chain tension Use a screwdriver to turn the chain tension adjusting screw clockwise for more tension or counterclockwise for less tension When adjusting the chain tension lift the end of the guide bar slightly Fig 6 After adjusting the chain tension use the socket wrench to tighten the hex bolt securely CAUTION When breaking in ...

Страница 10: ...or one of high viscosity is neither needed nor advisable since the aim is to lubricate the chain and the guide bar Do not use dirty oil nor volatile oil Switch action To prevent the trigger from being acciden tally pulled a lock off button is provided as a safety feature To start the tool press in the lock off button and pull the trigger Release the trigger to stop Trigger switch I _ r Lock off bu...

Страница 11: ...wood Be sure the chain is adequately lubricated Use the spike as a pivot point and ease the tool into the wood rocking it in gently Do not force the guide bar in as this may cause overload and overheating Instant chain brake This tool is equipped with an instant chain brake to reduce the risk caused by kickback To actuate the instant chain brake push the protector forward Fig 13 CAUTION As soon as...

Страница 12: ...ght contact the saw chain Then turn the tool on After running the tool for a couple of seconds turn the tool off While the motor is coasting reset the protector with the same hand you used to turn the tool on Hold the tool firmly by grasping the front handle with the other hand Careless handling of the tool a t this time could result in serious injury therefore use extreme caution when resetting t...

Страница 13: ...de of the terrain as the tree is likely to roll or slide downhill after it is felled A retreat path should be planned and cleared as necessary before cuts are started The retreat path should extend back and diagonally to the rear of the expected line of fall as shown in Fig 16 I Treat DirectIon of fall _ I Fig 1 Before felling is started consider the natural lean of the tree the location of larger...

Страница 14: ... tree from twisting and falling in the wrong direction Do not cut through the hinge LIMB CUT Keep work off ground Leave support limbs until log is cut of fall Direction back cut Notch __ 7 2 inches Hinge 1 1 Fig 1 As the felling cut gets close to the hinge the tree should begin to fall If there is any chance that the tree may not fall in the desired direction or it may rock back and bind the saw c...

Страница 15: ...rbuck 2 3 diameter to meet 1st cut to avoid pinching When the log is supported on one end as shown in Fig 20 cut 1 3 the diameter from the underside underbuck Then make the finished cut by overbucking to meet the first cut When the log is supported on both ends as shown in Fig 21 cut 1 3 of that diameter from the top overbuck Then make the finished cut by underbucking the lower 2 3 to meet the fir...

Страница 16: ...chain saw handles Don t let the chain contact the ground After completing the cut wait for the saw chain to stop before you move the chain saw Always stop the motor before moving from tree to tree 1 log may roll Fig 2 Carrying tool Carry the tool by the front handle with the tool turned off finger off the switch the guide bar and the saw chain to the rear Use the scabbard to cover the guide bar an...

Страница 17: ...ection of the arrow When pulling it back be careful not to touch the cutters with the file Saw chain Fig 2 After a saw chain has been filed two or three times the raker see Fig 24 may need to be filed down slightly This is because the raker acts as a depth gauge for the cutters As the cutters are filed they lose some height due to their angled shape Eventually the cutters will become lower than th...

Страница 18: ... a screwdriver to remove the brush holder caps Take out the worn carbon brushes insert the new ones and secure the brush holder caps Clean out Guide bar Fig 2 Limit mark Storing the tool Before storing the tool be sure td do the following 0 Removethe chain cover Removeany chips and sawdust from the tool 0 Install the chain cover Turn the tool on and depress the oil button 4 or 5 times Cover the sa...

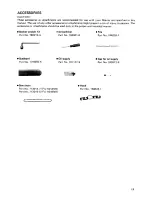
Страница 19: ...ent a risk of injury to persons The accessories or attachments should be used only in the proper and intended manner Socket wrench 13 0 Screwdriver File Part No 782212 4 Part No 783001 0 Part No 744003 1 Scabbard Oil supply Cap for oil supply Part No 414593 5 Part No 181117 9 Part No 242012 9 Saw chain Part No 713014 7 For 5014NB Part No 713015 5 For 5016NB Hook Part No 158024 1 19 ...

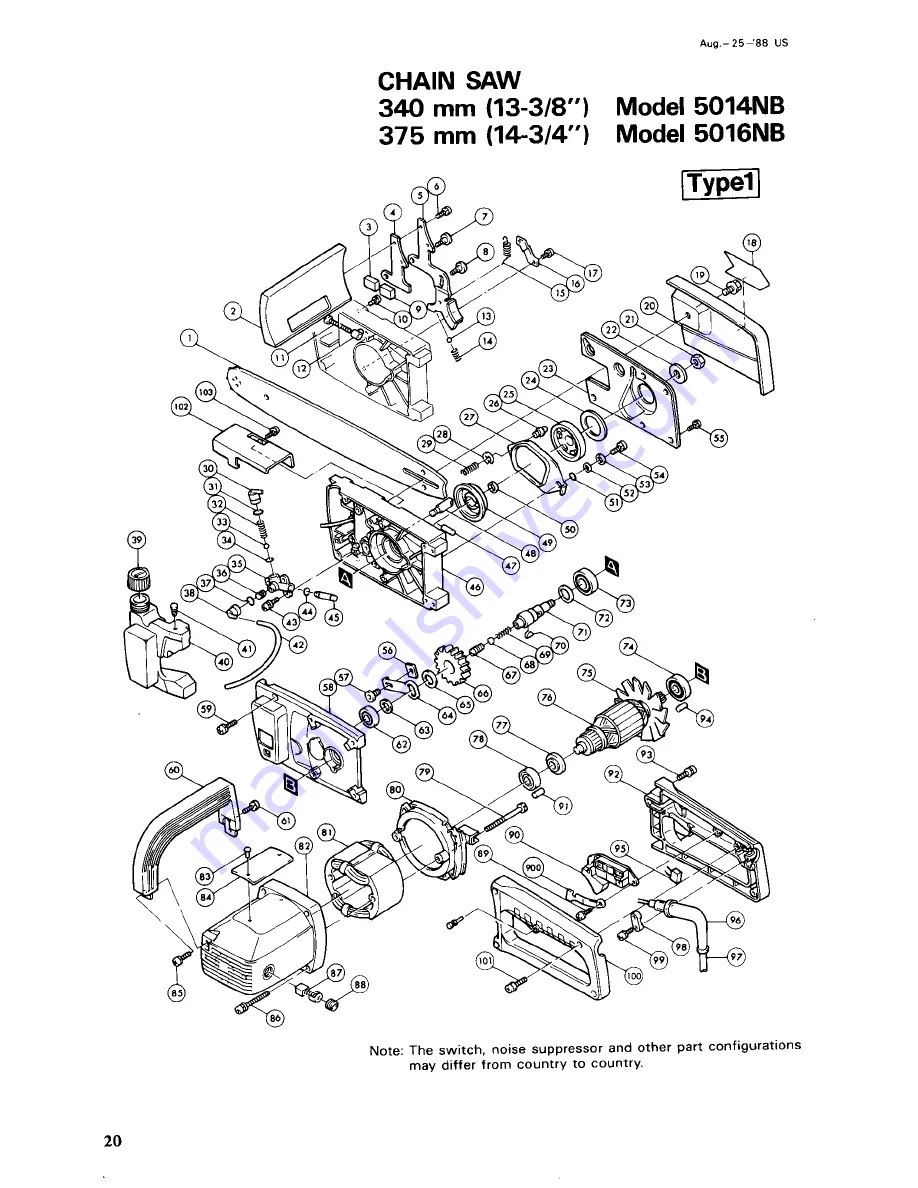
Страница 20: ...A q 2 5 4 3 8 US CHAIN SAW 340 mm 13 318 Model 5014NB 375 mm 14 3 47 Model 5016NB Note The switch noise suppressor and other part configurations may differ from country to country 20 ...

Страница 21: ... spring 5 68 69 70 71 72 73 74 75 76 77 78 79 80 81 82 83 84 85 86 87 88 89 90 91 92 93 94 96 97 98 99 100 101 102 103 900 1 1 1 1 4 1 1 2 2 1 I Pan Head Screw M5x16 With Washerl Pan Head Screw M 4 x 1 0 iWith Washerl Slider Plate Hex Sockel Head Bolt M6 Gear HousingCover Pan Head Screw M5x20 IWith Washerl Grip Pan Head Screw M5x16 IWith Washerl Ball Bearing 6001LLB Flat Washer 12 Slider Flat Wash...

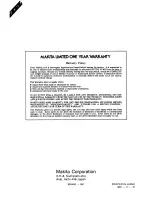
Страница 22: ...or Improperly mamtruned alterations have been made to the tool IN NO EVENT SHALL MAKITA BE LIABLE FOR ANY INDIRECT INCLDENTAL OR CON SEOIJENTIAL DAMAGES FROM THE SALE OR USE OF THE PRODUCT THIS DISCLAIMER APFLIEsBOTH DURING AND AFTER THE TERM OF THIS WARRANTY MAKlTA DISCLAIMS LIABILITY FOR ANY IMPLIED WARRANTIES INCLUDING IMPLIED WARRANTIES OF MERCHANTABILITY AND FITNESS FOR A SPECIFIC PURPOSE AFT...

Отзывы: