


R
epair P 7 / 11
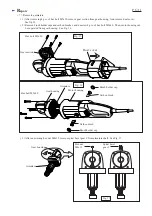
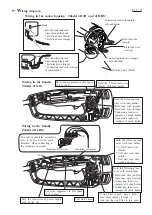
Fig. 22
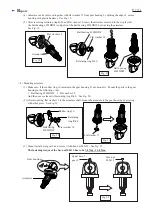
( 3 ) Mount spiral bevel gear 9 and secure it with hex nut M8x12. See Fig. 22.
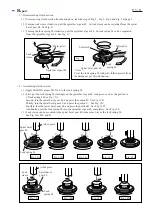
( 1 ) Make sure, if the rubber ring 36 remains in the gear housing. If not, mount it. Mount the parts to the gear
housing in the following order.
1. Ball baring 6202DDW 2. Flat washer 30
And then, secure them with retaining ring R-40. See Fig. 20.
( 2 ) After mounting flat washer 15 to the armature shaft, mount the armature to the gear housing by pressing
with arbor press. See Fig. 21.
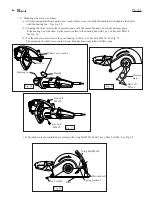
The fastening torque of the hex nut M8x12 has to be 7.4 N.m - 15.0 N.m.
Gear housing
Armature
Spiral bevel
gear 9
Hex nut
M8x12
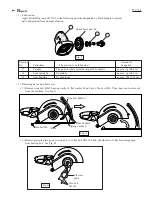
( 4 ) Armature can be removed together with flat washer 15 from gear housing by striking the edge of motor
housing with plastic hammer. See Fig. 18.
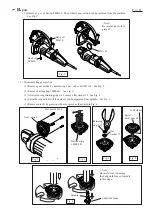
( 5 ) After removing retaining ring R-40 and flat washer 30, insert the armature removed in the step (4) into
the ball bearing 6202DDW. And pull out the ball bearing 6202DDW by swaying the armature.
See Fig. 19.
Fig. 18
Flat washer 15
Armature
Retaining ring R-40
Flat washer 30
Ball bearing 6202DDW
Ball bearing
6202DDW
Fig. 19
< 8 > Mounting armature
Rubber ring 36
Ball baring
6202DDW
Flat washer 30
Retaining
ring R-40
Fig. 20
Fig. 21
Flat washer 15