


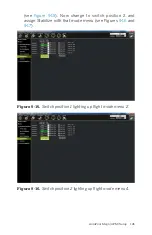

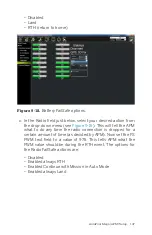


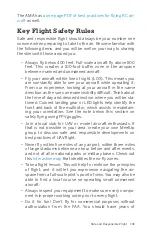
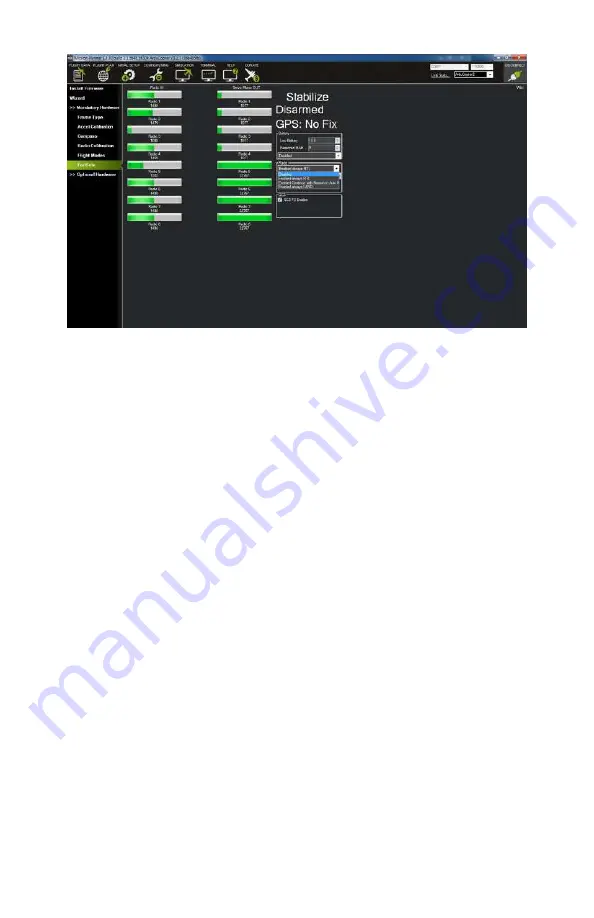
Figure 9-19.
Radio FailSafe options.
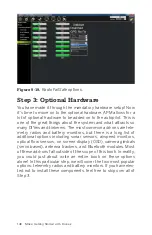
Step 3: Optional Hardware
You have made it through the mandatory hardware setup! Now
it’s time to move on to the optional hardware. APM allows for a
lot of optional hardware to be added on to the autopilot. This is
one of the great things about the system and what attracts so
many DIYers and tinkerers. The most common add-ons are tele-
metry radios and battery monitors, but there is a long list of
additional options including sonar sensors, airspeed monitors,
optical flow sensors, on screen display (OSD), camera gimbals
(servo based), antenna trackers, and Bluetooth modules. Most
of these add-ons fall outside of the scope of this book. In reality,
you could just about write an entire book on these options
alone! In this particular step, we will cover the two most popular
options: telemetry radios and battery monitors. If you have elec-
ted not to install these components, feel free to skip over all of
Step 3.
148 Make: Getting Started with Drones
Содержание Belinda Kilby
Страница 1: ......
Страница 3: ...Make Getting Started with Drones Terry Kilby and Belinda Kilby...
Страница 25: ...Figure 1 5 Basic quadcopter showing how the stick commands would move the craft Introduction 13...
Страница 26: ......
Страница 90: ......
Страница 126: ......
Страница 142: ...Figure 8 7 Mobius camera next to the quick release camera mount 130 Make Getting Started with Drones...
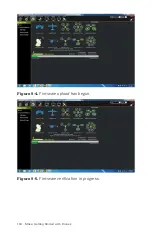
Страница 146: ...Figure 9 4 Firmware upload has begun Figure 9 5 Firmware verification in progress 134 Make Getting Started with Drones...
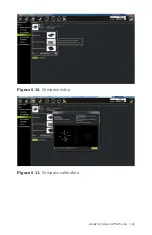
Страница 153: ...Figure 9 10 Compass setup Figure 9 11 Compass calibration ArduPilot Mega APM Setup 141...
Страница 198: ......


