


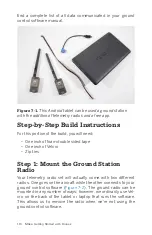


Step 3: Plug in the Radio
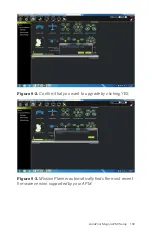
Wiring up your new telemetry radio couldn’t be simpler (see
). Find the correct cable that came with the radio set
and plug it into the back half of the aircraft radio. This cable will
have five individual wires (four black and one red), but the plug
on either end will have slots for six wires, leaving one of them
empty. This is normal. The other end of that cable will plug into
the telemetry port on your autopilot.
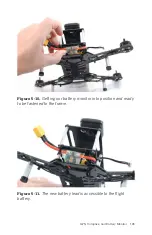
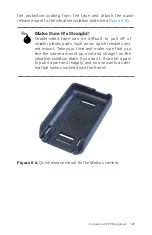
Figure 7-4.
Plugging in the telemetry radio will be much easier if
done before it’s mounted to the frame.
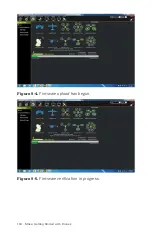
Step 4: Mount the Aircraft Radio
Now that you have plugged in the radio, go ahead and mount it
on the back of the airframe (see
tape should hold it securely in place. Make sure that it sticks out
from the frame far enough to allow the antenna to swivel freely
as needed, but not so far that it will be in the way as you
handle it.
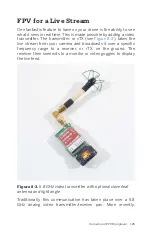
Telemetry Radios 119
Содержание Belinda Kilby
Страница 1: ......
Страница 3: ...Make Getting Started with Drones Terry Kilby and Belinda Kilby...
Страница 25: ...Figure 1 5 Basic quadcopter showing how the stick commands would move the craft Introduction 13...
Страница 26: ......
Страница 90: ......
Страница 126: ......
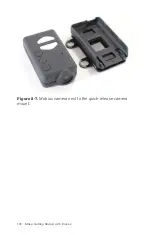
Страница 142: ...Figure 8 7 Mobius camera next to the quick release camera mount 130 Make Getting Started with Drones...
Страница 146: ...Figure 9 4 Firmware upload has begun Figure 9 5 Firmware verification in progress 134 Make Getting Started with Drones...
Страница 153: ...Figure 9 10 Compass setup Figure 9 11 Compass calibration ArduPilot Mega APM Setup 141...
Страница 198: ......


