Operation Manual easyTymp
8111254 Rev. 7.0
25
02/16
5 Operating easyTymp
Operating the easyTymp is very intuitive. After switching the instrument on, it will usually
start in the Test Screen and is ready to test the same protocol as was used last. After
disconnecting easyTymp from a PC it will start in the Select Protocol screen and the
desired protocol should be selected.
The battery status bar will show the current battery power status. If the battery is empty,
you will be warned, the measurement will be stopped and all recorded data will be stored.
If this occurs shut down the instrument and change the battery to continue testing. The
measurement data will be recovered when you start up again, so the measurement can
continue without restarting the test.
NOTE:
If a white screen appears and the easyTymp does not proceed with the next
screen, the battery is almost empty. Please change the battery to proceed.
The following paragraphs describe the precise operation of the different screens you will
observe during the use of easyTymp.
5.1 Test
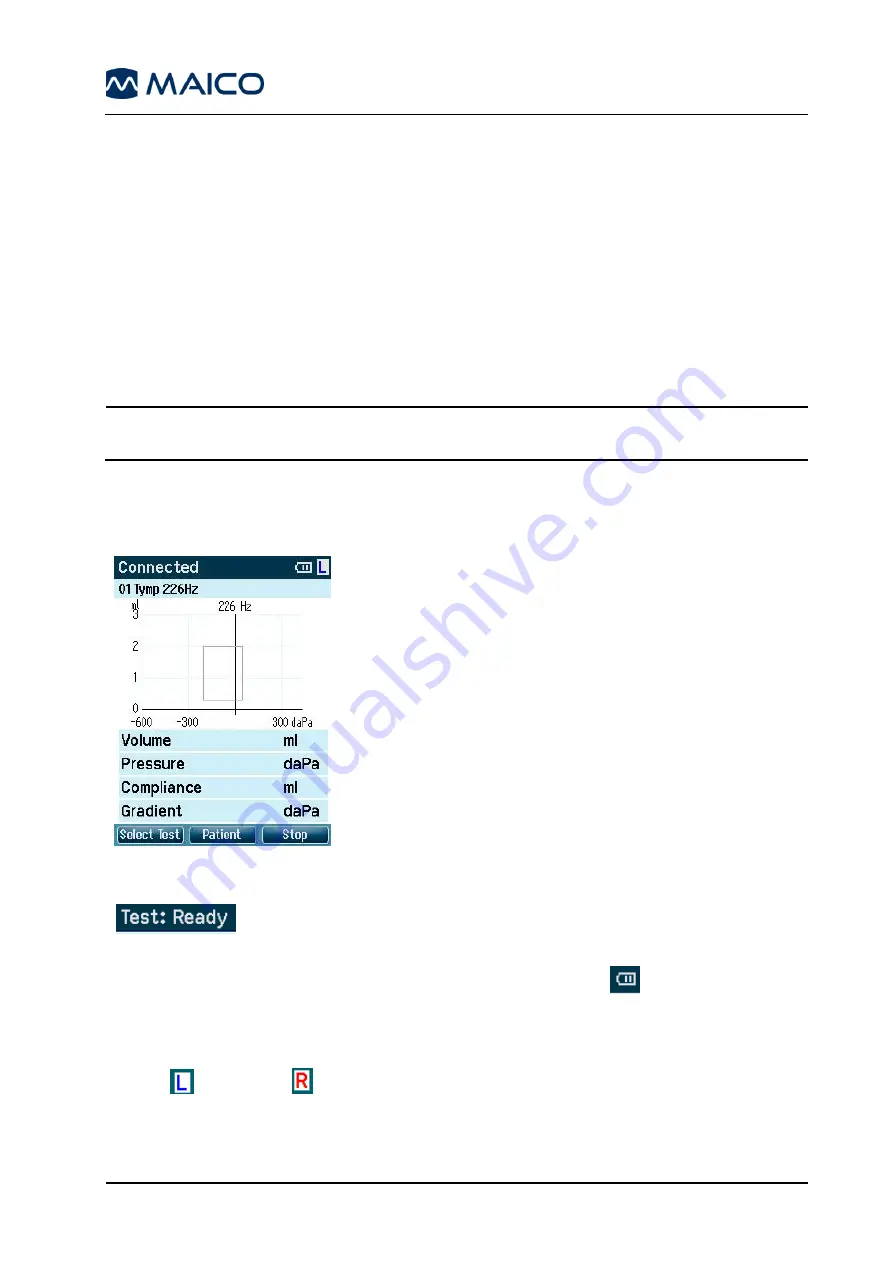
Figure 26
Usually the easyTymp starts with the Test Screen. When
deleting or saving data after a measurement, you will also
return to this screen (Figure 26).
The graphics of the ongoing test will also be displayed. The
box indicates the normative area where the peak of the
tympanogram is expected to fall. The measured curve will
be directly shown in the graphic while the measurement is
being taken. Below the graphic the measured values
(Volume, Pressure, Compliance and Gradient) are shown
following the measurement.
The header shows the status of the probe. It might show
Ready, In Ear,
Leaking
or
Blocked
.
-
In the upper right corner the battery status is indicated
. When the
easyTymp is placed in the cradle, it will charge the battery and a flashing battery
icon will be shown.
-
In the upper right corner an icon indicates if the easyTymp is testing the left ear
or right ear
.
Содержание easyTymp
Страница 1: ...Operation Manual easyTympTM...
Страница 2: ......


