background image

Timer Recording (cont’d)  31

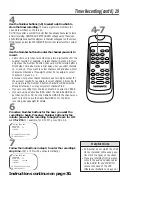
6

Repeat steps 1-4 to make sure you have cleared the cor-
rect timer recording.

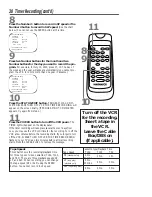
•  CLASH may flash on the screen when

you finish setting a timer recording. This
means that the timer recording you just
programmed and another timer record-
ing overlap. The current timer recording
will not take place. You may choose to
cancel the overlapping timer recording.

•  To stop a started timer recording, press

the STOP/EJECT button on the VCR.

•  If the power fails for more than one

minute, programmed timer recordings
will be lost. If this occurs, repeat the
steps on pages 11 and 15 before reset-
ting the timer recordings.

•  If the preset time for a timer recording

comes up during an OTR, the OTR has
priority. A message will remind you
when the timer recording was scheduled
to begin. You may let the OTR continue;
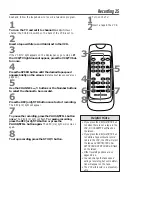
the timer recording will not take place.
Or, stop the OTR and turn off the VCR
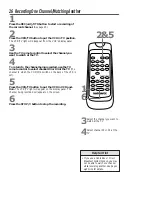
immediately. The timer recording will
take place if you turn off the VCR
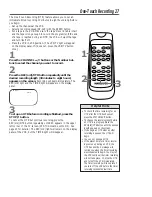
before the timer recording’s scheduled
start time.

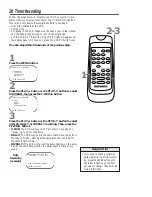
See page 42 for more hints.

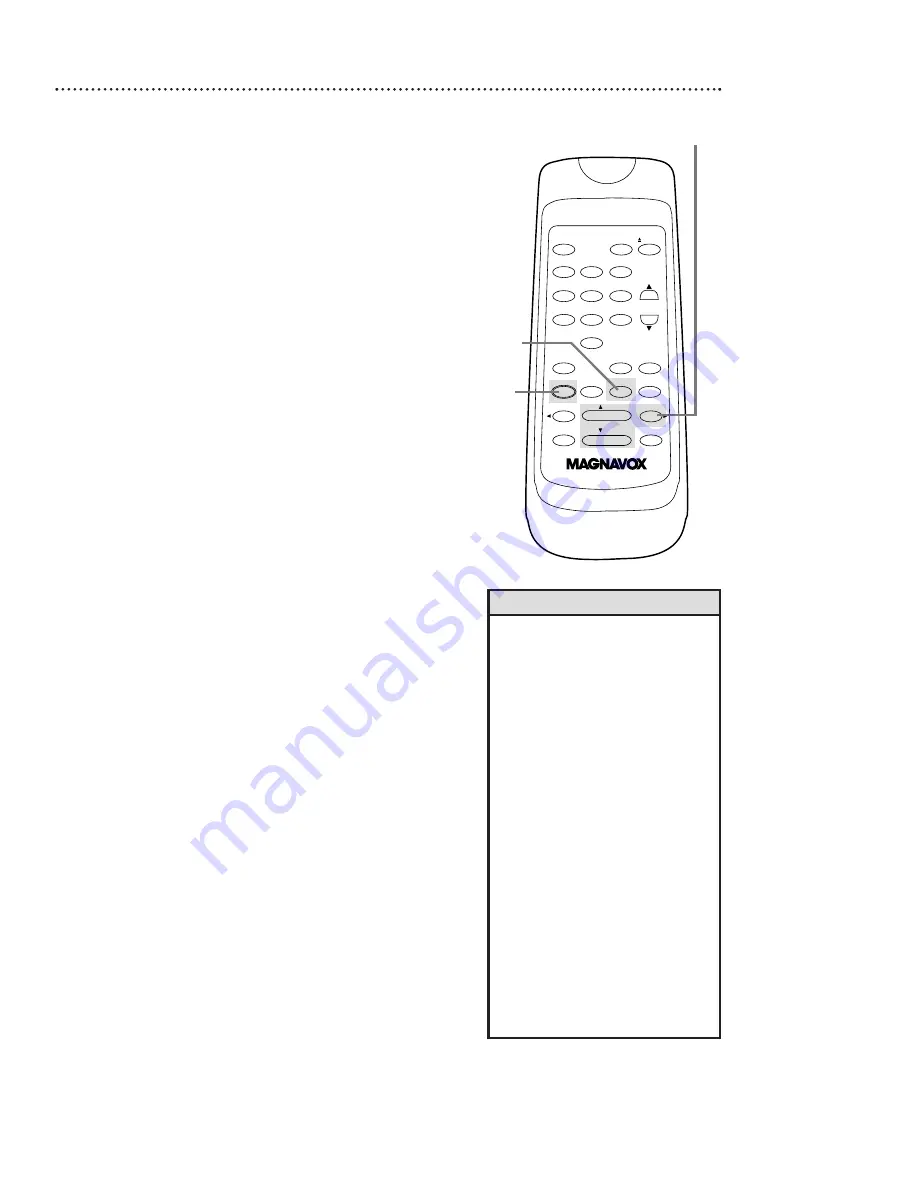
Helpful Hints

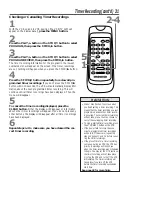
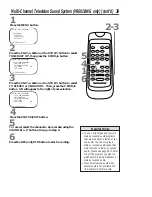
1

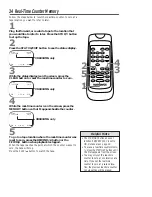
With the VCR on and in VCR position (the VCR/TV light will
appear on the display panel), press the MENU button.

Checking or Cancelling Timer Recordings

2

Press the PLAY/

o

button or the STOP/

p

button to select

PROGRAM, then press the F.FWD/

B

button.

3

Press the PLAY/

o

button or the STOP/

p

button to select

PROGRAM REVIEW, then press the F.FWD/

B

button.

The timer recording information for the program in the lowest
numbered slot will appear on the screen. If no timer recordings
are set, nothing will happen when you press the F.FWD/

B

button.

4

Press the F.FWD/

B

button repeatedly to review all pro-

grammed timer recordings. If you don’t press the F.FWD/

B

button within 10 seconds, the VCR will automatically display infor-
mation about the next programmed timer recording. This will
continue until all timer recordings have been displayed. Then the
menu will disappear.

5

To cancel the timer recording displayed, press the
CLEAR button. 
Either the display will disappear or information
about other timer recordings will appear. If you do not press any
other buttons, the display will disappear after all timer recordings
have been displayed.

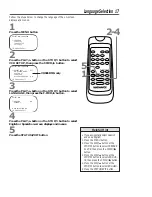
1

2-4

5

POWER

EJECT

VCR/TV

1

2

3

4

5

6

7

8

9

0

CHANNEL

MEMORY

STATUS/EXIT

CLEAR

SLOW

MENU

REWIND

/PLAY

F.FWD

REC/OTR

PAUSE/STILL

/STOP

TIME SEARCH

SPEED

Содержание VR601BMG

Страница 1: ...VCR VR401BMG VR601BMG Video Cassette Recorder Video Cassette Recorder Owner s Manual Owner s Manual...

Страница 2: ...s easy access to accessories from our convenient home shopping network And most importantly you can count on our uncompromising com mitment to your total satisfaction All of this is our way of saying...

Страница 3: ...ding as close to the point of cable entry as possible Declaration of Conformity Model Number VR401BMG VR601BMG Trade Name Magnavox Responsible Party Philips Consumer Electronics P O Box 14810 Knoxvill...

Страница 4: ...atus Displays 20 VCR Display Panel 21 Front Panel 22 Rear Panel 23 Basic Operations Playing 24 Recording 25 Recording Recording One Channel Watching Another 26 One Touch Recording 27 Timer Recording 2...

Страница 5: ...ting Batteries in the Remote Control 1 Remove the battery compartment lid on the bottom of the remote control by sliding it in the direction of the arrow 2 Place two AA batteries inside the battery co...

Страница 6: ...or a Direct Broadcast System please see pages eight nine If you have a Stereo TV please see page 10 After you hook up the VCR go to page 11 to turn on the VCR The VR601BMG is illustrated here The VR40...

Страница 7: ...TENNA IN Jack on the TV You may use either a snap on type supplied or screw on type of coaxial cable whichever you prefer 5 Set the CH3 CH4 switch on the back of the VCR to CH3 or CH4 whichever channe...

Страница 8: ...nnel This is step 5 on page 29 Leave the Cable Box DBS on for a timer recording AUDIO R L VIDEO OUT IN IN OUT CH3 CH4 OUT IN ANT OUT IN 75 ANT CABLE TV s ANTENNA IN Jack Cable Box DBS VCR Recording Vi...

Страница 9: ...to record at the VCR Start the recording 2 Press the VCR TV button once to put the VCR in TV position The VCR TV light will disappear 3 Select the channel you want to watch at the Cable Box DBS TV s A...

Страница 10: ...d of the audio cable to the AUDIO IN Jack on your TV If your TV has Right and Left AUDIO IN Jacks you must use a Y splitter audio cable as illustrated to deliver audio to the TV s right and left chann...

Страница 11: ...ll only scan through channels that you receive To skip this feature and play a tape immediately insert a tape with its record tab removed Or to skip step 3 press the MENU button All on screen display...

Страница 12: ...elect TUNER SET UP then press the F FWD B button SELECT op CHOOSE B AUTO PROGRAMMING ADD DELETE CH CH MEMORY REVIEW TV STEREO ON 2ND AUDIO TO END PUSH EXIT 3 Press the PLAY o button or the STOP p butt...

Страница 13: ...nel number you want to add or delete appears beside the arrow SELECT op ADD DELETE B 16 DELETED 17 ADDED 18 ADDED 19 ADDED 20 ADDED TO END PUSH EXIT 5 Press the F FWD B button to select ADDED or DELET...

Страница 14: ...within 10 seconds you will either go to the next screen of channels or you will return to the previ ous menu 4 Press the STATUS EXIT button once or twice to exit 1 Press the MENU button SELECT op CHO...

Страница 15: ...SH EXIT 6 Press the STATUS EXIT button Enter a 0 before a single digit number Entries that do not match the VCR s clock or calendar will cause a question mark to appear on the screen To make correctio...

Страница 16: ...Time You may program the VCR so its clock will automatically move forward one hour in April and turn back one hour in October Daylight Savings Time is set to ON when you receive your VCR Turn Daylight...

Страница 17: ...USH EXIT SELECT op CHOOSE B REPEAT PLAY OFF ON SCREEN MODE AUDIO OUT LANGUAGE BLUE BACKGROUND ON TO END PUSH EXIT If you accidentally select Spanish and need English 1 Press the MENU button 2 Press th...

Страница 18: ...after a brief delay There also may be a brief delay when you select channels 10 11 and 12 If you want to select channels 100 and above enter channel numbers as a three digit number For example to sele...

Страница 19: ...CLEAR SLOW MENU REWIND PLAY F FWD REC OTR PAUSE STILL STOP TIME SEARCH SPEED STOP p Button Press to stop the tape Press to select an item in the VCR menu CHANNEL o p Buttons Press to change channels a...
Страница 20: ...Portions of the status display also may appear when you press other function buttons If you select STATUS ON then select COUNTER ONLY OFF Whenever you press the STOP p button or the PLAY o button the...

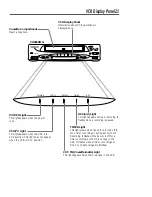
Страница 21: ...OWER Light This light appears when the power is on TIMER Light This light glows when the VCR is turned off to set a timer recording or during a One Touch Recording It flashes if the power is off for a...

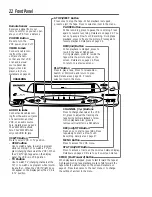
Страница 22: ...e menu REW ind Button When playback is stopped press to rewind the tape at high speed During playback press to rewind the tape while the picture stays on the screen Details are on page 36 Press to ret...

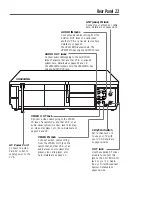
Страница 23: ...are on pages six nine OUT Jack Use the supplied RF coaxi al cable to connect this jack to the ANTENNA IN Jack on your TV Cable Box or Direct Broadcast System Details are on pages six nine VIDEO OUT Ja...

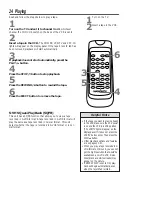
Страница 24: ...er channel the CH3 CH4 switch on the back of the VCR is set to 2 Insert a tape in the VCR The POWER VCR TV and CST IN lights will appear on the display panel If the tape s record tab has been removed...

Страница 25: ...32 You can change the tape speed during a recording but some distor tion will appear on the tape The VCR will record in a preset vol ume Helpful Hints 4 Press the SPEED button until the desired tape s...

Страница 26: ...channel you want to watch at the TV 4 To return to the channel being recorded use the TV remote control to select channel 03 or 04 at the TV the channel to which the CH3 CH4 switch on the back of the...

Страница 27: ...p button To cancel the OTR but continue recording press the REC ord OTR button repeatedly until REC appears in the upper left corner of the TV screen STATUS must be set to ON See page 20 for details T...

Страница 28: ...button to select PROGRAM then press the F FWD B button SELECT op CHOOSE B ONCE DAILY WEEKLY PROGRAM REVIEW TO END PUSH EXIT 3 Press the PLAY o button or the STOP p button to select a ONCE DAILY or WEE...

Страница 29: ...er a brief delay There also may be a brief delay when you select channels 10 11 and 12 If you want to select channels 100 and above enter channel numbers as a three digit number For example to select...

Страница 30: ...button to turn off the VCR power The TIMER light will appear on the display panel If the timer recording will take place several hours or days from now you may use the VCR until time for the recording...

Страница 31: ...CR on and in VCR position the VCR TV light will appear on the display panel press the MENU button Checking or Cancelling Timer Recordings 2 Press the PLAY o button or the STOP p button to select PROGR...

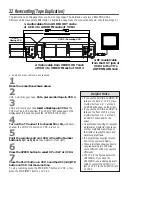
Страница 32: ...o cable from VIDEO OUT Jack of VCR 1 to VIDEO IN Jack of VCR 2 3 RF coaxial cable from the OUT jack of VCR 2 to the TV s ANTENNA IN Jack If you use the AUDIO and VIDEO IN Jacks on the back of VCR 2 pr...

Страница 33: ...teps 1 3 above At step 4 press the F FWD B button so that OFF appears beside REPEAT PLAY Press the STATUS EXIT button The real time counter memory does not function during Repeat Play Helpful Hints 3...

Страница 34: ...op the tape 2 Press the STATUS EXIT button to see the status display 3 While the status display is on the screen press the CLEAR button to reset the real time counter to zero STOP 1 08 PM TV STEREO CH...

Страница 35: ...B button or the REWIND button The VCR will skip over the specified length of time then begin playback If you want to search for more than 59 minutes you must enter the length of time in hours and min...

Страница 36: ...return to playback press the PLAY o button or press the PAUSE STILL button again Viewing a Slow Motion Picture 1 During tape playback press the SLOW button The tape will play in slow motion 2 To relea...

Страница 37: ...will not eject the tape automatically or shut itself off Tape Eject A tape can be ejected with the VCR power on or off but the VCR must be plugged in If a timer recording is set a tape can only be ej...

Страница 38: ...When a program broadcast in stereo is available STEREO appears here When a program broadcast in second audio is available 2ND AUD appears here When a program is available both in stereo and second au...

Страница 39: ...ND AUDIO TO END PUSH EXIT SELECT op CHOOSE B AUTO PROGRAMMING ADD DELETE CH CH MEMORY REVIEW TV STEREO 2ND AUDIO ON TO END PUSH EXIT You can only receive and record in stereo or second audio programs...

Страница 40: ...EXIT SELECT op CHOOSE B REPEAT PLAY OFF ON SCREEN MODE AUDIO OUT LANGUAGE BLUE BACKGROUND ON TO END PUSH EXIT Normally HIFI should be selected from the AUDIO OUT menu for playback with Hi Fi sound But...

Страница 41: ...E BACKGROUND to ON The screen will be blue and the sound will be muted Or if you want to receive the weak signal set BLUE BACK GROUND to OFF When you select a channel that is receiving a weak signal y...

Страница 42: ...on a tape is missing the VCR will eject the tape The TIMER light will blink Make sure the VCR power is off Make sure the clock is set Details are on page 15 The VCR may not perform or continue a timer...

Страница 43: ...get stereo sound if you use audio cables to con nect the AUDIO OUT jacks on the VCR to the AUDIO IN jacks on your TV and if the TV is in Line Auxiliary Input mode When you connect the AUDIO OUT jacks...

Страница 44: ...VIDEO In jacks on the front of the VCR select channel 002 AV FRONT If you use the AUDIO and VIDEO IN jacks on the back of the VCR select 001 AV REAR If you accidentally enter Line Input mode press the...

Страница 45: ...ms unbalanced Power Requirement 120V AC 60Hz Power Consumption 14W VR601BMG 12W VR401BMG Operating Temperature 41 F 5 C to 104 F 40 C Relative Humidity 10 to 80 Weight 5 5 lbs 2 5 kg VR601BMG 5 3 lbs...

Страница 46: ...possible cover age for this product the warranty has been updated and improved for you the customer Please refer to the new warranty sheet that is included in the product carton All the warranty detai...

Страница 47: ...ause button 22 pause still button 19 25 36 play K button 18 22 24 36 playing 24 power button 18 22 cord 23 light 21 real time counter 34 rear panel 23 rec otr button 18 22 25 27 rec ord light 21 recor...

Страница 48: ...d Beta cassettes M61104 Six High grade VHS T 120 Cassettes MHG1206 Stereo Audio and Video Cables 6 feet M61106 gold connectors M61105 color coded connectors RF Coaxial Cable 75 ohm 4835 323 27011 PO W...

Отзывы: