


19
EN
Recording
Playing
discs
Editing
Before
you
start
Changing
the
Setup
menu
Others
Español
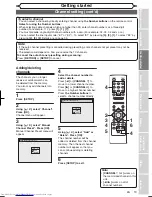
Connections
Getting
started
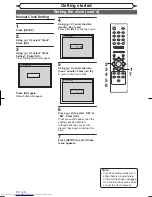
Note
• If the auto channel presetting is cancelled during presetting, some channels not yet preset may not be
received.
• The selection will depend on how you receive the TV channels.
To cancel the auto channel presetting during scanning:
Press
[RETURN] or [SETUP] to cancel.
To select a channel
You can select a channel by directly entering channel using
the Number buttons on the remote control.
Notes for using the Number buttons:
• When selecting cable channels which are higher than 99, enter channel numbers as a three-digit
number.(For example: 117, press
[1], [1], [7])
• You must precede single-digit channel numbers with a zero (For example: 02, 03, 04 and so on).
• You can select the line input mode (“E1” or “E2”). To select “E1” by pressing
[0], [0], [1]. To select “E2” by
pressing
[0], [0], [2]. Details are on page 35.
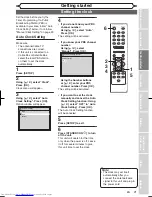
Channel setting (cont’d)
Getting started
4
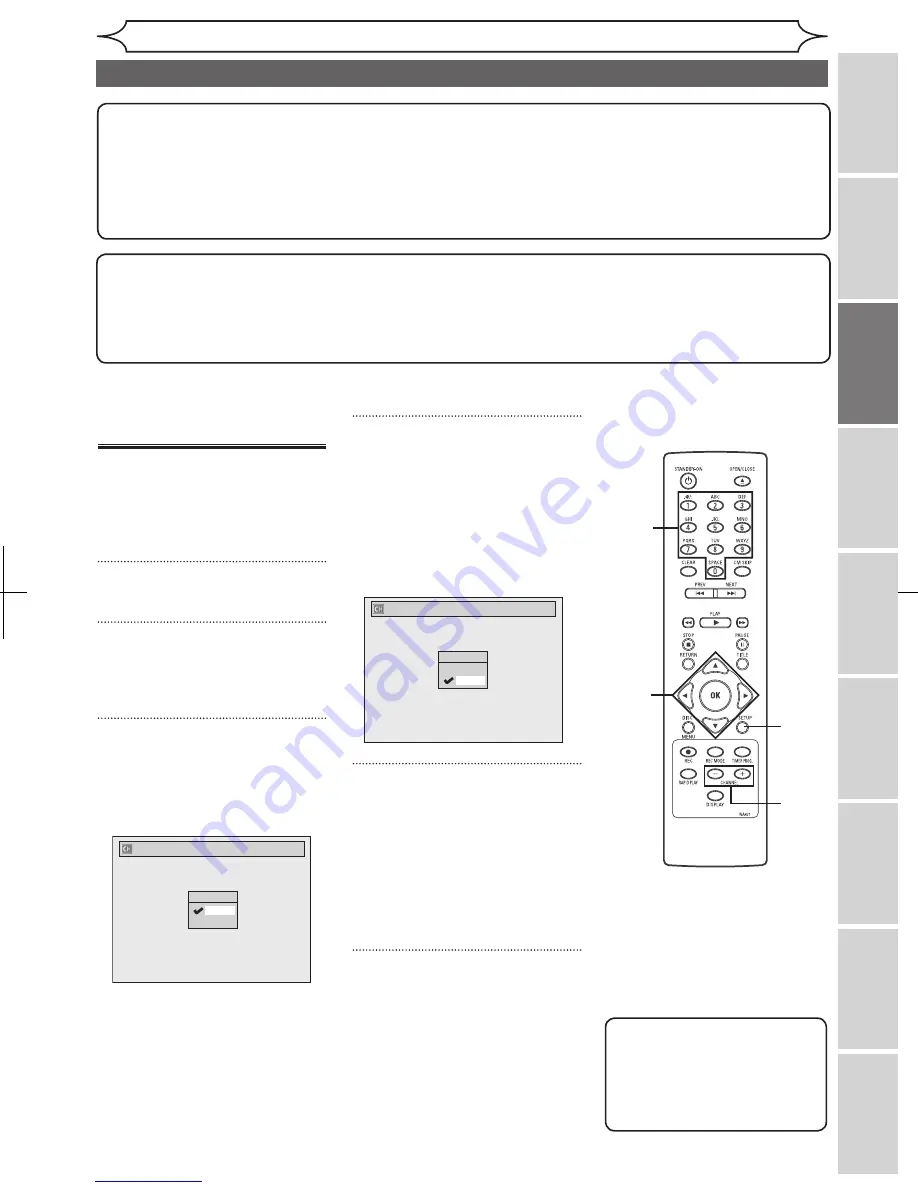
Select the channel number to
add or delete.
Press
[
{
] or [CHANNEL
-
] to
move to a lower channel number.
Press
[
B
] or [CHANNEL
+
] to
move to a higher channel number.
Press
the Number buttons to
select a channel number directly.
5
Using [
K
/
L
], select “Add” or
“Delete”. Press [OK].
The channel number will be
added or deleted from the channel
memory. Then the next channel
number will appear so that you
can continue adding or deleting
channels.
6
Press [SETUP] to exit.
Adding/deleting
channels
The channels you no longer
receive or seldom watch can
be deleted from the memory.
You also may add channels into
memory.
1
Press [SETUP].
2
Using [
K
/
L
], select “Channel”.
Press [OK].
Channel menu will appear.
3
Using [
K
/
L
], select “Manual
Channel Preset”. Press [OK].
Manual Channel Preset menu will
appear.
Manual Channel Preset
CH 2
Add
Delete
1
2
3
4
5
6
4
Manual Channel Preset
CH 7
Add
Delete
Note
•
[CHANNEL
-
/
+
] works on
the memorized channel in this
unit.
•
[
{
/
B
] works on all of
channel numbers.
4
Downloaded from
www.Manualslib.com
manuals search engine


