21
AUTOLOCK
A
utoLock allows the viewer to block out any channels. A channel blocked by the AutoLock control cannot be viewed
until a correct access code is used to unlock the channel for viewing.
Timer
AutoLock
Active Control
Picture
Sound
Features
Install
Timer
AutoLock
Active Control
Access Code
xxxx
Incorrect
Time
AutoLock
Active Control
New Code
_ _ _ _
DTV Setup
Main
Ch. Install
Channel Edit
Weak Dig Sig
AutoLock
Fact CH Reset
Ch. Install
Channel Edit
Weak Dig Sig
AutoLock
Fact CH Reset
Features
Features
Main
DTV Setup
Ch Install
Digital Audio
Timer
Closed Caption
Emerg Alert
Channel Edit
Weak Dig Sig
AutoLock
Fact Ch Reset
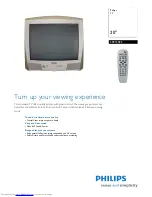
AutoLock
Block Channel
Password _ _ _ _
Incorrect
Password _ _ _ _
Correct
Digital Mode
Analog Mode
NUMERIC
>
>
<
>
MENU
1
Press
MENU
button on
the remote control to
display the onscreen menu.
2
Press
CURSOR
<
or
>
to scroll through the
onscreen menu until
you see
DTV Setup
highlighted. Press
CURSOR
> to display
DTV Setup
features.
3
Press
CURSOR
<
or
>
to scroll through the
DTV Setup
features until
Ch. Install
is highlighted.
4
Press
CURSOR >
followed by CURSOR
<
or
>
until
you see
AutoLock
highlighted.
5
Press
CURSOR
> to
enter the AutoLock
mode.
"
Password _ _ _ _
" will
appear.
6
Press
CURSOR >
followed by
the
NUMERIC
buttons on the
remote control to enter
the access code.
0711
is the default. The first
time you enter the code,
Incorrect
will appear on
the screen. Enter the same
code again.
Correct
will
be displayed. Now can
proceed to block channels.
Note :
When you are in
Digital
Mode
you can only
AutoLock
Digital
Channels.
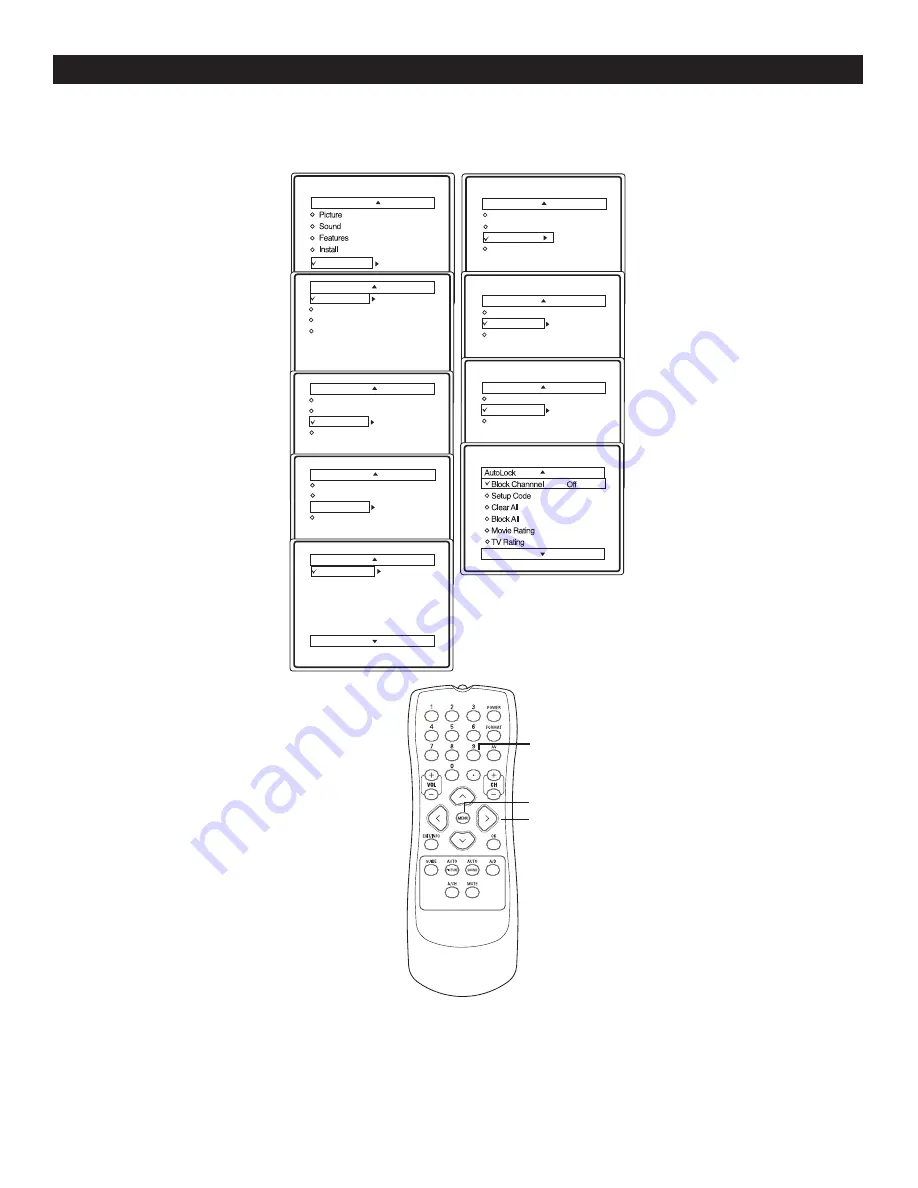
1
Press
MENU
button on
the remote control to
display the onscreen menu.
2
Press
CURSOR
<
or
>
to scroll through the
onscreen menu until you
see
Features
highlighted.
3
Press
CURSOR
> to
display
the
Features
menu.
4
Press
CURSOR
<
or
>
repeatedly until you
see
AutoLock
highlighted.
5
Press
CURSOR
> to
enter the AutoLock
mode.
"
Access Code _ _ _ _
" will
appear.
6
Using the
NUMERIC
buttons on the remote
control enter the access
code.
0711
is the default.
The first time you enter
the code, Incorrect will
appear on the screen.
Enter the same code again.
You will be prompted to
enter a new code.
7
Use the
NUMERIC
buttons on the remote
control enter the access
code of your choice.
Enter the same code a
second time to confirm
it. Once the new code is
confirmed, the
AutoLock
menu will appear. You can
now access the functions
available in the menu.
Note :
When you are in
Analog
Mode
you can only
AutoLock
Analog Channels.
Follow these steps for Digital Mode
Follow these steps for Analog mode