


H
OW TO
A
UTOMATICALLY
P
ROGRAM
TV
13
When CABLE is selected, channels
1-125 are available.
When ANTENNA is selected,
channels 2-69 are available.
When AUTO is selected, the TV
will automatically set itself to the
correct mode based on the type of
signal it detects when the AUTO
PROGRAM feature is activated.
H
ELPFUL
H
INT
Auto Program
Channel
12
Main
Picture
Sound
Features
Install
Brightness
Color
Picture
Sharpness
Tint
More...
Main
Picture
Sound
Features
Install
Language
Tuner Mode
Auto Program
Channel Edit
Install
Language
Tuner Mode
Auto Program
Channel Edit
Auto Program
Channel
13
Auto Program
Channel
14
1
2
3
POWER
CH
CH
VOL
VOL
STATUS
EXIT
SLEEP
MUTE
SMART
PICTURE
SOUND
SURF
A/CH
4
5
6
7
8
9
0
CC
MENU
MAGNAVOX
6
3
5
1
2
4
Y
our TV can automatically set itself
for local area (or Cable TV) chan-
nels. This makes it easy for you to
select only the TV stations in your
area when the CHANNEL
(+) or (–)
buttons are pressed.
Note: Make sure the antenna or
cable signal connection has been
completed before AUTO PROGRAM is
activated.
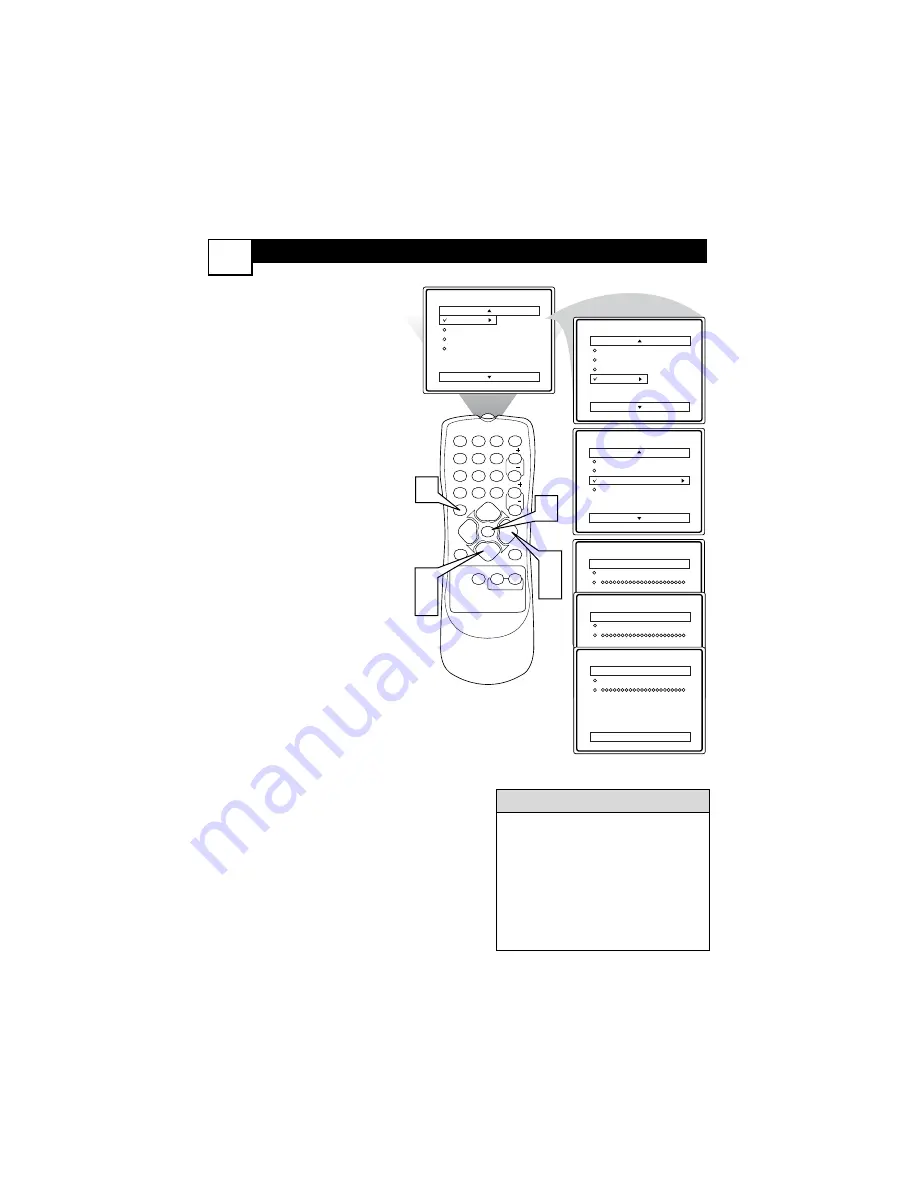
1
Press the MENU button
on the remote to show the
on-screen menu.
2
Press the CURSOR UP
▲
or DOWN
▼
buttons
to
scroll through the on-screen
menu until the word
INSTALL
is highlighted
.
3
Press the CURSOR
RIGHT
button
to dis-
play the
INSTALL
menu
features.
4
Press CURSOR UP
▲
or
DOWN
▼
buttons
to
scroll the Install features until
the words
AUTO PRO-
GRAM
are highlighted.
5
Press the CURSOR
RIGHT
button
to start
the Auto Program scanning of
channels. Auto Programming
will store all available chan-
nels in the TV’s memory then
tune to the lowest available
channel when done.
6
When finished, press the
STATUS/EXIT button
to
remove the menu from the
TV’s screen.