20
THE MC 200‘S MENU
The tone and further parameters may be comfortably adjusted via a menu.
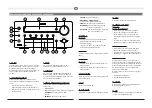
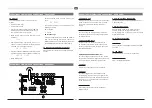
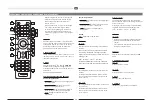
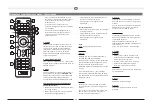
• The menu is launched with the MENU key on the remote control or by pressing the knob SEARCH/SKIP/
MENU on the front.
• The menu may be navigated and settings changed with the keys ◄◄, ►► , ▲and▼ on the remote control
or by turning the knob SEARCH/SKIP/MENU.
• The individual menu items may be confirmed with the SELECT key on the remote control or by pressing
the knob SEARCH/SKIP/MENU.
The following settings are possible:
• Bass adjustment:
Select BASS in the menu. Bass playback may be ramped either up or down in 7 steps.
• Treble adjustment:
Select TREBLE in the menu. The treble setting may be ramped either up or down in 7 steps.
• Balance adjustment:
Select BALANCE in the menu. The stereo balance may be adjusted either to the right or left in ten steps.
•
Loudness
(aurally compensated volume correction):
Select LOUDNESS in the menu. The function may now be activated or deactivated.
• Auto standby function:
The unit has an auto standby function that automatically switches the device to standby mode around 3
1/2 hours after the last time it was operated (via the controls on the unit or via the remote control). This
function implements an EU energy-saving regulation (1275/2008 EC), reducing power consumption if
the device is accidentally left turned on after use.
Select APO SETTING in the menu. The function can now be activated or deactivated. When leaving the
factory, the function is activated.
• Sleep function:
This function enables you to set a time after which the device will switch off automatically and change to
the standby mode. The time can be set between 5 and 240 minutes by using the ▲and▼ buttons. After
exiting the menu, the active Sleep function is permanently indicated by a symbol at the bottom right of
the display.
• System information:
Select SYSTEM INFO in the menu. The individual firmware versions of the device can be displayed for
service purposes by pressing the ◄◄ and ►► buttons.
• Network Wizard (see “CONNECTING TO THE NETWORK VIA W-LAN)
• Upgrade (see chapter UPGRADE)
Available product update are available at our home page including detailed installation description.
• System Reset:
The SYSTEM RESET menu item will restore the basic settings (clear all station presets, set all tone
controls to 0, disable loudness function and sleep timer, auto standby on, clear Network settings, clear
favourites).
You can leave the menu via EXIT.
INITIAL OPERATION
• Place the MC 200 on an even surface. Observe the relevant clearance gaps as specified under
“Important safety instructions”.
IMPORTANT
: Do not place any objects on top of the device (magazines, CD/record cases, etc.).
The ventilation slots located on top of the device must be unobstructed at all times!
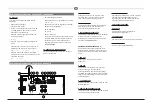
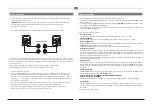
• Connect your speakers:
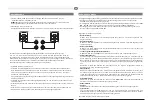
The stereo speakers (impedance of 4 to 8 ohms) are connected to the rear as follows:
Only use high-quality audio speaker cables with a conductor cross section of min. 1.5 - 2.5 mm². Strip
approx. 10 mm from the cables and twist the ends. Loosen the terminal screws one after the other and
insert the stripped ends into the holes. Re-tighten the terminal screws. Make sure you pay attention to
the correct polarity.
You can also use prefabricated cables with 4mm banana plugs or forked fittings.
Also observe the operating instructions for the speakers you are using.
• Connect your audio sources.
• Connect the DAB/FM antenna to the antenna connection point at the rear of the device. For later
operation, the position of the antenna should then be determined according to where the best
reception is. The end of antenna should then be secured in the appropriate position, e.g. using a
drawing pin.
Reception can be improved by a suitable indoor or outdoor household antenna if
the reception is not so good.
• Connect the supplied mains cable to the rear and then insert the other end into a 230V socket.
• Actuate the on/off switch on the rear side, the device is now in the standby mode.
• Now switch on the device using the remote control or with the ON/STBY key on the front.
• Select your desired audio source using the input selector switch.

