


Magma
EB3600-P | Chapter 6 Rack Slide Installation
93
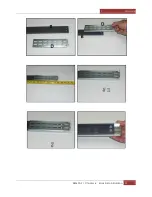
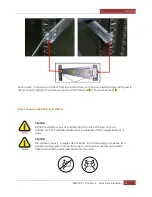
Add Screws to Rack Post (STEP 4)
Attach 2 Panhead screws into the rack post where you want the chassis mounted. Be sure you have
measured accurately to ensure that everything fits in the rack correctly. Leave the screws untightened until
after you place the slide rail’s fingers (Step
5
) between the screws as shown. If your rack has holes too large
for the screws, you can use the Bar Nut to secure your mounting by inserting the Panhead screw through
the rack hole and screwing it into the Bar Nut on the reverse side of the rack post, as shown. Notice that the
holes on the Bar Nut are spaced unevenly to accommodate different racks.
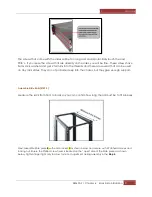
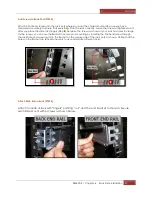
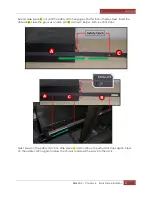
Attach Slide Rail to Rack (STEP 5)
Attach to inside of rack with “fingers” pointing “out” and the end bracket to the rear. Secure
each Slide Mount with 4 screws as shown below.
Содержание ExpressBox EB3600-P
Страница 1: ...EB3600 P User Manual PCIe to PCIe Expansion MODEL EB3600 P...
Страница 13: ...Magma EB3600 P Chapter 1 Introduction 13...
Страница 32: ...Magma EB3600 P Chapter 2 Hardware Installation 32...
Страница 33: ...Magma EB3600 P Chapter 2 Hardware Installation 33...
Страница 37: ...Magma EB3600 P Chapter 2 Hardware Installation 37...
Страница 92: ...Magma EB3600 P Chapter 6 Rack Slide Installation 92...
Страница 106: ...Manual P N 09 09957 01 Rev A2...


