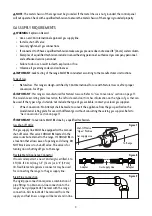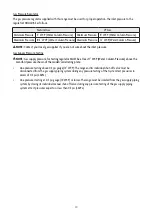
14
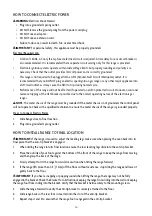
HOW TO CONNECT ELECTRIC POWER
W
ARNING:
Electrical Shock Hazard
•
Plug into a grounded 3 prong outlet�
•
DO NOT remove the ground prong from the power cord plug�
•
DO NOT use an adapter�
•
DO NOT use an extension cord�
•
Failure to do so can result in death, fire, or electrical shock�
IMPORT
ANT:
For personal safety, this appliance must be properly grounded.
Electrical Require
ments
•
A 120 volt, 60Hz�, AC only 15-amp fused, electrical circuit is required� A time delay fuse or circuit breaker is
also recommended� It is recommended that a separate circuit serving only for this range is provided�
•
Electronic ignition systems operate within wide voltage limits, but proper grounding and polarity are
necessary� Check that the outlet provides 120-volt power and is correctly grounded�
•
This range is not required to be plugged into a GFCI (Ground-Fault Circuit Interrupter) outlet� It is
recommended that you DO NOT plug an electric spark ignition gas range or any other major appliance into
a GFCI wall outlet as it may cause the GFCI to trip during normal cycle�
•
Performance of this range will not be affected if operated on a GFCI-protected circuit� However, occasional
nuisance tripping of the GFCI break is possible due to the normal operating nature of the electronic gas
ranges�
NOTE
: The metal chassis of the range must be gr
ounded� If the metal chassis is not grounded, the control panel
will not operate� Check with a qualified technician to ensure the metal chassis of the range is grounded properly�
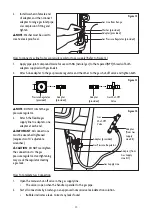
Steps to Connect Electric Power
1�
Slide Range close to final location�
2�
Plug into a grounded 3 prong outlet�
HOW TO INST
ALL RANGE TO FINAL LOCATION
IMPORT
ANT:
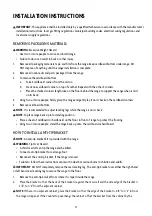
If the range is moved to adjust the leveling legs, make sure when placing the oven back into its
final place that the anti-tip bracket is engaged�
1�
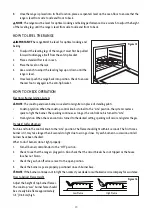
When sliding the range into its final location ensure the rear leveling legs slide into the anti-tip bracket�
2�
Place the outside of your foot against the bottom of the front of the range to keep the range from moving,
and then grasp the back of the range�
3�
Slowly attempt to tilt the range forward� Use caution when tilting the range forward�
4�
If the range lifts more than 1/2” (1�3cm) off the floor without resistance, stop tilting the range and lower it
gently back to the floor�
IMPORTANT
: If you hear a snapping or popping sound when lifting the range, the range may not be fully
engaged in the bracket� Check the bracket for obstructions keeping the range from sliding into the wall or keeping
the range foot from sliding into the bracket� Verify that the bracket is held securely to the mounting screws�
5�
Slide the range forward to verify the anti-tip bracket is securely attached to the floor�
6�
Slide range back so the rear foot is inserted into the slot of the anti-tip bracket�
7�
Repeat steps 1 and 2 to ensure that the range foot is engaged in the anti-tip bracket�
Содержание MCSBRG24W
Страница 22: ...22 PRECAUCIONES planation ADVERTENCIA Peligro de volcamiento...
Страница 23: ...23...


