background image

ESB700A 3 06/07/19

SETUP INSTRUCTIONS

Failure to follow these Setup Instructions may result in serious injury or death, and/or property damage.

WARNING

PLEASE REFER TO THE EXPLODED VIEW DRAWING IN THIS MANUAL IN ORDER TO IDENTIFY PARTS.

1.  Remove all contents from box and be sure all components are included. First, insert feet with sleeves (#13) into short tubes welded at the end of both support  
 

beams (#1 & 2).

NOTE: 

The foot (#13) with the largest opening goes on the largest support beam (#1).

2.  Slide transfer adapter (#11) over the end of small support beam (#2) as shown in parts drawing (pg. 5) with short tube toward you  and in the up and down position.  
 

This transfer adapter will be used for mounting the transfer bar (#10) when needed or J-hook (#3) when the transfer bar is not used.

NOTE: 

The Engine Transverse Bar may be used with or without the transfer bar, depending on the load being supported.

3.  If mounting the transfer bar (#10) to assist with an unbalanced load, insert the adjustable pipe (#6) with the rubber tip up through the large hole at either end of the  
 

transfer bar (#10), and secure in place with hex bolt (#9) and wing nut (#8). Do not fully tighten wing nut as height adjustment may be necessary once the Engine  


Transverse Bar is placed over the engine compartment of the vehicle.

4.  After determining the length of transfer bar needed to ensure correct placement of the adjustable pipe (#6) and to properly assist in supporting the load, insert hex bolt  
 

(#5) down through the transfer bar (#10) and the short tube of the transfer adapter (#11) to hold transfer bar in place on the small support beam. Secure bolt with wing  


nut (#4). Again, do not fully tighten wing nut (#4), as some length adjustment may be required once the Engine Transverse Bar is placed in support position over engine  


compartment of the vehicle.

5.  It is time to install the two J-hooks (#3) provided. This must be done BEFORE placing the Engine Transverse Bar over the engine compartment because ample space may  
 

not be available once the support bar is in place. Insert one J-hook up through the bottom of short tube welded on the center portion of the large support beam (#1), and  


secure with barrel hex nut (#7). Run hex nut (#7) all the way down to end of threads toward the hook portion of the J-hook to hold it out of the way until needed. Then,  


locate the best position for the second J-hook and install in the same manner. The second J-hook may be installed in either the transfer bar (#10) as shown in the parts  


drawing (if the transfer bar is used), or through the short tube welded on the adjustable transfer adapter (#11) (if the transfer bar is not used).

6.  The Engine Transverse Bar is ready to be placed over the engine compartment of the vehicle.

OPERATING INSTRUCTIONS

1.  Locate the two engine support bolts to determine where the Engine Transverse Bar will be attached in relation to them Make sure that the feet with protective sleeves (#13)  
 

are sitting in the inner fender lips of the engine compartment and fully extended until the feet are touching the inside of the fenders. 


CAUTION:

 If the inside fender lips are more than 61" apart, the Engine Transverse Bar must not be used. Do not extend past the designated marking (61") as over-extending  


this unit may compromise the 700 lb. Capacity. This could cause the Engine Transverse Bar to collapse, resulting in bodily injury or property damage.

2.  Make sure the transfer bar is in correct position (if being used). The rubber tip of the adjustable pipe (#6) should be on a flat, reinforced surface capable of supporting the  
 

weight of the engine. Tighten both wing nuts (#4 & #8) to secure adjustable pipe (#6) and transfer bar (#10).

3.  The J-hooks (#3) may be lowered to the appropriate position. Be sure J-hooks are directly over the engine support bolts or brackets so the engine does not swing when  
 

vehicle is disassembled. Attach the looped ends of the two 1/8" braided steel cables (#12) to the engine support bolts on the engine and loop middle of braided cables  


over J-hooks. If the engine being supported is equipped with engine lift brackets, hook the J-hooks directly into engine lift brackets for extra protection.


NOTE:


Use only fasteners rated Grade 5 or higher as engine support bolts.

4.  Tighten the barrel hex nuts (#7) on both J-hooks until cables are snug or hex nuts are tight against support bar. Double check that engine is properly supported before  
 

conducting any work.

Failure to follow these Operating Instructions may result in serious injury or death, and/or property damage.

WARNING

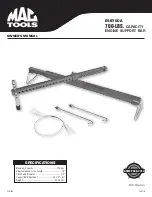
ESB700A

700-LBS. 

CAPACITY  

ENGINE SUPPORT BAR

Содержание ESB700A

Страница 1: ...djustable Hook Screw Length 14 Steel Cable Diameter 1 8 Support Bar Adjustment 34 1 2 61 Weight 25 24 Lbs SPECIFICATIONS OWNER S MANUAL ESB700A 700 LBS CAPACITY ENGINE SUPPORT BAR S A FETY STANDA R D C OMPLIES WIT H ASME PASE 2014 2019 Mac Tools ...

Страница 2: ... manual packed with this device before operating Inspect before each use Do not use if damaged altered modified in poor condition or has loose or missing components Take corrective action before using Do not exceed rated capacity This product was not designed to lift an engine but rather support the engine when lifted by other means Consult the vehicle manufacturer for the proper positioning and a...

Страница 3: ...n hex nut 7 all the way down to end of threads toward the hook portion of the J hook to hold it out of the way until needed Then locate the best position for the second J hook and install in the same manner The second J hook may be installed in either the transfer bar 10 as shown in the parts drawing if the transfer bar is used or through the short tube welded on the adjustable transfer adapter 11...

Страница 4: ...with the operator in the operator s native language by the purchaser owner making sure that the operator comprehends its contents Owner and or user must study and maintain for future reference the manufacturers instructions Owner and or user is responsible for keeping all warning labels and instruction manuals legible and intact Replacement labels and literature are available from the manufacturer...

Страница 5: ... Bar 1 11 Transfer Adapter 1 12 RS520712A 1 8 Braided Steel Wire each 2 13 RS70001 Foot with Sleeve Black set of 2 1 14 Rubber Tip incl with 6 1 Not Shown RSESB700APLK Product Label Kit 1 Index No Part No Description Qty Index No Part No Description Qty Only available in Bolt Kit Part RS5207BKA Only Index No s identified by Part No are available separately PARTS DIAGRAM AND LIST ESB700A 700 LBS CA...

Страница 6: ... Other important warranty information This warranty does not cover damage to equipment or tools arising from alteration abuse misuse damage and does not cover any repairs or replacement made by anyone other than Mac Tools The foregoing obligation is Mac Tools sole liability under this or any implied warranty and under no circumstances shall we be liable for any incidental or consequential damages ...

Страница 7: ...e gancho ajustable 14 Diámetro del cable de acero 1 8 Ajuste de la barra de soporte 34 1 2 61 Peso 25 24 Libras ESPECIFICACIONES MANUAL DE OPERATIÓN S A FETY STANDA R D C OMPLIES WIT H ASME PASE 2014 2019 Mac Tools ESB700A BARRA DE SOPORTE PARA MOTOR CAPACIDAD 700 LIBRAS ...

Страница 8: ...ara ningún otro propósito excepto el para el cual fue diseñado sin consultar al representante autorizado del fabricante No exceda la capacidad nominal Esta herramienta no fue diseñada para levantar un motor sino que para soportar el motor cuando éste elevado por otros medios Consulte el fabricante del vehículo por su colocación y sujeción adecuadas de la herramienta al motore Asegúrese que el moto...

Страница 9: ...r de transferencia se usará para montar la barra de transferencia 10 según sea necesario o para el gancho tipo J 3 cuando la barra de transferencia no está en uso NOTA La barra de soporte del motor podrá usarse con o sin la barra de transferencia dependiendo de la carga a soportarse 4 Si se monta la barra de transferencia 10 para asistir con la carga desequilibrada inserte el tubo ajustable 6 con ...

Страница 10: ...E LAS HERRAMIENTAS Y PRODUCTOS CON LA MARCA DE LA EMPRESA MAC TOOLS NO CONTIENEN DEFECTOS EN SU MANO DE OBRA NI MATERIAS PRIMAS Mac Tools reparará o sustituirá sus productos con la marca Mac Tools que reflejen fallas en el funcionamiento satisfactorio debido a que la mano de obra o las materias primas estén defectuosas tomando como base las cláusulas y condiciones de los planes de garantía descrit...

Страница 11: ...crochet 14 po Diamètre du câble d acier 1 8 po Ajustement de la barre de support 34 1 2 po 61 po Poids 25 24 Livres SPÉCIFICATIONS MANUEL D OPERATIÓN S A FETY STANDA R D C OMPLIES WIT H ASME PASE 2014 2019 Mac Tools ESB700A BARRE DE SUPPORT DE MOTEUR D UNE CAPACITÉ DE 700 LIVRES ...

Страница 12: ...ltérée modifiée ou en mauvais état ou si elle présente des pièces ou composantes lâches ou manquantes Ne pas utiliser ou modifier ce produit pour un usage autre que celui pour lequel il a été conçu sans consulter le représentant autorisé du manufacturier Ne pas dépasser la capacité nominale Cet outil n a pas été conçu pour soulever un moteur mais pour soutenir le moteur une fois soulevé par d autr...

Страница 13: ...nir à l écart jusqu à ce que nécessaire Puis localisez la meilleure position pour le deuxième crochet en J et installez le de la même manière Le deuxième crochet en J peut être installé dans la barre de transfert no 10 comme montrée dans le dessin de pièces si la barre de transfert est utilisée ou par le tube court soudé sur l adaptateur réglable de transfert no 11 si la barre de transfert n est p...

Страница 14: ...abricant Une liste des ateliers de réparation peut être obtenue du fabricant Le non respect de ces consignes d Inspection pourrait entraîner des blessures corporelles graves ou la mort et ou des dommages matériels AVERTISSEMENT AVERTISSEMENT MAC TOOLS GARANTIT À SES CLIENTS QUE LES OUTILS DE MARQUE MAC TOOLS SONT EXEMPTS DE DÉFAUTS DE MAIN D ŒUVRE ET DE MATÉRIAU Mac Tools réparera ou remplacera se...

Отзывы: