background image

MAD-VR60

3

www.madison-sound.com

POWER SUPPLIES

Battery operation

Open the battery compartment lid by pressing the two brackets (OPEN) at the same time. Remove the lid and 

insert 6 batteries (C/UM-2). Please observe the correct polarities when inserting the batteries.
Close the battery compartment by pushing in the two tabs of the lid into the corresponding recesses and flap it 

towards the device, until the brackets audibly snap in.

Important

:

If the device is operated exclusively with AC power or during non-use of more than one month, please remove the 

batteries in order to avoid any damage by leaking batteries.
Replace the batteries if the volume of the device becomes lower or the sound becomes distorted.

Battery safety precautions

Follow the battery manufacturer’s safety, usage and disposal instructions.
Only use batteries of the same type and size.
Insert the batteries observing the polarity (+/-). Failure to properly align the battery polarity can cause personal 

injury and/or property damage.
Do not mix battery types (e.g. alkaline, zinc carbon, rechargeable batteries) or exhausted and new batteries.
To avoid fire and explosion do not recharge normal batteries. Keep batteries away from children and pets.
We recommend the use of alkaline batteries for a longer lifetime of the batteries.

Mains operation

The device is designed for mains power supply of 220-240V~50/60Hz. Do not connect the device to any other 

power supply to avoid damage that is not covered by your warranty.
Connect the connector to the AC socket at the rear of the device. Make sure that it is completely inserted.
Insert the mains plug into a wall outlet.
Disconnect the power cord from the mains when not in use.

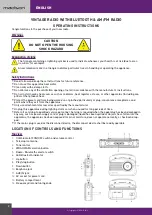
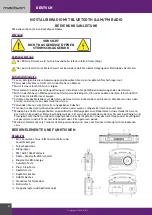
GENERAL OPERATING INSTRUCTIONS

ON/OFF

Switch the device on by turning the volume control clockwise until you overcome the point of resistance. Switch if 

off by turning the volume control counterclockwise until you overcome the point of resistance.

Volume control

Rotate the volume control to the left or the right.

Radio operation

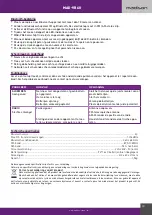
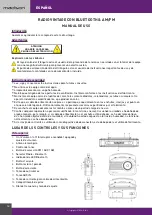
Set the function switch (5) to RADIO operation.
Press the FM or AM button to select the desired frequency band.
Advice for better reception:
FM: Fully extend the telescopic antenna and turn it for better reception
AM: The device has a built-in antenna. Change the position of the device if the reception is poor.

Frequency adjustment

Tune in the desired station by rotating the frequency scale. Rotating clockwise increases and rotating counterclo-

ckwise decreases the frequency.
The current adjusted frequency for the selected band can be read on the frequency scale.

AUX IN Function

You can listen to the music of your audio reader device (MP3 player, etc.). Connect a 3.5mm jack lead to your audio 

device and the LINE IN jack on the side of the radio. Select the desired music. Adjust the volume with the radio 

volume control.
When you don’t use the Aux IN function, please unplug the lead from the radio.

Tone control

Adjust the tone by rotating the Tone knob. Rotate it to the left to increase the basses or to the right to increase the 

treble.

Содержание MAD-VR60

Страница 1: ...ETOOTH en AM FM TUNER ALTAVOZ MULTI FUENTES con BLUETOOTH TUNER FM LECTOR CD y USB NAMIZNI ZVO NIK z BLUETOOTH FM SPREJEMNIKOM CD PREDVAJALNIKOM in USB INCINT AUDIO CU INTR RI MULTIPLE cu BLUETOOTH TU...

Страница 2: ...ng walked on or pinched particularly at plug convenience receptacles and point where they exit from the apparatus Only use attachments accessories specified by the manufacturer Unplug this apparatus d...

Страница 3: ...to avoid damage that is not covered by your warranty Connect the connector to the AC socket at the rear of the device Make sure that it is completely inserted Insert the mains plug into a wall outlet...

Страница 4: ...tteries inserted Volume is set too low Batteries are exhausted Batteries inserted incorrectly Connect the power cord correctly or insert batteries Adjust the volume Replace the batteries Change to the...

Страница 5: ...n particulier au niveau de la fiche des prises de courant et la sortie de l appareil Utilisez uniquement les pi ces accessoires sp cifi s par le fabricant D branchez cet appareil pendant les orages ou...

Страница 6: ...d alimentation pour viter des dommages non couverts par votre garantie Branchez le connecteur sur la prise secteur situ e l arri re de l appareil Assurez vous qu il est compl te ment ins r Ins rez la...

Страница 7: ...PROBLEME CAUSE POSSIBLE SOLUTION GENERALITES Pas de son Cordon d alimentation non connect ou pas de piles ins r es Le volume est r gl trop bas Les piles sont puis es Piles mal ins r es Branchez le cor...

Страница 8: ...Steckern Steckdosen und an den Stellen an denen sie aus dem Ger t austreten Verwenden Sie nur vom Hersteller angegebenes Zubeh r Trennen Sie das Ger t w hrend Gewitterst rmen oder wenn es l ngere Zeit...

Страница 9: ...t an eine andere Stromversorgung an um Sch den zu vermeiden die nicht von Ihrer Garantie abgedeckt werden Verbinden Sie den Stecker mit der Steckdose an der R ckseite des Ger ts Stellen Sie sicher das...

Страница 10: ...Sie sich bitte an Ihren Fachh ndler PROBLEM M GLICHE URSACHE L SUNG ALLGEMEINES Kein Ton Netzkabel nicht angeschlossen oder keine Batterien eingelegt Die Lautst rke ist zu schwach ein gestellt Batteri...

Страница 11: ...kan worden afgekneld met name bij de stekker stopcontacten en het punt waar ze uit het apparaat komen Gebruik alleen accessoires die zijn gespecificeerd door de fabrikant Ontkoppel dit apparaat tijden...

Страница 12: ...n op een andere stroomvoorziening om schade te voorkomen die niet wordt gedekt door uw garantie Sluit de connector aan op de AC aansluiting aan de achterkant van het apparaat Zorg ervoor dat deze voll...

Страница 13: ...zijn leeg Batterijen verkeerd geplaatst Sluit het netsnoer op de juiste manier aan of plaats batterijen Stel het volume in Vervang de batterijen Plaats de batterijen met de juiste polariteit RADIO Sl...

Страница 14: ...e que el cable de alimentaci n se pise o se pellizque especialmente en los enchufes clavijas y el punto en el que salen del aparato Utilice nicamente las piezas accesorios especificados por el fabrica...

Страница 15: ...n corriente de 220 240V 50 60Hz No conecte el equipo a una fuente de alimentaci n diferente para evitar da os no cubiertos por la garant a Conecte el conector a la toma de corriente situada detr s del...

Страница 16: ...GENERALIDADES No hay sonido Cable de alimentaci n no conectado o pilas mal insertadas El volumen est muy bajo Las pilas est n agotadas Pilas mal insertadas Conecte el cable de corriente correcta mente...

Страница 17: ...zlasti na vti ih vti nicah in na mestu kjer izstopajo iz aparata Uporabljajte samo priklju ke dodatke ki jih je dolo il proizvajalec Med nevihtami ali dalj im asom neuporabe naprave izklopite iz elekt...

Страница 18: ...ne pokriva Priklju ite priklju ek na AC vti nico na zadnji strani naprave Prepri ajte se da je popolnoma vstavljen Omre ni vti vstavite v elektri no vti nico Ko ga ne uporabljate iztaknite napajalni...

Страница 19: ...snost je nastavljena prenizko Baterije so prazne Baterije so vstavljene nepravilno Pravilno priklju ite napajalni kabel ali vstavite baterije Prilagodite glasnost Zamenjajte baterije Spremenite pravil...

Страница 20: ...ablul pentru a nu fi c lcat sau ag at n special la techer bornele de alimentare i locul de ie ire din aparat Utiliza i doar accesorii specificate de produc tor Deconecta i aparatul de la priz n timpul...

Страница 21: ...e alt tensiune pentru a evita deteriorarea deoarece in acest caz garantia este nula Conecta i conectorul la mufa AC din spatele dispozitivului Asigura i v c este introdus complet Introdce i cablul n p...

Страница 22: ...sunt desc rcate Bateriile sunt introduse gre it Conecta i cablul de alimentare sau intro duce i bateriile Regla i volumul nlocui i bateriile Introduce i bateriile cu polaritatea corect RADIO Recep ie...

Страница 23: ...del MAD VR60 Conforms with the essential requirements of RED 2014 53 EU ROHS 2011 65 EU ERP 2009 125 EU Based on the following specifications applied EN 60065 2014 EN 62479 2010 ETSI EN 301 489 1 V2 1...

Страница 24: ...conformes aux exigences essentielles et aux autres dispositions pertinentes des directives RED 2014 53 EU ROHS 2011 65 EU ERP 2009 125 EU Les produits sont en conformit avec les normes et ou autres do...

Отзывы: