background image

4

Mackie TT24 Tech Note 

Wireless Remote Control

4.  Install the remote desktop client on your client/laptop computer:


The client software is installed by default on computers running Windows 
XP Professional, but you must install it manually on computers with other 
operating systems. The client software is an XP feature, but it is backwards 
compatible. For example, you can use an XP CD to install this feature on 
Win 2000, ME, 98 or 95 systems as follows:

a.  If you have a Windows XP CD, insert it into your client computer’s 

CD-ROM drive. When the Welcome page appears, click “Perform 
additional tasks,” and then click “Setup Remote Desktop Connection.” 
When the installation wizard starts, follow the directions that appear 
on your screen.

or:

b.  If you do not have the Windows XP CD, download the Client installer 

from the following link and follow the on-screen instructions:


www.microsoft.com/windowsxp/downloads/tools/rdclientdl.mspx

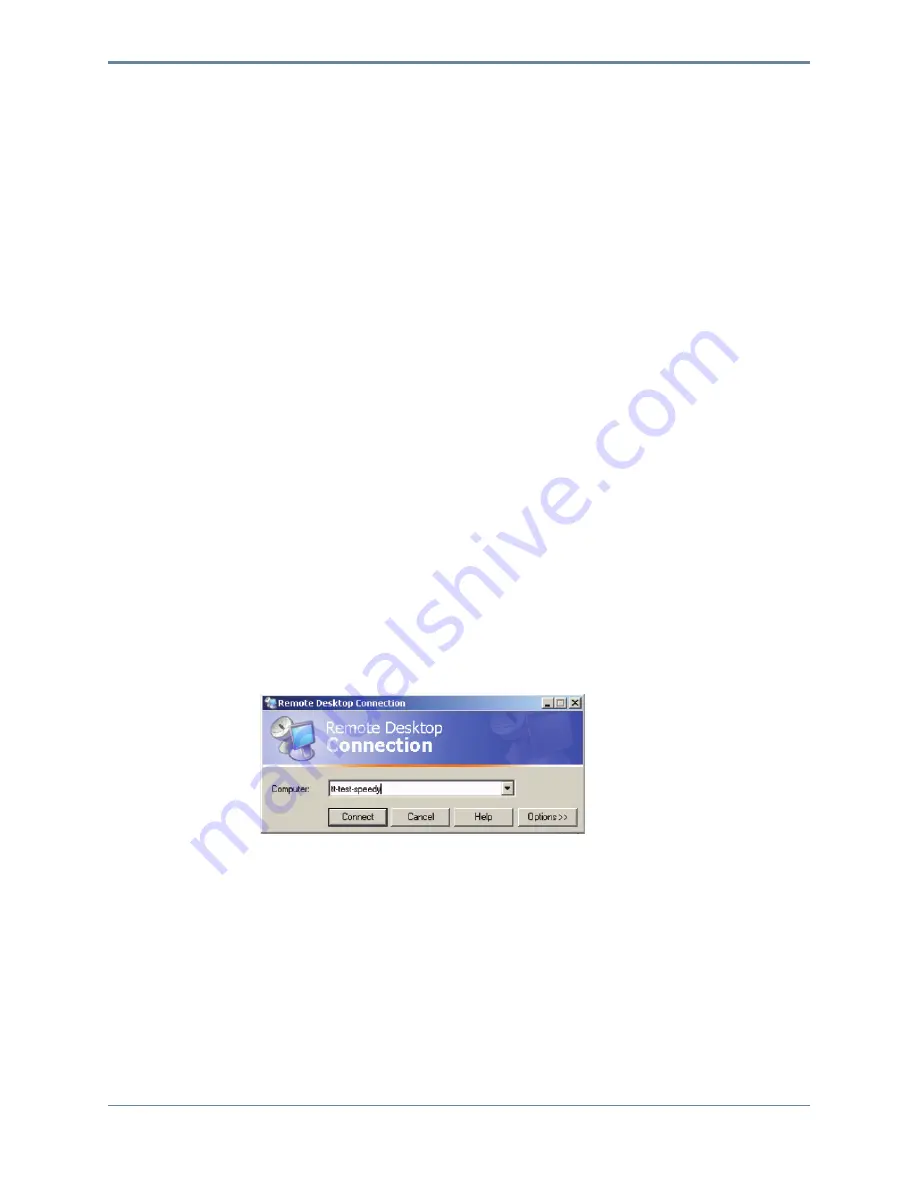
5.  On the client/laptop computer,  begin a remote desktop session:

a.  Open Remote Desktop Connection. (Click Start, point to Programs 

or All Programs, point to Accessories, point to Communications, and 
then click Remote Desktop Connection.)

b.  In the “Computer” fi eld, type the computer name of your host 

computer. (You wrote this down in step 3.b, remember?)

c.  Click Connect. The “Log On to Windows” dialog box appears on your 

client computer. 

d.  Enter your host computer’s user name, password, and domain (if 

required), and then click OK. The remote desktop window will open 
on your client computer, and you will see the desktop settings, 
fi les, and programs of your host computer. Using remote desktop to 
control a computer is just like using that computer directly; you can 
do anything remotely, that you could do locally.

Содержание TT24

Страница 1: ......

Страница 2: ...mally or has been dropped 15 This mixer has been designed with Class I construction and must be connected to a mains socket outlet with a protective earthing connection the third grounding prong 16 This mixer has been equipped with an all pole rocker style AC mains power switch This switch is located on the rear panel and should remain readily accessible to the user 17 This apparatus does not exce...

Страница 3: ...er 2 TT24 Interface 11 2 1 Channel Strip 11 2 2 Banks 12 2 3 V Pot Control Area 14 2 4 QuickMix Area 14 2 5 Snapshots 16 2 6 Flex Groups and Master 16 2 7 Matrix Plus 17 2 8 Utility Area 18 2 9 TT Control Software 18 Chapter 3 Quickstart Tutorial 19 3 1 Connect Amplifier Speakers 19 3 2 Connect a Mic 20 3 3 Connect a CD Tape Device 23 3 4 Aux Functions 25 3 5 Effects 27 Chapter 4 TT24 Specificatio...

Страница 4: ...Mackie TT24 Digital Live Console Quickstart Guide iv Print Version Part No 0012118 Rev C 7 04 Web Version Part No SW0134 Rev C 7 04 2004 LOUD Technologies Inc All Rights Reserved ...

Страница 5: ...We have used our extensive expertise and experience de signing analog mixers to produce a powerful easy to use digital console for a wide range of applications and budgets theaters and houses of worship permanent concert installations professional live music touring companies 1 2 Summary of Features 24 bit 96 kHz mixing console designed for live applications 24 mic line inputs with 4 band EQ comp ...

Страница 6: ...ors except for the Group Matrix outputs which are shown in Figure 1 2 Figure 1 1 Analog I O Figure 1 2 Group Matrix connectors CD TAPE A TALKBACK OUT IN LINE INSERT LINE INSERT LINE INSERT LINE INSERT LINE INSERT LINE INSERT LINE INSERT LINE INSERT LINE INSERT LINE INSERT LINE INSERT LINE INSERT LINE INSERT LINE INSERT LINE INSERT 1 2 3 4 5 6 7 8 9 10 11 12 13 14 15 CTR MONO RIGHT LEFT MONITOR MAI...

Страница 7: ...ut Stereo TRS Digital I O The rear panel digital I O Figure 1 3 consists of the following connectors and features ADAT optical 24 channels 44 1 48 kHz 12 channels 88 2 96 kHz Stereo AES EBU or S PDIF with switchable input sample rate conversion and output dithering Word Clock MIDI USB connection for TT control software Two expansion cards slots offer several options OPT24t expands console for 24 c...

Страница 8: ... sound 24 Mic Line Inputs Polarity invert Variable High Pass Filter Gate Expander Compressor Limiter 4 band parametric EQ Stereo linking OUT OUT IN IN OUT IN A B C A B C AES EBU MIDI ADAT DIGITAL I O USB POWER SPDIF EXPANSION CARD A CARD B OUT IN WORD CLOCK IN OUT Power On Off MIDI In Out USB Input Word Clock In Out ADAT Optical I O connectors Expansion card slots AES EBU In Out S PDIF In Out AC P...

Страница 9: ...ll filters L R Mono or LCR modes of operation 12 Aux Sends Compressor Limiter 4 band parametric EQ with dual kill filters Stereo linking 8 Flex Groups with 8 Assignable DSP Blocks Compressor Limiter 4 band parametric EQ Mono Stereo LCR and VCA modes of operation 8 Matrix Outputs Each output can have 600 ms delay 4 Internal Stereo Effects Reverb Gated Reverb Mono Stereo Ping Pong Delay Chorus Flang...

Страница 10: ...zation i e press the ANLG bank button Touchscreen and console areas are represented by capital letters in plain type i e press the PAN button in the V POT CONTROL area Activate pertains to switches buttons that toggle between two values and means press the button until it lights Deactivate pertains to switches buttons that toggle between two values and means press the button until it is not lit To...

Страница 11: ...n The following sections summarize the TT24 s major functional categories 2 1 Channel Strip Channel strip means one of the 24 vertical areas bounded at the bottom by a fader and at the top by the LINE mic line level switch Each channel strip can control one input at a time from one of four banks The top section of each channel strip Figure 2 1 has analog controls for mic line input switching 48 V ...

Страница 12: ...GITAL There are 24 digital inputs from three ADAT optical connectors on the rear panel 44 1 48 kHz At 96 kHz there are 12 digital inputs from the three built in connectors another 12 are available from the optional ADAT I O expansion card OL SIG 1 GAIN U 30 40 60 MUTE LINE 48V V Pot knob 48 V phantom power button Line Mic level button Gain knob Overload LED Signal LED Mute button 1 25 AUX SEND 1 L...

Страница 13: ...Aux and Master sections RETURNS MASTER ANALOG DIGITAL GROUP ASSIGN SELECT MASTER V POT CONTROL AUX SENDS FX1 FX2 FX4 FX3 ANLG MUTE DGTL 1 RTNS 5 MSTR SELECT PFL SOLO MUTE 2 6 SELECT SOLO MUTE 3 7 SELECT SOLO MUTE 4 8 SELECT SOLO CTR MONO L R SELECT PAN HPF AUX MODE 2 4 6 8 10 12 CLEAR SOLO TRIM METERS AUX PAN 1 3 5 7 9 11 Group Assign Select buttons Master Center Mono Assign button Master Left Rig...

Страница 14: ...e button on the console and effectively turns the TT24 into a powerful dedicated monitor mixer by providing aux mixing on the faders In this mode the 24 channel faders act as channel aux sends and the 4 group faders act as auxiliary master sends 2 4 QuickMix Area The upper right of the console below the 5 5 inch Touchscreen is called the QuickMix area Figure 2 3 It consists of 12 push button rotar...

Страница 15: ...uickMix and Touchscreen The four QuickMix buttons on the right access configuration mixing tasks AUX MSTR puts all 12 Aux master sends on the 12 knobs SNAP provides detailed control of the 99 snapshots including naming lock ing and filtering All elements can be filtered out of a snapshot For example filtering out all but mute will provide mute groups via snapshots EFX accesses parameters and setup...

Страница 16: ... fader on the console surface The four Group strips control either Groups 1 4 or 5 8 The currently selected Group bank is indicated by the GROUP ASSIGN SELECT buttons Changing the Group Bank Press any of the GROUP ASSIGN SELECT buttons to select that Group bank The GROUP ASSIGN SELECT buttons illuminate 1 4 or 5 8 and cause the faders and buttons to snap to their previous Group bank settings Group...

Страница 17: ...er How ever Matrix Plus provides the unique ability to patch other signals into the ma trix Press the desired Group QuickMix knob to display the screen in the right side of Figure 2 4 to select the desired signals Figure 2 4 Matrix screens The available matrix input signals are Analog inputs 1 24 pre post fader Digital inputs 25 48 pre post fader Line inputs 1 8 pre post fader Internal effects ret...

Страница 18: ...de capability The TT24 connects to the PC via a USB cable six ft cable supplied The min imum PC requirements are summarized below Table 2 1 Minimum PC Requirements The main screens of the TT control software mirror and elaborate the Touch screens The TT control screens can be set to operate independently or to track the Touchscreen When they are independent two users may control the TT24 one from ...

Страница 19: ...user guide Chapter 2 TT24 Interface provides a good overview of the TT24 s important functional entities It may also be helpful to refer to Appendix A TT24 Configurations and Block Diagrams to see how several useful complete systems are interconnected 3 1 Connect Amplifier Speakers 1 Plug in a left right pair of amps speakers into the MAINS OUT LEFT and RIGHT XLR connectors Figure 3 1 2 Connect an...

Страница 20: ... 4 Set the 48V switch to the down position if the mic uses phantom power set it to the up position otherwise Set the channel gain 5 Activate the PFL button right of Figure 3 2 6 Activate channel 1 s SOLO button above fader to set gain 7 Provide a representative signal to the mic watch the meters to the right of the Touchscreen and listen in phones the phones level is in the UTILITY area The level ...

Страница 21: ...GN area and acti vate channel 1 s SELECT button The mic is now routed to Group 1 12 Press and hold the L R button in the GROUP ASSIGN area and activate Group 1 s SELECT button Group 1 is now assigned to L R Use the channel Group and Master fader to listen to the mic signal in the L R speakers Figure 3 3 Aux Group and Master areas RETURNS MASTER ANALOG DIGITAL GROUP ASSIGN SELECT MASTER V POT CONTR...

Страница 22: ...R QuickMix button Figure 3 4 16 Adjust Aux 1 s master level with the corresponding QuickMix knob see the Aux Master screen in Figure 3 5 You should hear your mic in the monitor speaker attached to Aux 1 Figure 3 4 QuickMix area Figure 3 5 Aux Master screen DYN EQ GRP AUX FAT SETUP CTRL COPY HELP UTIL PASTE STORE RECALL EFX SNAP AUX MSTR MATRIX SNAPSHOTS Utility button Aux Master button AUX 1 Maste...

Страница 23: ...ection illustrates how to connect a CD tape device to the dedicated CD TAPE A or B connectors A RCA B TRS and to channels 23 24 to demon strate stereo linking and channel strip processing Connect CD to CD Tape input 1 Connect the CD player into CD TAPE A or B Figure 3 1 2 Press the UTIL button Figure 3 4 Figure 3 6 Stereo input assign 3 Touch STEREO INPUT ASSIGN on the Touchscreen Figure 3 6 4 Tou...

Страница 24: ...d be between 7 and 10 dBFS 9 Repeat steps 7 and 8 for the other channel in the linked pair NOTE Stereo linking always operates on a consecutive odd even channel pair The odd channel s parameters are copied to the even channel except Pan which is inversely linked i e hard left on odd channel translates to hard right on even channel Adjust EQ Dynamics and channel routing 1 With channel 23 and 24 sel...

Страница 25: ...tion discusses how to setup route and mix the Aux buses Each of the 12 Aux masters have their own EQ and compressor limiter 1 Display the Aux masters by pressing the AUX MSTR button Figure 3 4 to the right of the QuickMix knobs 2 Select Aux master 1 by pressing the top left QuickMix knob Figure 3 7 left shows Aux 1 selected 3 Touch the EQ grid or press the EQ QuickMix button to display the EQ outp...

Страница 26: ... bandwidth narrows Turn the knob to adjust the frequency The channel aux levels are set with the channel V Pots by pressing the desired Aux number in the V POT CONTROL area All 12 Aux levels for a selected channel can be set by pressing the GRP AUX QuickMix button Aux Routing Examples To send mic channel 1 to all monitors 1 Press channel 1 s SELECT button 2 Press the GRP AUX QuickMix button 3 Adju...

Страница 27: ... ANLG bank button 2 Press AUX SENDS 9 in the V POT CONTROL area 3 Turn channel 1 s V Pot to 3 00 to send channel 1 to Aux 9 4 Press the EFX button in the QuickMix area The INTERNAL effects screen displays on the Touchscreen left of Figure 3 8 Figure 3 8 Internal Effects and Reverb screens 5 Touch the Reverb s Edit button to edit its parameters on its own screen right of Figure 3 8 6 Touch EFX IN t...

Страница 28: ...pedance Equivalent Input Noise EIN 128 dBu Residual Noise 103 dBu Mic In to Insert Out 0 dB gain Common Mode Rejection Ratio CMRR 60 dB 1 kHz gain maximum Mic In to Insert Out Rise Time 3 µs Slew Rate 3 6 V µs Input Gain Control Range Mic In 0 dB to 60 dB Line In 20 dB to 40 dB Phantom Power 48 VDC Input Impedance Mic Input 2 kΩ balanced Line Input 10 kΩ Aux Returns CD Tape A and B 10 kΩ Maximum I...

Страница 29: ...ut 0 1 dB 10 Hz to 20 kHz 44 1 kHz 0 2 dB 10 Hz to 40 kHz 96 kHz 0 0 5 dB 14 Hz to 27 5 kHz 96 kHz Distortion THD N Mic Input to Main Output 0 02 4 dBu input 44 1 kHz 10 Hz to 20 kHz 0 03 4 dBu input 96 kHz 10 Hz to 20 kHz AES Input with SRC to AES Output 0 0002 10 dBFS input 44 1 kHz 10 Hz to 22 05 kHz 0 0006 10 dBFS input 96 kHz 10 Hz to 48 kHz Signal to Noise Ratio 78 dBu ref 4 dBu Mic In to Ma...

Страница 30: ...m Level 0 4 V p p Duty Cycle 50 Impedance 75 Ω External Word Clock Lock Range 44 1 kHz 42 5 kHz 45 8 kHz 48 kHz 46 4 kHz 49 4 kHz 88 2 kHz 85 0 kHz 90 7 kHz 96 kHz 92 2 kHz 98 2 kHz Word Clock Output Open Circuit Level 5 V p p Duty Cycle 50 Impedance 75 Ω AES Input IEC 60958 3 Sample Rate with SRC 32 kHz 96 kHz Sample Rate without SRC System sample rate exactly Maximum Level 0 4 V p p Impedance 11...

Страница 31: ...Input Sample Rate with SRC 32 kHz 96 kHz Sample Rate without SRC System sample rate exactly Minimum Level 0 4 V p p Impedance 75 Ω S PDIF Output Sample Rate System rate or switchable half system rate Level into 75 Ω 0 5 V p p Impedance 75 Ω transformer coupled General AC Power Requirements 100 240 VAC 50 60 Hz auto switching Fuse 6 A 250 V Operating Temperature 10ºC 40ºC 50ºF 104ºF Physical Dimens...

Страница 32: ... Stereo Power Amplifier ONYX 800R TT24 Main Outs L R Mono Aux Outs Floor Monitors Stereo Power Amplifier In Ear Monitor System Left Right 24 Built in Optical Inputs Expansion Cards 1 UFX2 24 Built in Mic Line Inputs TT24 Aux Outs 1 12 stereo linked In Ear Monitor System mono monitor output headphones and monitor for engineer Eight additional mono monitor mixes from Matrix Plus ...

Страница 33: ...X 800R Mic Preamps ONYX 800R Mic Preamps p TT24 TT24 Main Outs L R Mono Aux Outs Floor Monitors Stereo Power Amplifier In Ear Monitor System Mono Power Amplifier Left Center Right 24 Built in Expansion Cards 1 U100 per TT24 1 UFX2 per TT24 24 Built in Mic Line Inputs TT24 Three way stereo system from Lake Technology s LP48 card Microphones ophones ONYX 800R 24 Built in Optical Inputs Two additiona...

Страница 34: ...ip Soft Clip Soft Clip ADAT OUT x3 Analog Ch13 Pre Processing Analog Ch13 Post Processing ADAT 13 Trim 4 Band Para EQ Comp Mute Fader 4 Band Para EQ Mute Comp Solo LR Assgn Stereo Group Group 1 Mono Group Matrix Out 1 Group Matrix Out 2 8 Aux Send 1 Odd Aux Send 3 5 7 9 11 Grp 1 Mono Group 1 as Stereo Group 2 8 as Stereo Grp 1 L Grp 1 R Grp 1 Mono Group 1 as Mono Group 2 8 as Mono Grp 1 Type Grp 2...

Страница 35: ... Aux Send 1 Odd Aux Send 3 5 7 9 11 Group 1 as LCR Group 2 8 as LCR Grp 1 Mono Group 1 as Stereo Group 2 8 as Stereo Grp 1 L Grp 1 R Grp 1 L Grp 1 C Grp 1 R Grp 1 Mono Group 1 as Mono Group 2 8 as Mono Grp 1 Type Grp 2 8 Note A maximum of 8 channels of processing can be assigned at once across all groups Mono 1 channel Stereo 2 channels LCR 3 channels Assignable Processing Assignable Processing As...

Страница 36: ......

Страница 37: ... ...

Страница 38: ...g if exposed to sufficiently intense noise for a period of time The U S Government s Occupational Safety and Health Administration OSHA has specified the permissible noise level exposures shown in the following chart According to OSHA any exposure in excess of these permissible limits could result in some hearing loss To ensure against potentially danger ous exposure to high sound pressure levels it...

Страница 39: ... 16 3 4 6 SNAP 17 3 4 7 EFX 17 3 4 8 MATRIX 17 3 4 9 Engineer s Utility 17 3 4 10 Main Meters and RUDE SOLO LED 17 3 5 UTILITY Area 18 3 5 1 TALKBACK 18 3 5 2 MONITOR 18 3 5 3 PHONES 18 3 6 Snapshots 18 3 7 Group and Master Controls 19 3 7 1 Changing the Group Bank 19 3 7 2 Group Assignment 19 3 7 3 Group Parameter Control 19 3 7 4 Mute Groups 19 3 8 Solo Area 19 3 8 1 CLEAR SOLO 19 3 8 2 PFL 19 C...

Страница 40: ...our Band EQ 39 6 5 2 Kill Filters 39 6 6 31 Band Equalizer 39 6 7 Dynamics 40 6 7 1 Compressor 40 6 7 2 Gate Expander 41 6 8 Snapshots 42 6 8 1 FILTER EDIT 42 6 8 2 TITLE EDIT 42 6 8 1 PROTECT 42 6 8 2 CLEAR 43 6 8 3 STORE 43 6 8 4 RECALL 43 6 8 5 Snapshot Filtering 43 6 9 Aux Master 43 6 10 Groups Auxes 44 6 10 1 GROUPS 44 6 10 2 AUXES 44 6 11 Matrix Mix 44 6 11 1 Delay 44 6 12 Effects 45 6 13 Se...

Страница 41: ... of Features 24 bit 96 kHz mixing console designed for live applications 24 mic line inputs with 4 band EQ comp gate HPF polarity invert can be stereo linked Eight line inputs with 4 band EQ can be stereo linked Instant recall of 99 snapshots with filtering Rear panel connections 36x28 analog I O 24 Mic Line Inputs 8 Line Inputs 4 Tape Inputs x 8 Matrix Outputs 3 Main Outputs 3 Monitor Outputs 12 A...

Страница 42: ...ut ton in the V POT CONTROL area Activate pertains to switches buttons that toggle between two values and means press the button until it lights Deactivate pertains to switches buttons that toggle between two values and means press the button until it is not lit ADC means analog to digital converter DAC means digital to analog converter Intercancel means that pushing one button simul taneously sel...

Страница 43: ...LEFT and RIGHT MAINS OUT Use the channel Group and Master fader to listen to the mic signal in the speakers connected to MAINS OUT OL SIG 1 GAIN U 20 30 40 60 1 25 AUX SEND 1 LINE INPUT SOLO SELECT MUTE LINE 48V V Pot knob 48 V phantom power button Mic Line level button Gain knob Overload LED Signal LED Select button Solo button Channel fader Mute button Bank Channel description RETURNS MASTER ANA...

Страница 44: ... 1 3 5 7 9 11 Group Assign Select buttons Master Center Mono Assign button Master Left Right Assign button Master Select button Group Select buttons V Pot Control Aux Sends Bank Select Clear Solo and PFL buttons Group Faders p Group Mute buttons Master Fader Group Solo buttons Aux Mode AUX AUX Figure 2 3 Aux Group and Master areas DYN EQ GRP AUX FAT SETUP CTRL COPY HELP UTIL PASTE STORE RECALL EFX...

Страница 45: ... Touch STEREO INPUT ASSIGN on the Touch screen Figure 2 6 4 Touch TAPE CD A or TAPE CD B in the INPUT SELECTION area Figure 2 6 5 Select L R in the GRP ASSIGN area to route the stereo source to the LEFT and RIGHT MAINS outputs 6 Adjust MUTE and SOLO from the Touchscreen 7 Adjust the stereo input fader to desired level from its QuickMix knob Connect CD to channels 23 and 24 1 Move the CD to the cha...

Страница 46: ...he QuickMix knobs 10 Push the QuickMix knobs to toggle each Aux send between pre and post fader 2 4 Aux Functions This section discusses how to setup route and mix the Aux buses Each of the 12 Aux masters have their own EQ and compressor limiter 1 Press the AUX MSTR button Figure 2 4 to display the AUX MASTER Touchscreen 2 Select Aux master 1 by pressing the top left Quick Mix knob Figure 2 9 righ...

Страница 47: ...each use one of the fol lowing effects reverb reverb through gate mono stereo ping pong delay chorus and flange The default effect sends are Aux sends 9 12 but any Aux or Matrix sends can be used The effect returns are on the Returns bank 1 Press the ANLG bank button 2 Press AUX SENDS 9 in the V POT CONTROL area 3 Turn channel 1 s V Pot to 3 00 to set channel 1 s level to Aux 9 4 Press the EFX Quic...

Страница 48: ...Ds in a ring from 7 00 to 5 00 They light clockwise as the signal level increases unless otherwise noted The V Pot also has a bottom red LED used to indicate different functions including meter clip default settings on off etc The 12 00 LED is also sometimes used to indicate a nominal setting i e pan set to center Each function s specific behavior is discussed in V Pot Control Area on page 14 OL SI...

Страница 49: ...is rule is panning The pans are inversely related between linked channels Panning one channel fully left pans the other fully right panning one channel to 10 00 pans the other to 2 00 True stereo compression applies to linked channels so the summed signal is delivered to the stereo compressor 3 1 9 SOLO Press the SOLO button to solo the channel This yel low backlit button lights when the channel i...

Страница 50: ...ble only to the ANALOG bank is used to adjust the input level just after the ADC and channel meter and before the channel DSP This allows setting the analog gain for the optimal A D conversion while still having an adjustable input level to the chan nel DSP This also provides a method to lower the level of all channel outputs and sends at once Digital Trim is before the Aux and Group sends in the ...

Страница 51: ...han nel Aux sends and the four Group faders as Aux masters Select an AUX SENDS button it flashes and each channel fader is then used to control that channel s Aux send level In AUX MODE the Group faders represent Aux Send masters 1 12 in three banks Group Fader 1 Group Fader 2 Group Fader 3 Group Fader 4 AUX SENDS 1 4 1 2 3 4 AUX SENDS 5 8 5 6 7 8 AUX SENDS 9 12 9 10 11 12 Table 3 1 Group Faders co...

Страница 52: ...has the Gate Expander and Compressor settings and their associated meters Touch the Gate or Dynam ics graphs to open their dedicated Touchscreens although most parame ters can be accessed from the DYNAMICS Touch screen See Dynamics on page 40 for complete details 3 4 4 GRP AUX Press the GRP AUX button to display the GRPS AUX ES Touchscreen Touch a GROUPS assignment button to assign the selected ch...

Страница 53: ...o restore its default value For example press and hold CTRL and turn a Pan V Pot to return it to its center position or turn an EQ Gain knob to return the setting to 0 Multiple Solo Press and hold the CTRL button to select multiple SOLO buttons This works even when EXCLUSIVE SOLO mode is active in the GENERAL SETUP Touchscreen see page 46 Special TT Control Screens CTRL METERS CTRL BANK ANLG DGTL ...

Страница 54: ...l 3 6 Snapshots The TT24 includes a robust snapshot feature that cap tures and restores the state of the console The console snapshot controls are in the top right of the console beside the QuickMix buttons Figure 3 5 These fast and intuitive surface controls can store recall up to 99 snapshots See Appendix B Snapshot Parameters Saved for a list of all the TT24 parameters saved in a snapshot More ...

Страница 55: ...or mute groups The Mute groups on the TT24 use the group assign area of the mixer s control surface to assign channels to a mute group as well as to activate deactivate mute groups To assign input channels to a Mute Group Press and hold the CTRL button in the QuickMix area and also press any one of the GROUP ASSIGN 1 8 buttons When this is done the Group Assign button il luminates and the Group Mu...

Страница 56: ...t Use the INSERT jacks to connect external serial effects devices i e com pressors equalizers to an individual channel These connectors can also be used as post gain control unbal anced channel direct outputs The INSERT points are after the GAIN control and just before the ADC The send tip is low impedance and the return ring is high impedance allowing con nection to virtually any device Cables fo...

Страница 57: ...SOURCE Touch screen see page 49 This allows cueing intermission music through the MONITOR or PHONES outputs The CD TAPE A inputs can also be routed to the MAINS OUT from the STEREO INPUT Touchscreen This allows playing music between sets over the main PA speakers When engaged the QuickMix Area pro vides input level adjustment for CD TAPE A on a rotary encoder WARNING Selecting L R in the STEREO IN...

Страница 58: ...12 The optional ADAT I O Expansion Card provides ad ditional Toslink connectors Expansion INPUTS A C Expansion OUTPUTS A C for channels 13 24 when operating at 88 2 96 kHz The following table summariz es the channels allocated under each sample rate with and without the expansion card 44 1 48 kHz 88 2 96 kHz INPUT A 1 8 1 4 INPUT B 9 16 5 8 INPUT C 17 24 9 12 OUTPUT A 1 8 1 4 OUTPUT B 9 16 5 8 OUT...

Страница 59: ...ock Use 75 Ω coaxial cable to connect a word clock signal to WORD CLOCK IN WORD CLOCK OUT is a BNC connector that produc es a word clock signal at the TT24 s current sample rate Use this connector to transmit the word clock to other devices when the TT24 is operating as the system s master word clock 4 2 5 MIDI IN OUT MIDI IN OUT are standard 5 pin DIN connectors to connect to other MIDI devices M...

Страница 60: ...inde pendently by pressing the LINK button in the Master OVERVIEW Touchscreen When unlinked the MASTER fader controls the LEFT and RIGHT outputs and the C Mono fader channel 24 on the MASTERS bank con trols the Center output which can also be controlled on the Master OVERVIEW Touchscreen When linked all processing is linked and the MASTER fader controls all levels A relative offset between the LEF...

Страница 61: ...screen 5 3 2 Compressor The Master Aux Send compressors operate identically to the channel compressors If a pair of Aux sends is linked their compressors are also linked adjusting one aux s compressor parameters also adjusts those of the other aux The compressor for the selected Aux Send Master is displayed from the AUX MASTER and the Aux OVER VIEW Touchscreens Its settings are adjusted on the Aux...

Страница 62: ...VCA faders The maximum gain from summation is 10 dB The VCA group fader has MUTE SOLO and SELECT buttons When the VCA Group is muted or soloed the channels assigned to the VCA group are also muted or soloed The channel s MUTE and SOLO buttons blink and the VCA Group s MUTE and SOLO buttons are lit solid 5 4 2 Group DSP Allocation Mono stereo and LCR groups can access DSP but VCA groups cannot Eigh...

Страница 63: ...adjusted from the EFX Touchscreens accessed by pressing the EFX button or from their associated returns OVERVIEW Touchscreens Each processor can utilize one of the following effects Reverb Mono Delay Stereo Delay Ping Pong Delay Chorus or Flange Each effect has a post effect EQ with high and low shelf filter and one parametric mid band filter The internal effects can be fed from any of the Aux Sends...

Страница 64: ...S to 1 dBFS 0 2 dBFS steps 60 dBFS Range 100 dB to 1 dB 0 5 dB steps 100 dB Ratio when Expander enabled 1 20 to 1 1 scaled steps 1 20 Attack 0 1 ms to 2500 ms scaled steps 0 1 ms Release 10 ms to 2500 ms scaled steps 100 ms Hold 0 ms to 2500 ms scaled steps 0 ms Gate On Off On or Off Off Mode Gate or Expander Gate Compressor Analog 1 24 Aux Sends 1 12 Assignable Bus DSP L R C Mono Threshold 60 dBF...

Страница 65: ... R C Mono Gain 1 15 dB to 15 dB 0 1 dB steps 0 dB Freq 1 20 Hz to 20 kHz scaled steps 80 Hz Gain 2 15 dB to 15 dB 0 1 dB steps 0 dB Freq 2 20 Hz to 20 kHz scaled steps 500 Hz Bandwidth 2 2 octaves to 1 30 octave scaled steps 1 2 Gain 3 15 dB to 15 dB 0 1 dB steps 0 dB Freq 3 20 Hz to 20 kHz scaled steps 2 kHz Bandwidth 3 2 octaves to 1 30 octave scaled steps 1 2 Gain 4 15 dB to 15 dB 0 1 dB steps ...

Страница 66: ...0 dB Mid Frequency 20 Hz 20 kHz scaled steps 2 kHz Mid Bandwidth 2 octaves to 1 30 octave scaled steps 1 2 High Shelf Gain 15 dB to 15 dB 0 1 dB steps 0 dB Gated Reverb Size 3 40 m 1 m steps 10 m Pre Delay 0 300 ms 1 ms steps 0 ms Diffusion 0 10 1 steps 5 Roll Off Flat to 500 Hz scaled steps Flat Type Hall Plate Random Reverse Hall Damping 0 10 1 steps 5 Roll Off Flat to 500 Hz scaled steps Flat E...

Страница 67: ...y Delay 0 1600 ms scaled steps 250 ms Feedback 0 to 100 1 steps 20 Damping Flat to 500 Hz scaled steps Flat EQ On Off On Off Off Low Shelf Gain 15 dB to 15 dB 0 1 dB steps 0 dB Mid Gain 15 dB to 15 dB 0 1 dB steps 0 dB Mid Frequency 20 Hz 20 kHz scaled steps 2 kHz Mid Bandwidth 2 octaves to 1 30 octave scaled steps 1 2 High Shelf Gain 15 dB to 15 dB 0 1 dB steps 0 dB Stereo Delay Delay Left 0 1600...

Страница 68: ... 3 ms Delay 0 100 ms 1 ms steps 0 ms Thicken 0 1 2 3 1 Speed 0 05 5 Hz scaled steps 1 Hz Waveform Sine Triangle Random Sine EQ On Off On Off Off Low Shelf Gain 15 dB to 15 dB 0 1 dB steps 0 dB Mid Gain 15 dB to 15 dB 0 1 dB steps 0 dB Mid Frequency 20 Hz 20 kHz scaled steps 2 kHz Mid Bandwidth 2 octaves to 1 30 octave scaled steps 1 2 High Shelf Gain 15 dB to 15 dB 0 1 dB steps 0 dB Flange Depth 0...

Страница 69: ...usses the general conventions for both interfaces Since the TT control software screens mirror and elabo rate the Touchscreens they will not be discussed except to define their functional differences In both the Touchscreen and TT control the Ctrl key has a useful function Press and hold the Ctrl key and adjust any TT control parameter to restore its default value For example press and hold Ctrl an...

Страница 70: ...ide Click on these arrows or press the console up down arrow keys to increment decrement through the list without opening the menu 6 1 4 TT Control Graphs Graphs with numbers or letters in small diamonds indicate that they can be adjusted by clicking holding and dragging the points the EQ GATE and Compressor graphs in Figure 6 1 In the EQ graph each point behaves according to its EQ type Since Ban...

Страница 71: ...ted channel or function For example the Analog and Effect Return OVERVIEW screens are different The currently se lected channel function appears in the upper left of the Touchscreen Mtx C in Figure 6 3 Up and down ar rows appear on either side of the selected channel that can be touched to increment or decrement the selected channel Pressing the up down QuickMix arrows also increments decrements t...

Страница 72: ...igital Figure 6 5 Digital OVERVIEW GROUP AUX ASSIGNMENTS The AUXES area displays the selected channel s as signments level settings pan settings if Auxes are ste reo linked and pre post fader status blank POST The GROUP ASSIGNMENTS area displays the selected channel s group assignments Touch anywhere in the AUXES area to open the GRPS AUXES Touchscreen see page 43 LINK If a channel is listed below...

Страница 73: ...Touch the arrows to toggle the processor order Touch the EQ IN COMP IN buttons to toggle their processors in out LINK If a channel is listed below LINK this Aux has been stereo linked with the selected Aux 6 3 6 Group Figure 6 10 Group OVERVIEW GRP DSP ENABLE DISABLE This button enables disables the group DSP Use this button in conjunction with the GRP DSP AVAILABLE meter to conserve DSP for where...

Страница 74: ... eight additional Line Inputs and eight Flex Groups can each access a four band EQ The four bands can be configured in two ways Bands 1 4 are identical with standard parametric controls Gain Frequency and Q Bands 2 and 3 are standard parametric filters while bands 1 and 4 can be individually set to be low and high shelf filters respectively This configuration is common on many analog consoles The enti...

Страница 75: ... 2 Each state increases in gain reduction and decreases narrows the bandwidth The filters default to the off setting Pressing and holding CTRL while adjusting the kill filter QuickMix knob resets the kill filter to the off position The kill filter setting is displayed beneath its frequency field Table 6 2 Kill Filter States Off State 1 State 2 State 3 Gain Reduction dB 0 6 12 18 Bandwidth octaves N A 1...

Страница 76: ...ol varies the time the compressor takes to begin gain reduction after the signal exceeds the threshold The ATK time range is 1 300 ms and the in crements are scaled such that the faster attack settings have finer adjustments The default setting is 15 ms Release The REL controls the time the compressor takes to stop applying gain reduction after the signal decreases below the threshold The REL time ...

Страница 77: ...ction begins HOLD is adjustable in the range 0 5 s the default is 0 s Attack The ATK control adjusts the time for the gate to open and pass the signal through once the signal exceeds the threshold after reduction has occurred ATK is adjust able in the range 1 30 ms ATK is scaled such that the faster settings can have finer adjustments The default ATK is 1 ms Release The REL control adjusts the time...

Страница 78: ... recalled Additionally internal EFX and individual input and output channels can be filtered out of snapshot recall as well through the channel filtering section on the filter edit screen Note All filter settings apply to an individual snapshot Figure 6 19 SNAPSHOTS Channel Filtering Touchscreen 6 8 2 TITLE EDIT Press the TITLE EDIT button to change the name of a snapshot from the default Snapshot n W...

Страница 79: ...ly the select ed parameters are included in the Snapshot The OTHERS button refers to DSP functions other than those listed INT 1 4 are the internal effects CHANNEL FILTERING SELECT Click on the BANK 1 4 or MATRIX A H buttons and select the desired channels for that bank from the list on the right Only the selected channels are included in the Snapshot CHANNELS FILTERED Displays the selected chan n...

Страница 80: ...x 8 matrix mixing Although the default inputs to each matrix are Groups 1 8 Left Right and Center virtually any other signal can be patched into the Matrix Press one of the MATRIX MIXER SELECTION buttons A H to select a Matrix for editing The knobs control the input levels to the selected Matrix The bot tom right knob controls the master output level for the selected Matrix which is reflected on th...

Страница 81: ...effect Touch an Edit button to edit the selected effect Touch a Source to change the source feeding the Effect this displays the Touchscreen on the right of Figure 6 23 Figure 6 26 EFX PRESET SELECTION The EFX preset display and dial in the EFX editing screen allow you to quickly and easily scroll through existing presets for any internal effect i e reverb reverb gate chorus etc Editing internal e...

Страница 82: ...t be muted in the monitors This requires the pre fader Aux sends to be pre mute PC AUTO FOLLOW The TT control software can be set to operate inde pendently from the Touchscreen or to follow it When independent two users may simultaneously control the TT24 one from the Touchscreen and one from the PC SELECT FOLLOWS SOLO Select Follows Solo allows channel selection to be dependent on pressing the ch...

Страница 83: ...evice connected to the TT24 s MIDI IN connector Addition ally the TT24 can be configured to send MIDI messages from its MIDI OUT connector when these parameters are changed from the console surface Enabling MIDI Input and Output MIDI messaging in the TT24 is disabled by default To configure the TT24 to respond to supported incoming MIDI messages click or press the RECEIVE button in the MIDI page to ...

Страница 84: ...f the SET UP menu the status of channel Mutes can be changed using MIDI Note messages Similarly when SEND is enabled a MIDI Note message is sent from the TT24 s MIDI OUT connector when you change a channel s Mute status from the console MIDI Channel Mute message bytes 9n ii mm Where n MIDI Channel 0x0 to 0xF ii Channel strip ID Deck 1 0x00 to 0x17 Deck 2 0x18 to 0x2F Deck 3 0x30 to 0x47 Deck 4 0x4...

Страница 85: ...f the solo group It varies 15 dB in 0 1 dB increments and its default level is 0 dB The RUDE SOLO LED lights when a chan nel is soloed 6 13 2 TALKBACK Figure 6 34 UTILITY TALKBACK Select the desired Matrix and Aux channels to enable for Talkback By default the Talkback button operates in a latching manner Press the talkback button on the mixer to en gage the input and the button illuminates Press ...

Страница 86: ...ation screen Utility User Bank has a grid of buttons labeled 1 24 that allows you to pick which channel will be assigned to the user bank A scrolling list of all channels is available to select the user bank channels Changes to the user bank are im mediate upon selection This control is available via TT control or LCD 6 14 6 TEST TONES Figure 6 38 UTILITY TEST TONES A test tone oscillator function...

Страница 87: ...trol PC application is done from the TT24 s internal memory Touch LOAD VENUE to select a venue from a list of all venues on the console Figure 6 40 FILE MGMT LOAD VENUE Use the up and down Touchscreen arrows to scroll if the list is too large to fit Touch the name of the desired venue and touch the OK button Touch SAVE VENUE from Figure 6 33 to save the current venue Figure 6 41 FILE MGMT SAVE VENU...

Страница 88: ... RESTORE CONSOLE 6 15 4 Backup and Restore Files Backing up and restoring of files is a flexible method for backing blocks of files or individual files of any type to a PC This backup is done exclusively from the TT control PC application by choosing the backup files op tion in the upper right corner of the application under the File menu 1 Choose the file type which consists of snapshot venue channel E...

Страница 89: ...in the upper right corner of the application under the File menu 6 15 6 Translate v1 0 Files The version 1 translator is a utility to allow for early release TT backup files to be forward compatible with version 1 2 firmware This translator requires that a ver sion 1 console backup file is selected and a new translat ed backup file named and pointed to a directory on the PC Once a file has been transla...

Страница 90: ...d Line Input 10 kΩ Aux Returns CD Tape A and B 10 kΩ MAXIMUM INPUT LEVEL Mic Input 22 dBu Line Input 22 dBu Aux Returns CD Tape A and B 22 dBu OUTPUT IMPEDANCE L R C Mono Group Matrix Out 150 Ω Aux Send Monitor Out 150 Ω CD Tape A and B Out 600 Ω MAXIMUM OUTPUT LEVEL Insert Out 22 dBu L R C Mono Group Matrix Out 26 dBu Aux Send Monitor Out 21 dBu CD Tape A and B Out 22 dBu Phones Out 500 mW into 1...

Страница 91: ...nce 75 Ω External Word Clock Lock Range 44 1 kHz 42 5 kHz 45 8 kHz 48 kHz 46 4 kHz 49 4 kHz 88 2 kHz 85 0 kHz 90 7 kHz 96 kHz 92 2 kHz 98 2 kHz WORD CLOCK OUTPUT Open Circuit Level 5 V p p Duty Cycle 50 Impedance 75 Ω AES INPUT IEC 60958 3 Sample Rate with SRC 32 kHz 96 kHz Sample Rate without SRC System sample rate exactly Maximum Level 0 4 V p p Impedance 110 Ω transformer coupled AES OUTPUT IEC...

Страница 92: ...ºC 50ºF 104ºF PHYSICAL DIMENSIONS Height 10 4 in 265 mm Width 42 6 in 1083 mm including handles Depth 25 0 in 636 mm Weight 71 0 lb 32 2 kg Disclaimer Since we are always striving to make our products better by incorporating new and improved materials compo nents and manufacturing methods we reserve the right to change these specifications at any time without notice ...

Страница 93: ...s Fader Select Stereo Input Source select Mono Main group assignmnets Fader Mute Talkback Talkback routing Internal DSP analog or digital The following parameters are saved in a snapshot ANALOG and DIGITAL INPUT channels 1 48 when UFXII is providing DSP on DIGITAL bank Trim Phase HPF EQ Gate Compressor DSP order Mute Fader Pan Select Group Assignments Aux pre post Aux level LINE INPUTS 1 8 EQ Mute...

Страница 94: ... selected channel s Comp gate to default settings Reset Group and Auxes CTRL GRP AUX Pressing these two buttons will reset the selected channel s group assignments to OFF and auxiliary send levels to OFF Reset all Channel Auxes CTRL AUX 1 12 Pressing the CTRL button plus any individual aux number button 1 12 will reset all channels aux sends to off Very useful for clearing an aux mix TT Control Sp...

Страница 95: ...8 1 2 3 4 ANALOG MICROPHONE PREAMP WITH 192kHz DIGITAL OUTPUT BALANCED LINE LEVEL INPUT BALANCED LINE LEVEL OUTPUT AES EBU OR S PDIF OUT AES EBU 110 PRO SPDIF 75 CONSUMER 100 240 VAC 50 60Hz 105W 8 7 6 5 4 3 2 1 110 75 NORMAL MID SIDE PRO CONS DUAL WIRE SINGLE WIRE O N Y X M I C P R E O N Y X M I C P R E O N Y X M I C P R E O N Y X M I C P R E O N Y X M I C P R E O N Y X M I C P R E O N Y X M I C ...

Страница 96: ...NSERT LINE INSERT LINE INSERT LINE INSERT LINE INSERT LINE INSERT LINE INSERT LINE INSERT LINE INSERT CTR MONO RIGHT LEFT LINE INSERT LINE INSERT LINE INSERT LINE INSERT LINE INSERT LINE INSERT LINE INSERT LINE INSERT LINE INSERT 2 3 4 5 6 7 8 9 10 11 12 13 14 15 16 17 18 19 20 21 22 23 1 2 3 4 5 6 7 8 24 LITE PIPES 1 24 IN LITE PIPES 1 24 OUT GROUP MATRIX OUT SPDIF EXPANSION CARD A CARD B OUT IN ...

Страница 97: ...6 4 192kHz 44 1 48kHz 1 8 1 8 1 4 5 8 1 2 3 4 ANALOG MICROPHONE PREAMP WITH 192kHz DIGITAL OUTPUT BALANCED LINE LEVEL INPUT BALANCED LINE LEVEL OUTPUT AES EBU OR S PDIF OUT AES EBU 110 PRO SPDIF 75 CONSUMER 100 240 VAC 50 60Hz 105W 8 7 6 5 4 3 2 1 110 75 NORMAL MID SIDE PRO CONS DUAL WIRE SINGLE WIRE O N Y X M I C P R E O N Y X M I C P R E O N Y X M I C P R E O N Y X M I C P R E O N Y X M I C P R ...

Страница 98: ...TERNAL WORD CLOCK IN SIDE MID OPTICAL OUT 88 2 96kHz 176 4 192kHz 44 1 48kHz 1 8 1 8 1 4 5 8 1 2 3 4 ANALOG MICROPHONE PREAMP WITH 192kHz DIGITAL OUTPUT BALANCED LINE LEVEL INPUT BALANCED LINE LEVEL OUTPUT AES EBU OR S PDIF OUT AES EBU 110 PRO SPDIF 75 CONSUMER 100 240 VAC 50 60Hz 105W 8 7 6 5 4 3 2 1 110 75 NORMAL MID SIDE PRO CONS DUAL WIRE SINGLE WIRE O N Y X M I C P R E O N Y X M I C P R E O N...

Страница 99: ...oft Clip ADAT OUT x3 Analog Ch13 Pre Processing Analog Ch13 Post Processing ADAT 13 Trim 4 Band Para EQ Comp Mute Fader 4 Band Para EQ Mute Comp Solo LR Assgn Stereo Group Group 1 Mono Group Matrix Out 1 Group Matrix Out 2 8 Aux Send 1 Odd Aux Send 3 5 7 9 11 Grp 1 Mono Group 1 as Stereo Group 2 8 as Stereo Grp 1 L Grp 1 R Grp 1 Mono Group 1 as Mono Group 2 8 as Mono Grp 1 Type Grp 2 8 Note A maxi...

Страница 100: ...Aux Send 3 5 7 9 11 Group 1 as LCR Group 2 8 as LCR Grp 1 Mono Group 1 as Stereo Group 2 8 as Stereo Grp 1 L Grp 1 R Grp 1 L Grp 1 C Grp 1 R Grp 1 Mono Group 1 as Mono Group 2 8 as Mono Grp 1 Type Grp 2 8 Note A maximum of 8 channels of processing can be assigned at once across all groups Mono 1 channel Stereo 2 channels LCR 3 channels Assignable Processing Assignable Processing Assignable Process...

Страница 101: ...pment into the same AC circuit so they share a common ground Warranty Service Details concerning Warranty Service are spelled out in Appendix E Warranty Information If you think your TT24 has a problem please do ev erything you can to confirm it before calling for service Doing so might save you from the deprivation of your TT24 and the associated suffering These may sound obvious to you but the fo...

Страница 102: ... any damage that occurs due to non factory packaging 5 Include a legible note stating your name shipping address no P O boxes daytime phone number Service Request Number and a detailed description of the problem including how we can duplicate it 6 Write the Service Request Number in BIG PRINT on top of the box 7 Tech Support will tell you where to ship the TT24 for repair We suggest insurance for ...

Страница 103: ...s or a limita tion on how long warranties last so some of the above limi tations and exclusions may not apply to you This warranty provides specific legal rights and you may have other rights which vary from state to state TT24 Limited Warranty A LOUD Technologies Inc warrants all materials work manship and proper operation of this product for a period of one year from the original date of purchase...

Страница 104: ......

Страница 105: ... F 4A B 0 D0 0334 3D E4AB8 D 30C4 ...

Страница 106: ...Don t forget to visit our website at www mackie com for more information about this and other Mackie products R Contents TT24 Version 1 5 Features 3 1 Channel Naming 3 2 Effect Tap Delay 7 3 OPT 24T ADAT Expansion Card Implementation 10 4 U100 Network Card Implementation 11 4 1 U NET 11 4 2 DS3232 Digital Snake 12 4 3 Console Linking 12 ...

Страница 107: ...aming for channels This is accomplished from the Touchscreen or TT Control software The custom names appear in the channel display on the top left when a channel is selected from either TT Control or the Touchscreen Channel names are stored and recalled with snapshots This means you can change to a new set of channel names for each snapshot They can also be filtered to prevent recall by using the ...

Страница 108: ...ult names on the left and any custom names on the right You can scroll through the list using the Touchscreen scroll bars and up down buttons and select the channel you wish to rename Pressing the Rename button will display the on screen keyboard to rename the channel Enter a name of six characters or less and press OK when finished ...

Страница 109: ...24 Digital Live Console Owner s Manual Addendum v1 5 To access Channel Naming from the TT Control software application click the Screen Name drop down box and select Setup Naming or use the keyboard shortcut F12 ...

Страница 110: ...Channel names can be up to 6 characters long You can use the up down arrow keys on your keyboard to scroll to the previous next channel for renaming Press Enter or click OK when finished renaming Click the CLEAR CHANNEL NAME button or press the CLEAR button in the Touchscreen to clear the custom name for the selected channel Click the CLEAR ALL NAMES button or press the CLEAR ALL button in the Tou...

Страница 111: ...Ping Pong the left and right delays can be set independently The delay rate is indicated by the Up Down channel Arrow LEDs on the console When viewing any other screen these are always lit but on an EFX page they will flash to show the delay rate When mono delay is selected both up and down arrows will flash together showing the delay rate For a stereo delay or ping pong the left arrow button will...

Страница 112: ...rsection of column 3 and row R in the figure below The screen will immediately jump to the delay page but you can continue to hold CTRL and tap the same encoder to edit that delay time This trick can also be used as a quick way to navigate to any effects screen even if it isn t configured as a delay To access tap delay from the TT Control software application click the Screen Name drop down box an...

Страница 113: ...ur internal effects and click the EDIT button You can click the Tap button on screen to adjust the tap in beats per minute BPM or click and drag on the Delay knob to adjust the delay in milliseconds ms To the right of the tap button an LED flashes indicating the delay rate Note that this only occurs when a TT24 is connected ...

Страница 114: ...DAT EXPANSION CARD 44 1 48 kHz 88 2 96 kHz INPUT A 25 32 25 28 INPUT B 33 40 29 32 INPUT C 41 48 33 36 OPT 24T INPUT D N A 37 40 OPT 24T INPUT E N A 41 44 OPT 24T INPUT F N A 45 48 OUTPUT A 1 8 1 4 OUTPUT B 9 16 5 8 OUTPUT C 17 24 9 12 OPT 24T OUTPUT D 1 8 13 16 OPT 24T OUTPUT E 9 16 17 20 OPT 24T OUTPUT F 17 24 21 24 ADAT Digital I O Channels at 44 1 48 and 88 2 96 kHz Sample Rates Note ADAT Digi...

Страница 115: ...rd and make sure the U100 card has been updated with the latest firmware Go to our website to get the latest firmware and software downloads http www mackie com products tt24 software html Note When updating a console or card make sure the console is configured as a Master see Console Mode on next page during the update procedure 4 1 U NET U NET is LOUD Technologies audio system networking solutio...

Страница 116: ...he new version 1 5 firmware in your TT24 you can link two TT24 consoles with a U100 network card installed in each console Simply connect the two U100 cards together using a standard Cat5 cable and designate one console as the Master and the other console as the Slave When two consoles are linked in this fashion the slave console sends its outputs Left Right Center Aux Sends Group Matrix Outputs S...

Страница 117: ...the consoles they will remain in that configuration until you change them using the CONSOLE MODE selection If you disconnect the console designated as the SLAVE you must change it back to MASTER in order for it to operate properly on its own In order for TT Control to work correctly it must be assigned the same Master Slave status as the console to which it is connected From the TT Control applica...

Страница 118: ... Sends EQ dynamics and Group Assignments For example Channel 1 on the slave console is completely independent from Channel 1 on the master console Bank 2 Digital Inputs The digital input strips operate locally and are not linked including the Aux Sends EQ and dynamics when assigned to the digital inputs or when a UFXII is installed and Group Assignments Bank 3 Line Inputs 1 8 Internal EFX Returns ...

Страница 119: ... might reserve snapshots 1 49 for individual consoles and 50 99 for linked consoles if you are frequently changing between linked and single console operation Console Backup and Restore Each console must be backed up and restored independently Console backup creates an offline file that contains all snapshots and presets currently stored on the TT24 Console backup and restore are performed only fr...

Страница 120: ...e Solo Global V Pot Speed Global Setup Digital Sample Rate Master Clock Source Master Clock Status Determined by Sample Rate Digital Input Local Sample Rate Convert Local 1 2 Sample Rate AES SPDIF Local Setup MIDI All Settings Local Setup Expansion All Settings Local Setup Channel Names Input Channels Analog Digital Line Card Local EFX Returns Output Channels Global Utility Monitor Source Monitor ...

Страница 121: ...3 4 5 6 7 8 9 10 11 12 13 14 15 16 17 18 19 20 21 22 23 1 2 3 4 5 6 7 8 24 LITE PIPES 1 24 IN LITE PIPES 1 24 OUT GROUP MATRIX OUT SPDIF EXPANSION CARD A CARD B OUT IN WORD CLOCK L R RETURNS 9 10 11 12 13 14 15 16 1 2 3 4 5 6 7 8 25 26 27 28 29 30 31 32 17 18 19 20 21 22 23 24 POWER U NET COMM DS3232 24 BIT 96kHz DIGITAL SNAKE INPUTS 9 10 11 12 13 14 15 16 1 2 3 4 5 6 7 8 25 26 27 28 29 30 31 32 1...

Страница 122: ...Mackie TT24 Digital Live Console Owner s Manual Addendum v1 5 18 ...

Страница 123: ...Mackie TT24 Digital Live Console Owner s Manual Addendum v1 5 19 ...

Страница 124: ...Red Road NE Woodinville WA 98072 USA www mackie com sales mackie com United States and Canada 800 898 3211 Europe Asia Central and South America 425 487 4333 Fax 425 487 4337 Middle East and Africa 31 20 654 4000 ...

Страница 125: ... you could use TT Control wirelessly Well you can it s easy and this is what you will need System Requirements A TT24 A local PC called the host connected to your TT24 via USB This computer must be running Windows XP Professional and have wireless capabilities A PC laptop called the client with wireless capabilities This computer must be running Windows 95 or later A properly configured wireless n...

Страница 126: ...to the TT24 to be the Windows Remote Desktop host You must be logged on as an administrator or a member of the Administrators group to enable Remote Desktop a Open the System folder in Control Panel Do this by clicking Start pointing to Settings clicking Control Panel and then double clicking the System icon b On the Computer Name tab write down the name listed as the Full computer name you will n...

Страница 127: ...ave access to this computer remotely click the Select Remote Users button and follow the instructions e Click OK in the Systems Properties dialog box to approve your changes f Log out of your host computer but leave the computer running and connected to your wireless network This is done by selecting Shutdown from the start menu and then choosing Log Out Check this box Do not check this box ...

Страница 128: ...indows XP CD download the Client installer from the following link and follow the on screen instructions www microsoft com windowsxp downloads tools rdclientdl mspx 5 On the client laptop computer begin a remote desktop session a Open Remote Desktop Connection Click Start point to Programs or All Programs point to Accessories point to Communications and then click Remote Desktop Connection b In th...

Страница 129: ... up 8 Mix away 9 When you are finished be sure to disconnect your client laptop from the remote desktop session In the Remote Desktop Connection window click Start and then click Disconnect Confirm your decision Note For more detailed information on remote desktop follow this link www microsoft com windowsxp using mobility getstarted remoteintro mspx Part No SW0138 Rev A 07 04 2004 LOUD Technologi...

Страница 130: ......

Отзывы: