Mackie PPM1012 Скачать руководство пользователя страница 3

3

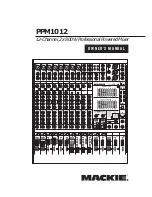
Owner’s Manual

Owner’

s Manual

Part No. SW0704 Rev. C 08/08 


©2008 LOUD Technologies Inc. All Rights Reserved. PDF pixels home grown and harvested in Woodinville, WA.

Don’t use guitar cords for speaker cables! 
They’re not designed to handle speaker-level 
signals and could overheat.

Set the levels

It’s not even necessary to hear what you’re doing to 

set optimal levels. But if you’d like to: Plug headphones 
into the phones output jack, then turn up the phones 
knob just a little.

1.  Turn on the PPM1012 by pressing the top edge 

of the power switch.

2.  For one channel, press the solo switch in, and 

the rude solo light will turn on.

3.  Play something into that input at real-world 

levels.

4.  Adjust that channel's gain control until the 

left main meter stays around the 0 dB LED 
(marked "level set").

5.  Disengage the channel's solo switch.

6.  Repeat steps 2 to 5 for the remaining channels.

7.   In normal playing, the channel's OL LED should 

only light occasionally. If it stays on for a large 
portion of your performance, check that the 
gain control is set correctly.

8.  Turn up the channel faders to the "U" mark.

9.  Slowly turn up the main level fader until you 

hear the signals in your speakers.

10.  If needed, apply some EQ wisely.

11.  Adjust the channel faders to get the best mix. 

Keep the gain controls and faders fully down on 
unused channels.

Other Notes

• 

Only connect the powered mixer's speaker-level 
outputs to passive loudspeakers.

• 

For optimum sonic performance, the channel 
faders and main mix fader should be set near 
the U (unity gain) markings.

• 

When shutting down, turn off any external 
amplifi ers fi rst. When powering up, turn on any 
external amplifi ers last. This will reduce the 
chance of turn-on or turn-off thumps in your 
speakers.

• 

Save the shipping box!

Read This Page!

We realize that you must be really keen 
to try out your new powered mixer. Please 
read the safety instructions on page 2 
and this page, and the rest can wait until 

you’re ready. But please read it — you’ll be glad you did.

Setup

Make sure there is at least 6 inches of airspace behind 

the powered mixer for ventilation. There are two fans 
inside to cool the power amplifi er section. Use the pow-
ered mixer in a nice clean environment, free from dryer 
lint and dust bunnies.

Zero the controls

1.  Fully turn down all the faders and controls, 

except for the channel EQ, graphic EQ faders, 
and pan controls, which should be centered.

2.  Make sure all buttons are in the out position.

Connections 

1.  Make sure the AC power switch is off before 

making any connections.

2.  Push the linecord securely into the IEC connec-

tor on the rear panel, and plug it into a  3-prong 
AC outlet that is properly confi gured for the 
voltage of your powered mixer.

3.  Plug a balanced microphone into one of the mic 

XLR (3-pin) connectors. Or connect any line-
level signal (keyboard, or guitar preamp) to a 
line input jack using a TS or a TRS 1/4” plug.

4.  If your microphone requires phantom power, 

press in the 48V phantom power button.

5.  You can connect a guitar directly to line inputs 

7 or 8 without need for a DI box. Press the hi-z 
switch on these channels if you do.

6.  The insert jacks can be used to connect an 

external effects or dynamics processor into the 
signal chain. See page 13 for more details.

7.  Plug the speakers (4 ohms or greater) into the 

speaker output jacks on the rear panel. If you 
plug two speakers into a side, each speaker 
must be 8 ohms or greater to maintain a 4-ohm 
minimum load on the amplifi er. Use at least 
18 gauge speaker cable with 1/4” TS plugs. For 
now, set the power amp mode switch to stereo 
mains.

Содержание PPM1012

Страница 1: ...1 5k 150 8k 100 EQ 12kHz HI PAN AUX SEND MON 1 MON 2 FX 1 FX 2 U 15 O O U 15 O O U 15 O O U 15 O O R L PAN AUX SEND MON 1 MON 2 FX 1 FX 2 U 15 O O U 15 O O U 15 O O U 15 O O R L PAN AUX SEND MON 1 FX...

Страница 2: ...sult the dealer or an experienced radio TV technician for help CAUTION Changes or modifications to this device not expressly approved by LOUD Technologies Inc could void the user s authority to operat...

Страница 3: ...of turn on or turn off thumps in your speakers Save the shipping box Read This Page We realize that you must be really keen to try out your new powered mixer Please read the safety instructions on pag...

Страница 4: ...power can be applied to all mics Built in compressors on the first 6 mono inputs dedicated in line compression Two independent internal FX processors each with 24 Running Man 32 bit effects with input...

Страница 5: ...IX A SERVICE INFORMATION 28 APPENDIX B CONNECTIONS 29 APPENDIX C TECHNICAL INFORMATION 31 APPENDIX D TABLE OF EFFECTS PRESETS 34 PPM1012 LIMITED WARRANTY 35 IMPORTANT SAFETY INSTRUCTIONS 2 READ THIS P...

Страница 6: ...LOW MID FREQ R L 600 1 5k 150 8k 100 EQ 12kHz HI PAN AUX SEND MON 1 MON 2 FX 1 FX 2 U 15 O O U 15 O O U 15 O O U 15 O O 15 U 15 15 U 15 15 U 15 80Hz LOW MID FREQ R L 600 1 5k 150 8k 100 EQ 12kHz HI PA...

Страница 7: ...I PAN AUX SEND MON 1 MON 2 FX 1 FX 2 U 15 O O U 15 O O U 15 O O U 15 O O 15 U 15 15 U 15 15 U 15 80Hz LOW MID FREQ R L 600 1 5k 150 8k 100 EQ 12kHz HI PAN AUX SEND MON 1 MON 2 FX 1 FX 2 U 15 O O U 15...

Страница 8: ...15 O O 15 U 15 15 U 15 15 U 15 80Hz LOW MID FREQ R L 600 1 5k 150 8k 100 EQ 12kHz HI PAN AUX SEND MON 1 MON 2 FX 1 FX 2 U 15 O O U 15 O O U 15 O O U 15 O O 15 U 15 15 U 15 15 U 15 80Hz LOW MID FREQ R...

Страница 9: ...EQ R L 600 1 5k 150 8k 100 EQ 12kHz HI PAN AUX SEND MON 1 MON 2 FX 1 FX 2 U 15 O O U 15 O O U 15 O O U 15 O O 15 U 15 15 U 15 15 U 15 80Hz LOW MID FREQ R L 600 1 5k 150 8k 100 EQ 12kHz HI PAN AUX SEND...

Страница 10: ...kon Connection 1 4 TS outputs are wired Tip positive and Sleeve negative 1 4 TS Connection These two types of outputs are wired in parallel and it is possible to use both types at once The minimum imp...

Страница 11: ...INPUTS We use phantom powered balanced microphone inputs just like the big studio mega consoles for exactly the same reason This kind of circuit is excellent at rejecting hum and noise You can plug in...

Страница 12: ...mpressor 25 circuits on channels 1 6 but before the channel s EQ 27 32 and fader 40 The channel signal can go out of the insert jack to an external device be processed or whatever and come back in on...

Страница 13: ...uts to the line level inputs of external power ampli fiers running passive loudspeakers or to the inputs of powered loudspeakers This is useful if you need more power or if you already have this equip...

Страница 14: ...o effect It cannot un mute or mute it The footswitch only affects the internal FX It has no effect on the output to and input from external effects processors MIC 1 MIC 2 MIC 3 MIC 4 MIC 5 MIC 6 MIC 7...

Страница 15: ...5 O O 15 U 15 15 U 15 15 U 15 80Hz LOW MID FREQ R L 600 1 5k 150 8k 100 EQ 12kHz HI PAN AUX SEND MON 1 MON 2 FX 1 FX 2 U 15 O O U 15 O O U 15 O O U 15 O O 15 U 15 15 U 15 15 U 15 80Hz LOW MID FREQ R L...

Страница 16: ...want to hear and filtering it out makes the low stuff you do want much more crisp and tasty Not only that but low cut can help reduce the possibili ty of feedback in live situations and it helps to c...

Страница 17: ...e chance of distortion due to overloading the input signals Dynamic range is the difference in level be tween the quietest part of your song and the loudest part Using a compressor you are able to squ...

Страница 18: ...LOW HI MID 2 5kHz LOW MID 400Hz U 15 15 U 15 15 U 15 15 U 15 15 12kHz HI 80Hz LOW HI MID 2 5kHz LOW MID 400Hz GAIN U 20 PAN AUX SEND EQ COMP COMP COMP COMP COMP COMP 20 MON 1 MON 2 FX 1 FX 2 U 15 O O...

Страница 19: ...ent This control is only available on the stereo channels 32 LOW EQ The low EQ provides up to 15 dB of boost or cut below 80 Hz The circuit is flat no boost or cut at the center detent posi tion This...

Страница 20: ...set correctly for your input device and that the channel EQ 27 32 is not set with too much boost The 20 0 and 10 LEDs show the channel signal strength 40 CHANNEL FADER The channel faders adjust the l...

Страница 21: ...a pack of wild dogs Although it may not seem cool to turn down controls with EQ it is often your best option Turn down any offending frequency range rather than boost the wanted range Having many slid...

Страница 22: ...eds your special touch If you are not using the monitor 2 system keep this switch out The EQ will then operate on your main left and right mix 47 POWER AMP LIMITER LEDs These independent LEDs turn on...

Страница 23: ...is trashing the stage there will be no upsetting micro phone yells noise thumps or rumbles heard in the main speakers The monitor 1 and monitor 2 outputs are not affected by the break switch so you co...

Страница 24: ...ur powered subwoofer or mono loudspeaker match the level of the other loudspeakers in your system The mono output can be the full frequency range to run a mono PA for example or just the low frequen c...

Страница 25: ...2 signals sent to the mon 1 and mon 2 line level outputs 10 and the monitor speaker level outputs 3 if the internal power amplifiers are playing monitor 1 or 2 These give you ultimate control over you...

Страница 26: ...n the send master levels 60 if these come on regularly The signals going into the processors are affected by the channel FX 1 and 2 aux sends 35 36 and the channel gain 23 EQ 27 32 and channel faders...

Страница 27: ...current digital delay The minimum tap delay is 50 ms and the maxi mum is 500 ms If your taps are faster than 50 ms they will be set to 50 ms If taps are between 500 ms and 1 second they will be set t...

Страница 28: ...puts main inserts or other line level outputs such as mono out mon 1 send mon 2 send FX1 and FX2 send just in case one of your external pieces has a problem If the power amp limiter lights come on oft...

Страница 29: ...ophone adapter Y two cables out of a female 1 4 TRS jack to two male XLR plugs one for the Right signal and one for the Left Unbalanced Send Return circuits When wired as send return Y connector a 1 4...

Страница 30: ...gnals in one connector See Figure F The sleeve is the common ground earth for both signals The send from the mixer to the external unit is carried on the tip and the return from the unit to the mixer...

Страница 31: ...EQ Main and Monitor 1 15 dB 63 125 250 500 1k 2k 4k 8k and 16 kHz Connections Mic input XLR balanced Line mono input 1 4 TRS balanced Line stereo input 1 4 TRS balanced Main outputs 1 4 TRS balanced...

Страница 32: ...an authorized collection site for recycling waste electrical and electronic equipment EEE Improper handling of this type of waste could have a possible negative impact on the environment and human he...

Страница 33: ...o Mon 2 FX1 Mon 1 FX2 Solo logic R sum Pan Solo pfl FX2 Mon2 Mute Pan FX2 Mon2 L R Solo pfl Mute L Insert R Insert Tape in level Mon 2 Mon2 Out Mon2 Main 9 band Graphic EQ 9 band Graphic EQ Mon2 level...

Страница 34: ...d reflections that would be found in a very large stone walled house of worship Gives amazing depth to choirs wind instruments organs and soft acoustic guitars 12 Gated Reverb This preset incorporates...

Страница 35: ...r those units deemed by us to be under warranty Note You must have a sales receipt from an authorized Mackie dealer for your unit to be considered for warranty repair IMPORTANT Make sure that the Serv...

Страница 36: ...Road NE Woodinville WA 98072 USA United States and Canada 800 898 3211 Europe Asia Central and South America 425 487 4333 Middle East and Africa 31 20 654 4000 Fax 425 487 4337 www mackie com E mail s...

Отзывы: