6
Mackie Digital X Bus
Getting Inside the Digital X Bus
7
Mackie Digital X Bus
Getting Inside the Digital X Bus
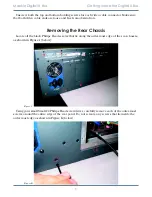
Once all the screws have been removed, start to slide out the entire rear chassis from the rest
of the mixer. You may need to thread both the COM and the Talkback Mic cables through the
metal plate that separates the motherboard from the Motherboard Access Area. A good place to
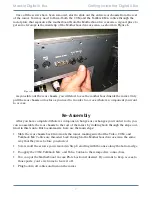
get some leverage is the inside lip of the Motherboard Access Area, as shown in Figure L:
As you slide out the rear chassis, you will start to see the motherboard inside the mixer. Only
pull the rear chassis out as far as you need to in order to access whatever component you want
to access.
Re-Assembly
After you have completed whatever component changes or exchanges you wanted to do, you
can re-assemble the rear chassis to the rest of the mixer by walking back through the steps out-
lined in this Guide. But to summarize, here are the main steps:
• Slide the rear chassis back in towards the mixer, making sure that the Video, COM, and
Talkback Mic Cables are threaded back through to the Motherboard Access Area the same
way that they were before you started.
• Screw in all the screws you removed in Step 8, starting with the ones along the bottom edge.
• Re-apply the COM, Talkback Mic, and Video Cables to their respective connectors.
• You can put the Motherboard Access Plate back on if desired. If you want to keep access to
those ports, you’re welcome to leave it off.
• Plug back in all cables and turn on the mixer.
Figure L


