Getting Started with FeverWarn l Models FW100, FW120, FW130, FW200 and FW230 11
MachineSense • Sales: +1-443-457-1165 • [email protected] • www.feverwarn.com
Setting up Cloud Storage and Retrieval
of Scan Information (FW200 and FW230)
(continued)
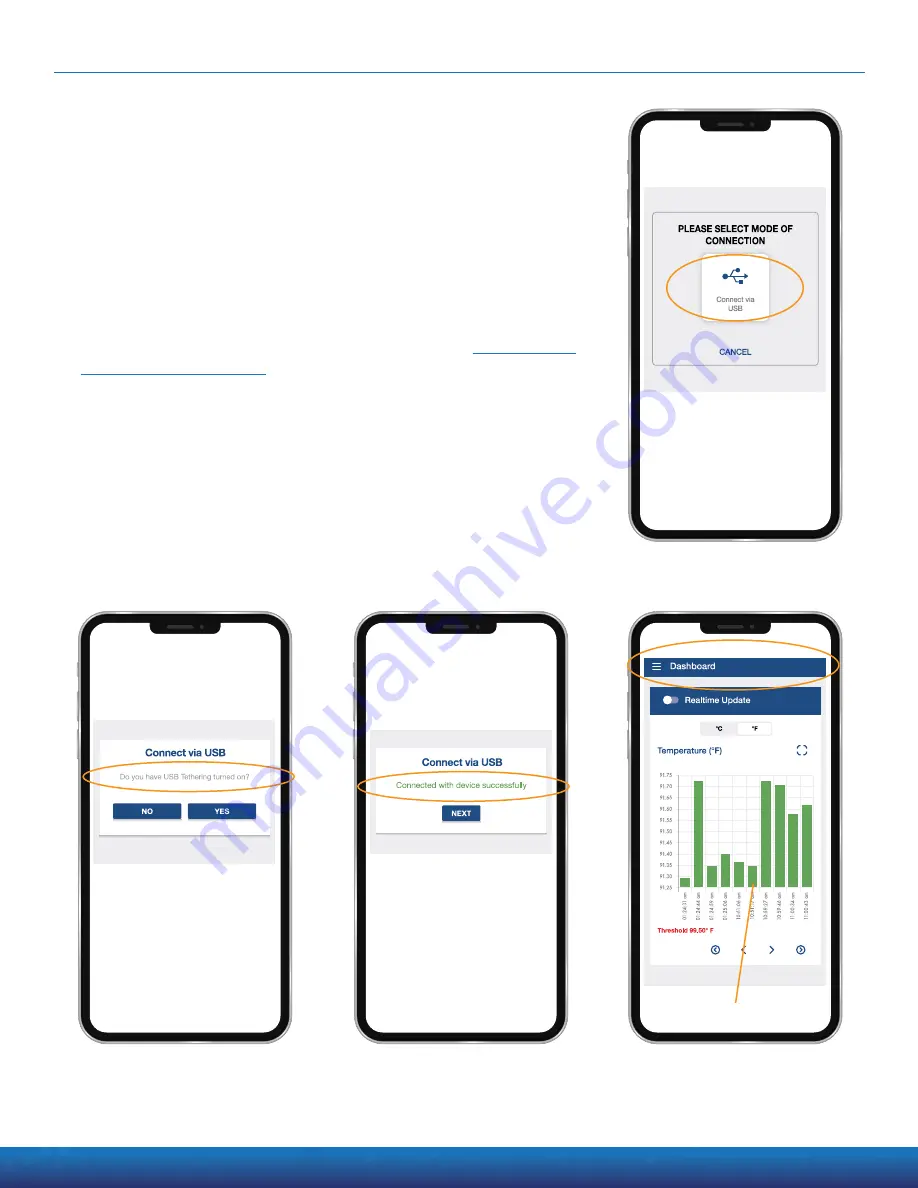
9. You will see a new section appear below the Gate2 section that
asks you to choose your mode of connection. Tap on
“Connect via
USB” (Figure 21).
10.
Figure 22 shows the tethering prompt screen. If you’re already
connected and have tethering turned on, answer
“YES” and
continue. If you’re not or don’t know, go back to the
section and make sure you’ve completed
the steps. Once you know you’re properly connected, tap the
“YES” button.
11. You should now be connected from your scanner, through the USB
USB cable to your cellphone and through the internet to the
MachineSense CrystalBall cloud
(Figure 23). Tap “NEXT.”
12. You are now on the “Dashboard screen”
(Figure 24). The green bars
represent recent FeverWarn scans. Tap on the three horizontal
stacked lines, often referred to as the “hamburger” menu, in the
upper left corner to view the app’s main menu.
Figure 21: You will be prompted to
choose your mode of connection.
Tap on “Connect via USB.”
Figure 22: This is the tethering prompt
screen. If you’re already connected
and have tethering turned on, answer
“YES” and continue.
Figure 23: This screen indicates that
you are connected from your scanner,
through the USB cable to your smart
device and through the internet to the
MachineSense CrystalBall cloud.
Figure 24: This is the Dashboard
screen. The green bars represent
recent FeverWarn scans.
FeverWarn scans


