5
ARRANGEMENT AND INSPECTION OT THE CANOPY
AND LINES
This chapter applies to all the 18, 20 and 22 – gore parachutes.
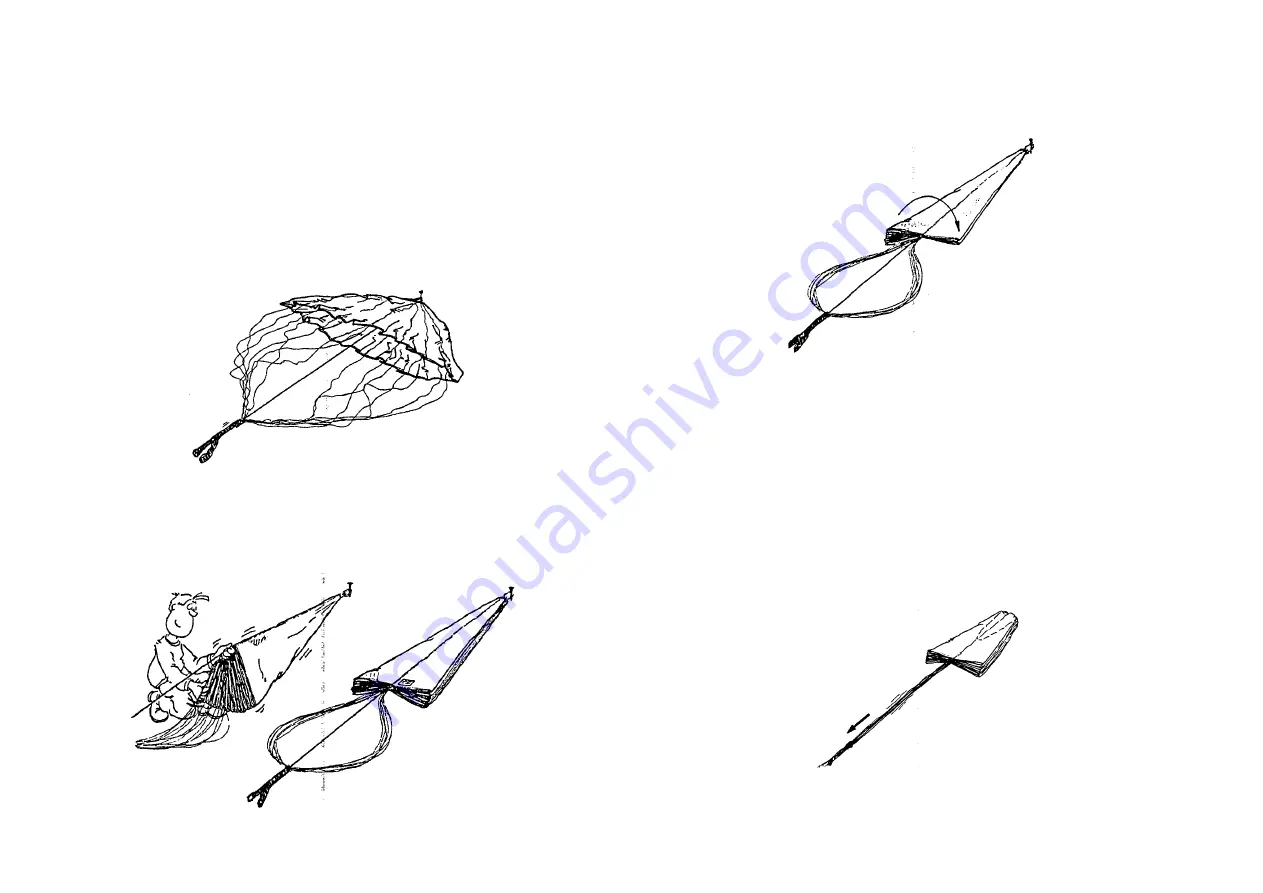
1) Lay the extended parachute on the table as shown in the following
figure. Line No. 1 should be on the top, in the middle, to the right of the
center, as shown. The central line, which joins the top of the parachute to
the bridle, is easily identified, being much thicker than other lines.
2) Passing a length of the line or strap under all the top lines, including the
central line, attach the top to the anchor point.
6
3) Bring the flipped gores back one by one, inspecting them carefully on
both sides for wear, damage, stains, deterioration, mildew, etc.
4) Repeat for the left-hand group of gores.
5) Inspect the lines for signs of wear or damage.
6) Gently insert by hand the top of the canopy downwards between the
gores as far as it will go. Now begin to pull down the central line, a little
at a time. After the line has straightened out between the gores, continue.
This will gradually pull the top inwards and down, inside and centrally
between the gores. After each pull, check whether the top is traveling
centrally between the gores, and whether the upper edges of the gores are
folding inwards evenly. Stop when the attachment point of the top line is
still inside.


