


Chapter 4: Using Venom with USB
30
Venom User Guide
Configuring M-Audio Venom Properties
The Windows control panel for M-Audio Venom properties provides controls for importing MIDI files for the
Phrase Arpeggiator, and also provides access to information about and resources for Venom. The Windows
control panel for M-Audio Venom also provides the Latency tab for controlling hardware buffering for audio
with Windows class compliant audio drivers.
To open the M-Audio Venom control panel:
1
From the Start menu, choose Control Panel.
2
Double-click the M-Audio Venom icon.
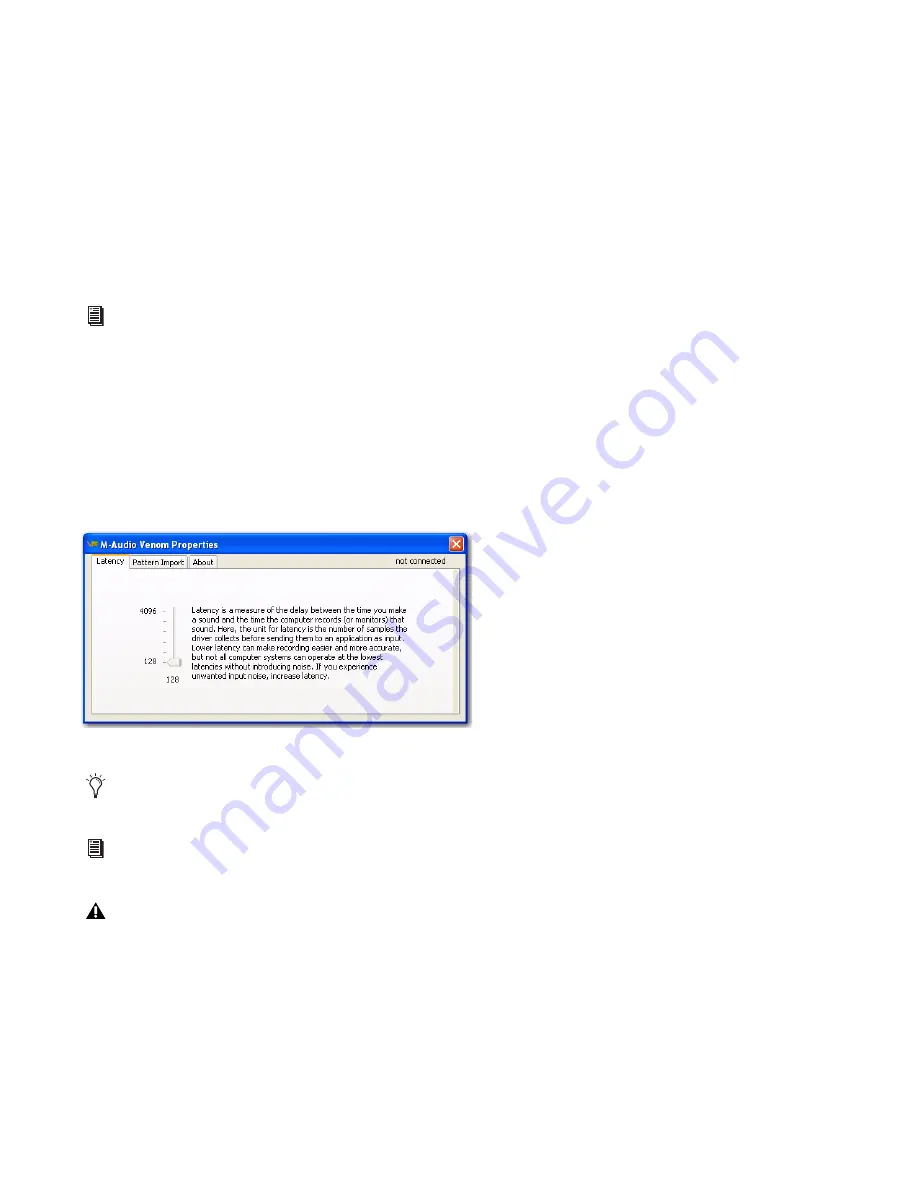
Latency
Latency is the time it takes for an input signal to pass through your recording software and appear at the out-
puts. This latency can result in a delay when overdubbing to existing tracks. This slider lets you control the
amount of latency by adjusting the buffer size in units of samples. The default buffer size is 256 samples.
Smaller buffer sizes result in lower latency, but may cause clicks, pops and dropouts on slower systems. If you
are experiencing clicks and pops in your recording, try increasing the buffer size.
For information about the Pattern Import and About pages of the M-Audio Venom control panel and About Pages, see “Control
Panel Pattern Import and About Pages” on page 31.
Venom Properties, Latency tab
To adjust the buffer size in Pro Tools M-Powered (Windows and Mac OSX), choose Setup > Playback Engine, then choose the
audio buffer size from the H/W Buffer Size pop-up menu.
Refer to the Pro Tools M-Powered User Guide for more information about setting the buffer size and other important settings
when configuring Pro Tools M-Powered.
If you are using a third party DAW, you should also refer to your documentation for information about setting the buffer size
and other important settings.
Содержание Venom
Страница 1: ...Venom User Guide ...


