


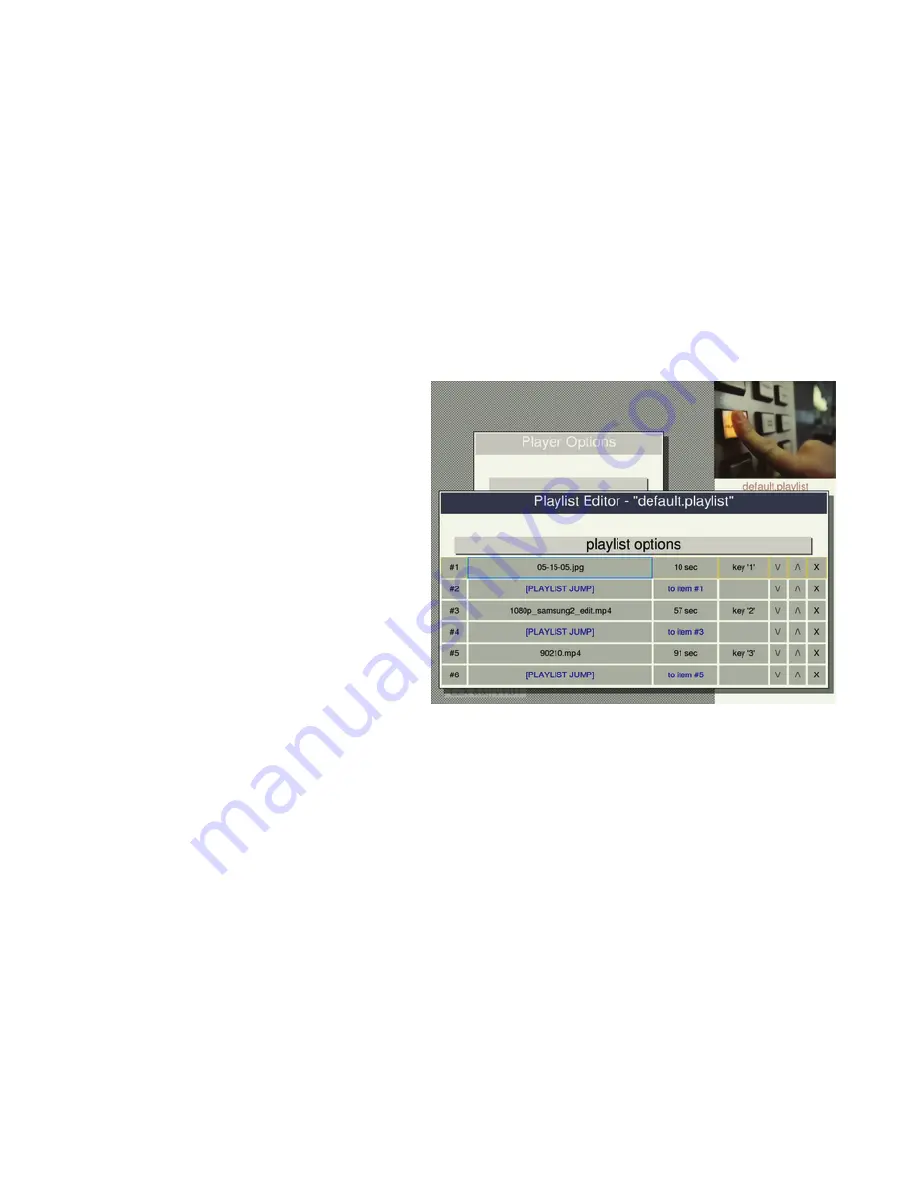
The cursor starts off on the playlist options button, and pressing the down button will move
the cursor into the playlist grid. Playback starts at the top of the playlist playing media
sequentially until it reaches the end, then it loops back to beginning.
There are 7 columns in the playlist grid. From left to right, they are: playlist item number,
playlist item name, duration, trigger key or note, the "/\" button to move playlist item up in the
list, the button "\/" to move the playlist item down, and the "X" button to delete playlist items.
Changes to the playlist are automatically saved to the file default.playlist unless the playlist is
renamed using the Playlist Options Menu. The Playlist Options Menu includes various tools to
help creating playlists, such as functions that automatically create playlists from all the media
files on your USB drive. In addition to normal playlist items, playlist delays and playlist jumps
can be inserted into the playlist. A playlist delay plays silent, blank video for a variable amount
of time, and a playlist jump skips to another location in the playlist.
Each media item in a playlist is automatically assigned a keyboard trigger, starting with the '1'
key (on your USB keyboard or the back of the remote control) and progressing along the
keyboard ('2','3','4'...). The trigger keys can be reassigned to other keys or to MIDI notes. A
trigger causes the playlist to restart at the trigger point, and if the player happens to by
synchronized with other players, then all the synchronized players will restart their playlists at
that same point in their own playlists. Using triggers in conjunction with playlist jumps makes
it possible to assign different media loops to keys on the keyboard. Keys that are able to be
assigned are 'A' through 'Z' and '0' through '9'.
Subtitles
- turn subtitles on or off. To use subtitles, include an SRT subtitle file on your USB
disk with the same name as your video file.
Analog video
- sets the analog video output mode as PAL or NTSC video standard.
Audio mode
- in most cases this should be set to stereo. When using 5.1 with a digital
surround decoder over HDMI, choose the hdmi thru mode. There is also the option to turn
audio off.
Test patterns button
- this button opens a menu for displaying a test pattern or solid black,
white, or blue video for testing and calibration.
System options button
- opens the System Options Menu which is described in the System
Options section below.
Reset all settings button
- resets all settings to defaults and reboots. It will ask for
confirmation first.
About button
- displays an information page including the full version number and the device
serial number.
THE PLAYLIST EDITOR
Playlists can be created and edited with
the integrated Playlist Editor. Its simplest
function is to string together a
sequence of videos or media files. But the
playlist system also has the ability to set
up keyboard or MIDI note triggers
for playlist items, and it is possible to
create loops and delays within the playlist.
When the playlist editor first opens, you'll
see the media file that is currently playing
listed in the playlist. The up, down, left,
and right arrow buttons move the cursor
through the playlist.


