IO-390-D Series Engine Maintenance Manual
© 2020 Avco Corporation. All Rights Reserved
72-20
March 2020
Page 171
IO-390-D Series Engine Maintenance Manual
D.
Propeller Governor Plug Installation
(1)
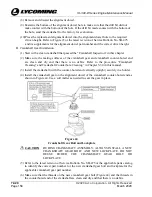
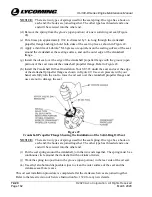
Examine the propeller governor plug (Figure 72) to
make sure it is not damaged or cracked. Replace a
damaged or cracked propeller governor plug.
(2)
Lubricate the threads of the propeller governor plug
with Anti-Seize.
(3)
Install the plug into the crankcase with a new gasket.
(4)
Torque the propeller governor plug between 150 to
180 in.-lb. (17 to 20 Nm).
(5)
Safety wire/cable the propeller governor plug.
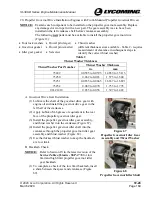
Figure 72
Propeller Governor Plug
E.
Apply heavy lubricant such as Modoc or equivalent to the teeth on the idler gear and the
governor drive gear.
NOTICE:
The governor drive cover or mask is to prevent FOD during engine assembly and
will be removed when the propeller governor is installed.
F.
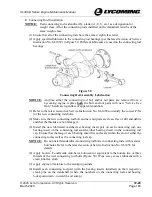
Install a new governor gasket and governor drive cover (Figure 13) or mask on the propeller
governor mounting pad.
G.
Install four nuts, new lock washers, and washers on the studs in the crankcase to attach the
governor drive cover or mask. Torque the nuts in accordance with the latest revision of the
Service Table of Limits - SSP-1776.
21.
Camshaft Assembly and Installation
A.
Camshaft Assembly
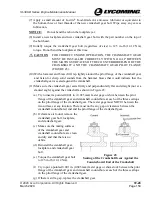
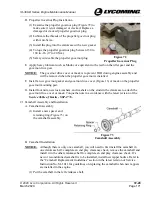
(1)
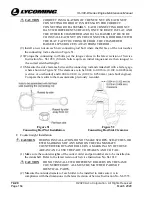
Install a new spacer and
retaining ring (Figure 73) on
the camshaft assembly.
Figure 73
Camshaft Assembly
B.
Camshaft Installation
NOTICE:
Although there is only one camshaft, you will need to first install the camshaft in
one crankcase half, complete an end play clearance check, remove the camshaft and
install it in the other crankcase half to complete an end play clearance check. If a
new or reconditioned camshaft is to be installed, install new tappet bodies. Refer to
the “Camshaft Replacement Guidelines” section in the latest revision of Service
Instruction No. SI-1011 for guidelines on replacing the camshaft when new tappets
are installed in the engine.
(1)
Put the camshaft in the left crankcase half.

