background image

Putting Laundry in the Machine

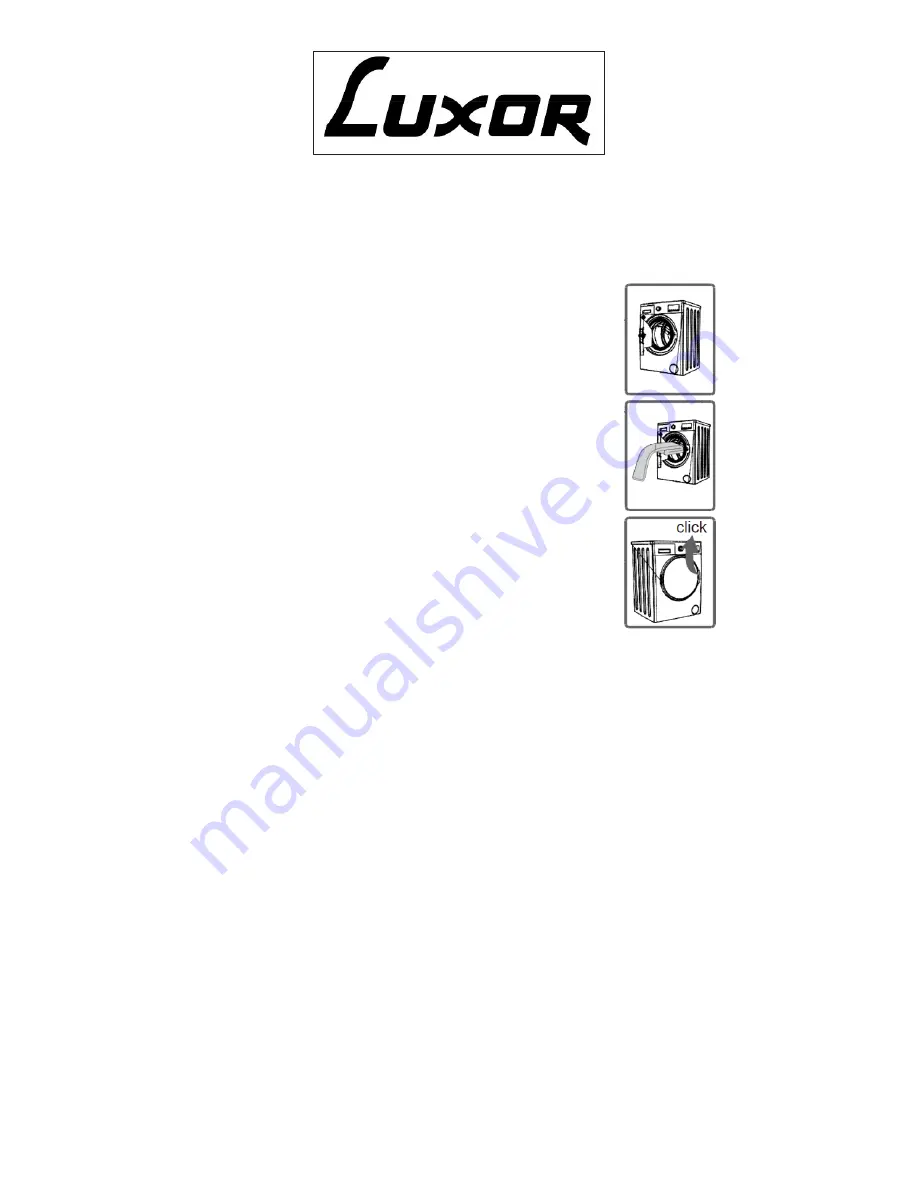
- Open the door of your machine.

- Spread your laundry in your machine.

NOTE: Maximum loading capacity may vary based

on the laundry type you will wash, degree of

contamination and the program you have chosen. Do not

exceed maximum dry loading capacity indicated in the

program table for washing programs.

- Put each item of laundry in separately.

- Ensure that no laundry is stuck between the cabinet and click

  rubber seal when closing the door of your machine.

- Push the door of your machine until you hear the locking

  sound.

- Close the door of your machine properly, otherwise the

  machine will not start.

Adding detergent to the machine

The amount of detergent put into the machine will depend on the following criteria:


- Only use detergents produced specifically for automatic washing machines. The


  amount of detergent to be used for your laundry is printed on the detergent packet.


- The higher the degree of hardness of the water the more detergent you need to use.


- Put the fabric softener into the softener compartment of the detergent drawer. Do not


  exceed the MAX level.


- Softeners with high density (thick) will need to be thinned before being put into the


  drawer. High-density (thick) softeners can clog the compartment and prevent the flow of


  the softener.


- You can use liquid detergents in all programs. For this, fit the liquid detergent level


  plate found in the accessories bag or the liquid detergent apparatus (*) into the 2nd


  compartment of the detergent drawer and set the amount of liquid detergent according


  to the levels on this plate. Remember to remove the liquid detergent plate.

0333 3052260

WASHING YOUR LAUNDRY

14

Содержание MW1449

Страница 1: ...HE BEST FROM YOUR APPLIANCE IT WILL ENSURE SAFE AND CORRECT INSTALLATION USE AND MAINTENANCE IF YOU NEED HELP OR HAVE DAMAGED OR MISSING PARTS CALL LUXOR SUPPORT ON 0333 3052260 INSTALLATION AND OPERA...

Страница 2: ...SPECIFICATIONS 9 DESCRIPTION OF APPLIANCE 10 CONTROL PANEL 11 12 WASHING YOUR LAUNDRY 13 16 PRELIMINARY PREPARATION OF LAUNDRY 13 PUTTING LAUNDRY IN THE MACHINE 14 ADDING DETERGENT TO THE MACHINE 14 A...

Страница 3: ...d for use by people including children with reduced physical sensory or mental capabilities or lack of experience and knowledge unless they have been given supervision or instruction concerning use of...

Страница 4: ...ty Some water might be left in your machine after factory trials and tests conducted due to Quality Control procedures This is normal and will not damage your machine Remember the packaging materials...

Страница 5: ...s paperclips lighters matches etc before placing it in your machine FALL AND INJURY HAZARD Do not climb on your machine The top lid of your machine may break and you might get injured Tidy the hose ca...

Страница 6: ...bolts should be loosened by being rotated counterclockwise using an appropriate wrench The transit bolts are removed by pulling out Fit the plastic transit bolt caps in the accessories bag into the ho...

Страница 7: ...vel of your machine by the adjustable feet Loosen the plastic adjustment nut Adjust the feet upwards or downward by rotating them After maintaining the level compress the plastic adjustment nut upward...

Страница 8: ...ble for machines with double water inlets Fit these nuts to the ends of new water inlet hoses on the tap end of the hose Connect the new water inlet hoses to a 3 4 threaded inlet pipe Connect the whit...

Страница 9: ...attempt to extend the water discharge hose by joining two pieces of hose Do not put the discharge hose of your machine into a bucket or sink Make sure that the water discharge hose does not bend buckl...

Страница 10: ...e symbol on the product or on the documents accompanying the product the Crossed Out Wheelie Bin indicates that this appliance may not be treated as household waste Instead it shall be handed over to...

Страница 11: ...0333 3052260 DESCRIPTION OF APPLIANCE BEFORE OPERATING YOUR WASHING MACHINE YOU MUST REMOVE THE TRANSIT BOLTS FAILURE TO DO SO WILL INVALIDATE YOUR GUARANTEE 10...

Страница 12: ...l the detergent drawer out as far as possible Diagram 1 Lift the front of the drawer continue to pull until the drawer is pulled out Diagram 2 Wash with an old toothbrush and water After drying the de...

Страница 13: ...ent The reason for this is that the conditioner is not viscous To prevent this situation more viscous liquid softeners are recommended to be used or the softener could be thinned and then used Pre was...

Страница 14: ...stained stained highly stained Never wash your coloured and white laundry together Wash your coloured laundry separately in the first washing as colours may run Ensure that there are no metallic mate...

Страница 15: ...following criteria Only use detergents produced specifically for automatic washing machines The amount of detergent to be used for your laundry is printed on the detergent packet The higher the degre...

Страница 16: ...ly after the end of the program in order to prevent creasing 2 Extra Rinse This function adds an extra rinse to your washing machine program 3 Easy Ironing By using this function you can ensure your c...

Страница 17: ...the program will be cancelled To drain the water accumulated in the machine switch the program knob to any program Your machine will perform the necessary discharge operation and cancel the program Y...

Страница 18: ...unable to receive sufficient water although the water tap is opened these filters should be cleaned Remove the water inlet hose Remove the filters found on the water inlet valves by using pincers and...

Страница 19: ...place a suitable container in front of the filter cover to prevent spillage of water that remains in the pump Loosen the filter cover by rotating it counter clockwise and drain the water Remove any f...

Страница 20: ...g a towel or dry cloth DO NOT WASH YOUR DETERGENT DRAWER IN A DISHWASHER Flush Stopper Disassemble the detergent drawer Disassemble the flush stopper and clean out any softener residues completely Ref...

Страница 21: ...carried out by our authorised service agents If your machine requires a repair or if you cannot remove the fault by the help of the information provided as follows Unplug your machine Turn the water t...

Страница 22: ...See the chapter regarding installation of your machine 0333 3052260 TROUBLESHOOTING 21...

Страница 23: ...ase call the Luxor Helpline on 0333 3052260 Please note if you call out an engineer when one of the above faults arises or to repair a fault that has arisen due to incorrect use you may have to bear t...

Страница 24: ...hat are capable of both taking necessary precautions and warning you in case of any breakdown by means of continuous self checking during washing operations See the chapter regarding maintenance and c...

Страница 25: ...NOTE Program duration might change according to the amount of laundry tap water ambient temperature and selected additional functions 0333 3052260 WASHING PROGRAM 24...

Страница 26: ...NOTE Program duration might change according to the amount of laundry tap water ambient temperature and selected additional functions 0333 3052260 WASHING PROGRAM 25...

Страница 27: ...ervice Help line on 0333 3052260 Please ensure that you have the model number serial number date of purchase and retailers information available before you make the call NOTE Program duration might ch...

Страница 28: ...lt cannot be found with the appliance Cost of Call out for work covering routine maintenance such as but not exclusively cleaning of filters or defrosting Cost of Call out for work required to correct...

Отзывы: