2
Using the telescope:
Note:
- Please check before the telescope is removed from the transport box that the locking of the blocking filter is
applied. Maybe it can happen elsewhere, that when removing the telescope the block filter slip out of the focuser
and fall off.
Safety First!
- Always check any telescope before use. Do not use any telescope or filter that appears to be damaged.
- The Blocking Filter diagonal must always be used with the Lunt telescope.
Attach the telescope and clamshell to your mount of choice. There is a ¼-20 threaded hole on the underside of
the clamshell. Attach the scope directly to a photographic tripod, or attach a Vixen-style dovetail plate to the
clamshell for installing at a astronomical mount.
Slide the Blocking Filter into the focuser and lock it down with the thumb screw. Insert a low power eyepiece into
the blocking filter. A 25 mm eyepiece is a good choice for a large field of view.
Point the telescope to the Sun. You can use the shadow of the front lens cell cast by the Sun onto the clamshell
of your telescope. Center the shadow and you should be pretty close. Never attempt to use a conventional finder
scope to locate the Sun! Look through the eyepiece. Do you see a fuzzy red ball? If not, make sure you have
removed the dust cap from the front and check your alignment to the Sun. If the Sun is still not in the field of view
of your eyepiece, move the telescope around a little while you are looking through it. Be patient, you will find it!
Once you do, center the Sun and, if you have one, adjust the Sol-Searcher so that it is correctly aligned to your
scope.
Now it’s time to focus. Your goal is to get the edge of the Sun as sharp as possible. Focus is achieved using the
helical style eyepiece focuser.
Tuning:
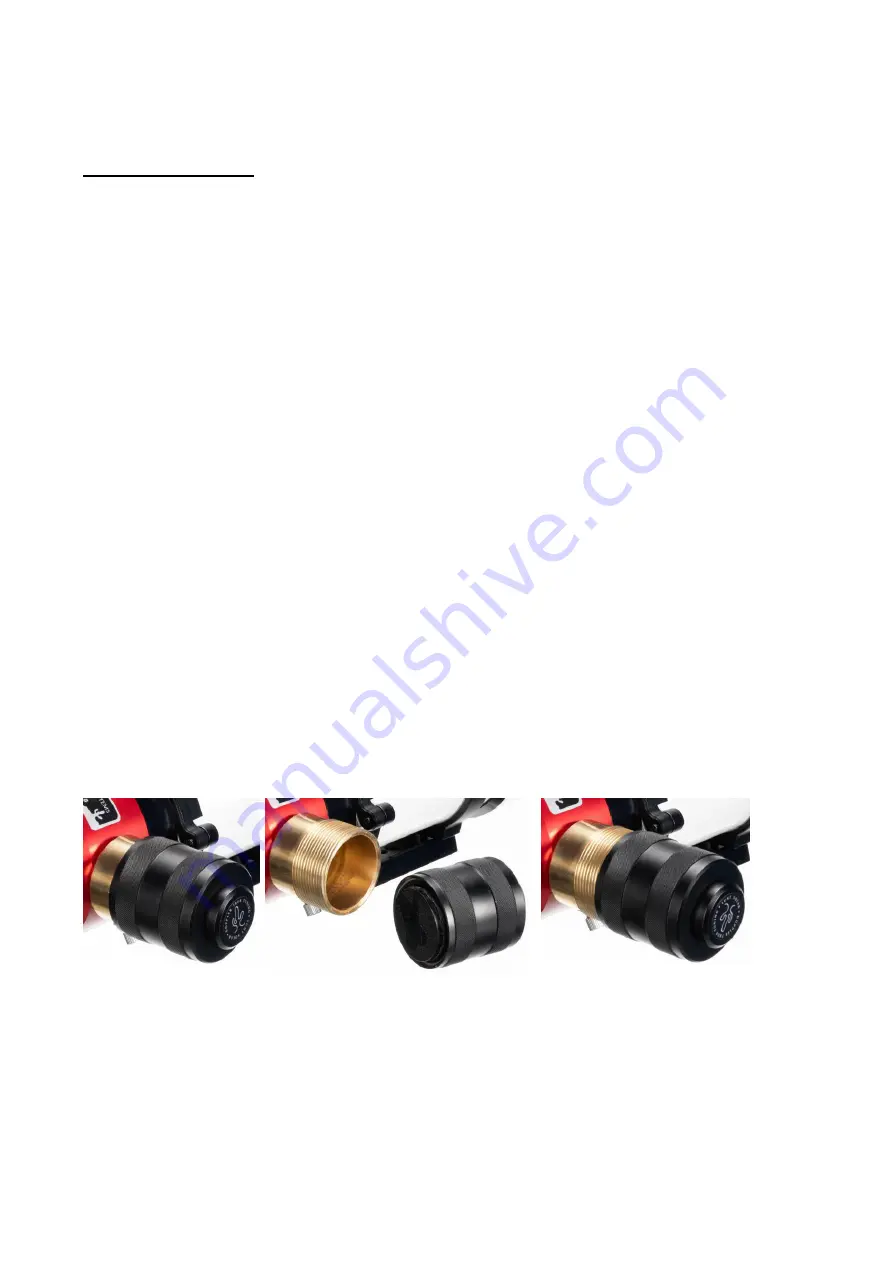
Here is where the magic begins. On the side of the scope is a large black cylinder on a brass barrel.
This cylinder is the Pressure Tuning system for the LS50THaPT. The black handle of the cylinder has a short
start-thread attaching it to the brass cylinder. Unscrew the black handle completely. There may be some
resistance and a faint “popping” sound. That’s normal when adjusting pressure for your altitude. Carefully install
the handle onto the cylinder, engaging the threads about one turn. While looking through the eyepiece, gently
turn the black handle clockwise onto the cylinder. There will be little resistance at first, but as the pressure in the
cylinder builds, the resistance increases slightly. As you turn the cylinder, centering the 656.28 nm wavelength
on- band, you should see features come into view. Continued tuning will result in the wavelength shifting past
656.28 nm, and details will begin to disappear. Fine-tune for the best images.
A few details regarding the pressure tune system. The amount of pressure being supplied to the etalon cavity is
minimal. It is the equivalent of going from -150m below sea level to about 3,000m. Or around 0.1 Bar, there is no
risk of explosion. We are dealing with only a fraction of 1 atmosphere. When not in use we recommend that you
release the pressure by simply backing off the black handle from the cylinder body. If the system unthreads
completely, simply thread it back on 1 turn. It is not necessary to re-set the system every time it is used. Re-
setting may only be required if the system has been sitting for a long period of time.


