background image


English - 

18


Chapter 5 Control Menu (OSD Menu)   

5.1 Operation 

1. Use

fe

to select main function (display, storage, settings and 

advance) . 

2. Use

dS

to select sub-item. 

3. 

The activated item with red line and yellow block. User

d


S

to select 

items. 

4. 

fe

: More items, you can press

fe

to execute. 

5. 

:Only one item, you can press

Enter

to execute. 

6. Press

Menu

to Exit. 


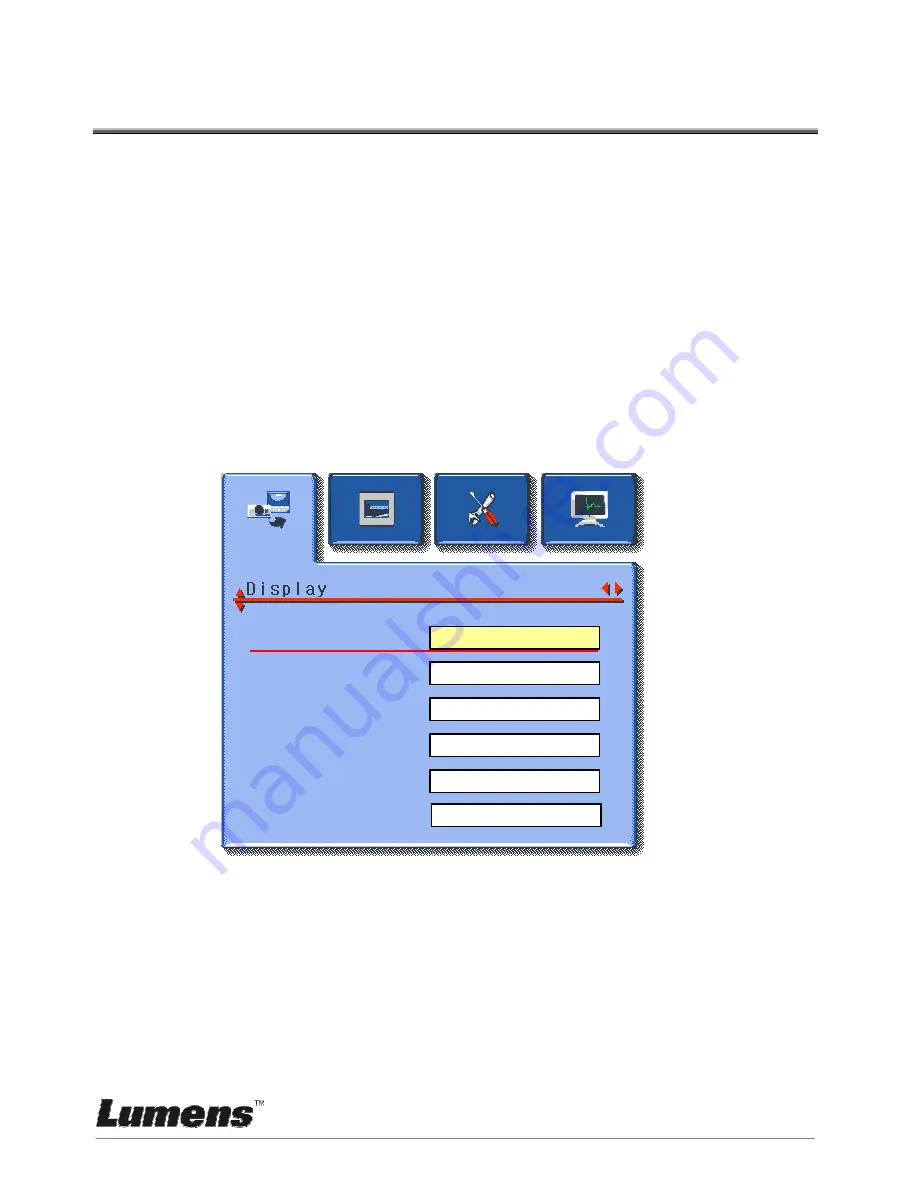
5.2  Control Menu (OSD Menu) 

z

  There are Display, Storage, Setting, Advance function pages in the 

Control Menu (OSD Menu). 

z

  The menu will be automatically turned off when not being activated 

for a while. 

OFF 

OFF 

OFF 

100 

c


d


f

e

Brightness 

Foucs 

Gamma 

Image 

Freeze 

Flip

100 

A

B

C

D

100 

Содержание DC162

Страница 1: ...English 1 DC162 Digital Visualizer User Manual ...

Страница 2: ...r damage to the lead or the plug 10 Unplug the projector form the wall socket before cleaning Use a damp cloth for cleaning Do not use liquid or aerosol cleaners 11 Do not block the slots and openings in the projector case They provide ventilation and prevent the Digital Visualizer from overheating Do not place the Digital Visualizer on a sofa rug or other soft surface or in a built in installatio...

Страница 3: ...tuting a risk of electric shock is present within this unit This symbol indicates that there are important operating and maintenance instructions in this User s Manual with this unit FCC Warning This Digital Visualizer has been certified to comply with the limits for a Class A computing device pursuant to Subpart J of Part 15 of FCC Rules These limits are designed to provide reasonable protection ...

Страница 4: ...English 8 Chapter 3 Product Overview 3 1 Product Introduction 8 DIP Switch 7 Infrared rays area 9 Auxiliary Stand 5 IO Connector 3 Gooseneck 4 Lamp 2 Lens 1 Auto Focus Button 6 Power Control keypad ...

Страница 5: ...lash memory of your Digital Visualizer 6 ghij Enter g h i j Select function Enable the selected function 7 Zoom Make the image larger smaller 8 Focus Manual Focus for fine tune 9 AF Auto Focus 10 Auto Tune Auto adjust the optimum image 11 Lamp Turn on off Lamp 12 Flip Rotate the image by 180 degrees 13 Freeze Freeze the image 14 Photo Text Select the text or photo mode 15 Microscope Set as microsc...

Страница 6: ...art 4 1 1 Turn on the Digital Visualizer When plug on the power cord the LED indicator will be Red When turn on DC162 the LED indicator will be Blue 4 1 2 Optimum Auto adjust the optimum image that will take some times to process Remote Remote Keypad ...

Страница 7: ... Input Source The default input source is set as Digital Visualizer press Source to switch 4 2 2 Select Photo Text The default setting is Text Users can switch mode by pressing Photo Text button Remote Keypad Remote Monitor Projector PC Notebook ...

Страница 8: ...English 14 4 2 3 Zoom in out 4 2 4 Auto Focus 4 2 5 Brightness Adjustment Goosehead Remote Keypad Remote ...

Страница 9: ...English 15 4 2 6 Display full control menu OSD 4 2 7 OSD Function Select and Execute 1 Press v navigate menu 2 Press Enter to select Keypad Remote Keypad Remote ...

Страница 10: ... to view next image 5 Press Play to go back 6 Press Menu to Exit 4 3 3 Delete Captured Images Remote 1 Press Play to show all thumbnail images in memory 2 Use d Sef to select thumbnail 3 Press Del to delete 4 Press Menu to Exit Keypad 1 Press Play to show all thumbnail images in memory 2 Use d Sef to select thumbnail 3 Press Enter to show all thumbnail images 4 Press Menu to invoke the full Contro...

Страница 11: ...PBP This function can do the comparison between real time image and captured images with left and right side Remote 1 Press PBP Select the saved image that you want to compare with the real time image 2 Press Enter to do the comparison between real time image and saved image Keypad 1 Press Menu to invoke the full Control Menu OSD Menu 2 Use ef to Advance 3 Use d to select PBP and use ef to select ...

Страница 12: ...er d S to select items 4 fe More items you can press fe to execute 5 Only one item you can press Enter to execute 6 Press Menu to Exit 5 2 Control Menu OSD Menu z There are Display Storage Setting Advance function pages in the Control Menu OSD Menu z The menu will be automatically turned off when not being activated for a while OFF OFF OFF 100 c d f e Brightness Foucs Gamma Image Freeze Flip 100 A...

Страница 13: ...rase ON OFF Delete all captured images when user turns off the power Lamp ON OFF Select Lamp On or Off AE ON OFF Auto Exposure Night vision ON OFF Select Night view function On or Off Digital Zoom ON OFF Set the digital zoom on or off Language English Traditional Chinese Simplified Chinese Deutsch Francais Italiano Espanol Русский Select a preferred language Setting Factory Reset Yes No Restore un...

Страница 14: ...e Freeze to retain the image on the screen Display AE ON OFF Auto Exposure Lamp ON OFF Turn on off lamp Full Range ON OFF Adjust On or Off of Full screen Night vision ON OFF Adjust On or Off of Night view function Language English Traditional Chinese Simplified Chinese Select a preferred language on the menu Setting Factory Reset Enter Exit Select a fitting output format ...

Страница 15: ...e again z Press a different source then press desired source again z Check if the power of the Digital Visualizer is turned on z Make sure the document or object is positioned under the camera Problem 2 Cannot focus correctly Solution The correct focus is to aim the lens at documents or objects Then zoom in the focal distance and focus the camera Later zoom out the focal distance to the length tha...

Отзывы: