background image


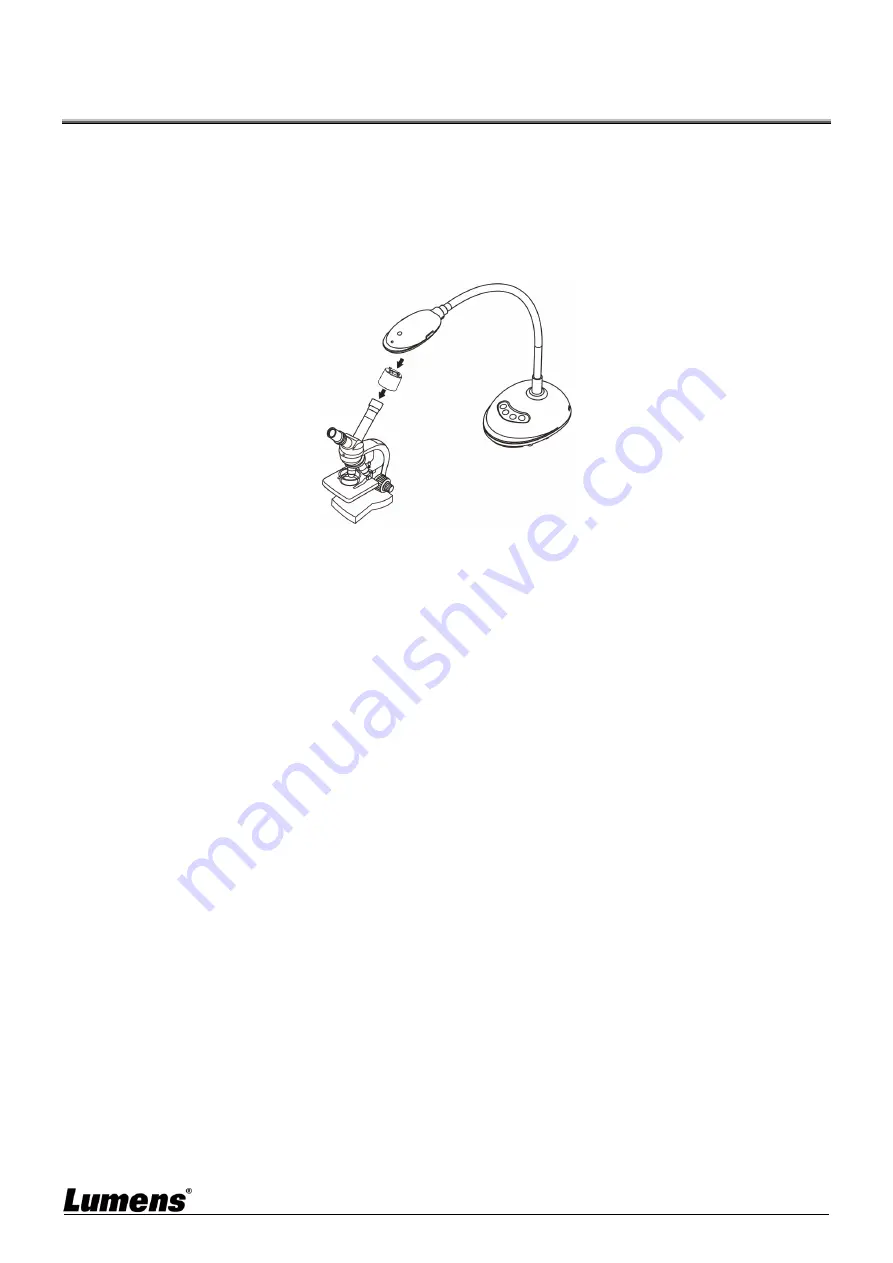
Chapter 7  Connecting to Microscope 

Microscope adapters are optional. Please contact Lumens sales to purchase them 


1. Attach the microscope adapter to the microscope. 

<Caution> 

Microscope adapter accessories are applicable to eyepieces of Ø 28 mm. 

2. Connect the lens with the microscope adapter 


3. If the image is not clear 

3.1  Press the [FOCUS] button on both sides of the lens to activate the auto focus.


Содержание DC132U

Страница 1: ...o download the latest version of Quick Start Guide multilingual user manual software or driver etc please visit Lumens https www MyLumens com support DC132U Document Camera User Manual English Important ...

Страница 2: ...se with VESA Installation Base 4 3 4 Installing Application Software 5 Chapter 4 Start Using 6 Chapter 5 Function Menu 7 5 1 Function Descriptions of Control Panel Button 7 Chapter 6 Descriptions of Major Functions 8 6 1 Control the Camera 8 6 2 Use Skype for Video Conference 8 Chapter 7 Connecting to Microscope 9 Chapter 8 Troubleshooting 10 Chapter 9 Safety Instructions 11 Copyright Information ...

Страница 3: ...2 Chapter 1 Package Contents DC132U Quick Installation Guide 4 Step Instruction Card USB cable ...

Страница 4: ...able the image and LED indicator will light up 2 Display the image and LED indicator will light up 3 Disable the image and LED indicator is OFF 2 2 Relative Operation Position Lens Gooseneck AF button LED Indicator Microphone Control panel Correct use Incorrect use X ...

Страница 5: ...ractive Whiteboard IWB 3 3 For use with VESA Installation Base 1 Please purchase the standard VESA installation base 2 Please use appropriate screws Screw length 5 mm base thickness H1 M4 screw P 0 7 VESA bolt pitch 75 75mm VESA base thickness H1 Screw length 5 mm base thickness H1 M4 screw P 0 7 ...

Страница 6: ...d on the computer enables you to Control the DC132U Capture and record images Annotate the image highlight important details and save it Support the full screen function Remark Please refer to the Ladibug 3 0 software user manual for installation steps and software operation ...

Страница 7: ...iew the images and control DC132U POWER Frequency setting page will display during the first use please complete the settings following the instructions on the screen 2 Place an object to be displayed under the camera 3 Press AUTO TUNE or button to optimize the image 4 You are ready to teach present Please download Ladibug software from Lumens website When connected to a computer via a USB cable D...

Страница 8: ...ame Function Descriptions LAMP Turn on off LED indicator FREEZE Freeze the current image to remain temporarily on the screen Press again to defreeze CAPTURE Capture the image to the computer AUTO TUNE Automatically adjust the image to have the best brightness and focusing performance ...

Страница 9: ...he computer Start Skype select a contact and press to start the video conference If it doesn t work please refer to the following steps to setup the camera 1 Start Skype Setting Audio Video 2 Select Lumens Video Camera 3 Select Lumens Audio After the setting is completed the video conference is ready to begin It can also be used with Zoom Teams Google Meet and other video software If the image of ...

Страница 10: ...to purchase them 1 Attach the microscope adapter to the microscope Caution Microscope adapter accessories are applicable to eyepieces of Ø 28 mm 2 Connect the lens with the microscope adapter 3 If the image is not clear 3 1 Press the FOCUS button on both sides of the lens to activate the auto focus ...

Страница 11: ...USB port at the front end of the computer is insufficient Try to connect to a USB port at the rear end or a USB hub with a power adapter 4 Cannot identify DC132U Outdated or incomplete OS versions might not be able to identify USB devices like DC132U Please use Windows XP SP2 or newer versions that are compatible 5 Output screen flicker The presetting value of Ladibug current frequency is 60 Hz If...

Страница 12: ...isconnect all the cables prior to cleaning and wipe the surface with a dry cloth Do not use alcohol or volatile solvents for cleaning Precautions This symbol indicates that this equipment may contain dangerous voltage which could cause electric shock Do not remove the cover or back No user serviceable parts inside Refer servicing to licensed service personnel This symbol indicates that there are i...

Страница 13: ...purchasing this product In order to keep improving the product the information in this file is subject to change without prior notice To fully explain or describe how this product should be used this manual may refer to names of other products or companies without any intention of infringement Disclaimer of warranties Lumens Digital Optics Inc is neither responsible for any possible technological ...

Страница 14: ...ion Supplier Lumens Integration Inc 4116 Clipper Court Fremont CA 94538 United States e mail support mylumens com FCC Compliance Statement This device complies with Part 15 of the FCC Rules Operation is subject to the following two conditions 1 This device may not cause harmful interference and 2 this device must accept any interference received including interference that may cause undesired oper...

Отзывы: