


4
Power cable
Data cable
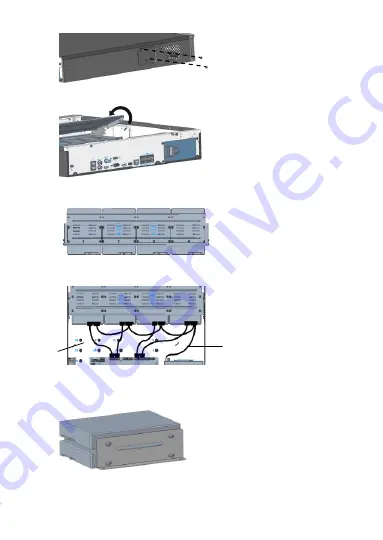
1.
Loosen the screws of the mounting plate on the side panels.
2.
Turn the upper mounting plate in the shown direction, then remove the plate. Repeat
the steps to remove the lower mounting plate (for 8-HDD devices only).
3.
Secure the disks on the mounting plate. Fix the screws according to the figure below.
Avoid damaging the disk in the process.
4.
Put the mounting plate back in place. Connect the power cables and data cables as
shown in the figure. Repeat the steps to connect all the disks.
5.
Put the cover back in place, and secure it and the mounting plates with screws.
Device with disk bracket
1.
Fasten the disks to the brackets.
2.
Fasten the brackets installed with hard disks to the device.
Содержание VSN8208-P8
Страница 1: ...Network Video Recorders Quick Guide...


