

Features:
•
For use as additional camera with Lorex SHS-4WLS
and SG8840 Wireless Surveillance System
•
Weather Resistant ideal for Outdoor or Indoor use
•
Night Vision for viewing in no/low light up to 23 ft.*
•
Built-in microphone provides listening as well as
viewing capability
•
Camera may be placed up to 300' from receiver** (not
included)
* IR illumination range of 23 ft. (7M) under ideal conditions. Objects at or be-
yond this range may be partially or completely obscured, depending on the
camera application.
** 300ft (100M) maximum open space transmission range.Actual range de-
pendent upon building materials and other obstructions in path of wireless
signal.
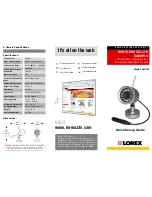
1 x WIRELESS COLOR
CAMERA
FOR USE WITH LOREX SHS-4WLS
AND SG8840 WIRELESS SYSTEMS
1. Package Contents
2. Before Installing the Camera
3. Connecting the Camera
Before permanently mounting the camera,
test the reception between the mounting
area and the receiver.
The SG8840 and SHS-4WLS receivers
allow for up to 4 cameras to be used (one per
available channel 1~4 with no duplication).
For example, you cannot have 2 cameras
both use Channel 4.
NOTE
: Once the DIP Switch Settings have
been changed on the camera, test the
reception on the Receiver.
1. Mount the Camera to a Wall or Ceiling
using 3 screws.
NOTE
: The Antenna should always be
pointed upwards (towards the ceiling).
When mounting the Camera to the Ceiling, it
may be necessary to change the attachment
of the stand:
• Unscrew the stand (2 screws).
• Locate the attachment points on the
reverse side of the camera.
• Reattach it to the other side of the
camera.
2. Position the camera to the desired
direction and angle.
3. Connect the Power end of the Camera
Cable to the AC Adapter. Plug the
adapter into a wall outlet.
1 x AC Power Adaptor
Channel DIP Switch Settings:
The Cameras have been set
to a specific channel (1~4)
by default - each camera is
labelled with a sticker to
indicate the default channel.
To change the camera
channel, unscrew the lens
cover from the camera, and
adjust the DIP switches
using a pin (See the
Channel DIP Switch
Settings chart below).
Channel Frequencies:
CH1=2,414MHz; CH2=2.432MHz; CH3=2.450MHz; CH4=2.468MHz
Installation Warnings:
•
Before you install the camera, carefully plan where and how
you will position the camera, and where you will route the
cable that connects the camera to an electrical outlet.
•
Select a location for the camera that provides a clear view of
the area you want to monitor, which is free from dust, and is
not in line-of-sight to a strong light source or direct sunlight.
•
Plan the camera location so that it is not close to power or
telephone lines, transformers, microwave ovens or other
electrical equipment that could interfere with the system.
•
Before starting permanent installation, have another person
hold the camera for you while you verify its performance by
observing the image on the monitor.
WARNING
- This product broadcasts over public airways and its video
and audio signals may be intercepted without your consent.


